How to configure the IP address manually on the wireless clients
Introduction
This article provides step-by-step instructions for configuring TCP/IP settings on wireless clients running different operating systems.
Requirements
- Retrieve the full TCP/IP configuration details from the host router, including the IP address, subnet mask, and default gateway. All the information can typically be accessed through the router's web interface under DHCP settings.
- One wireless device that can be configured to enter the IP address manually.
Configuration
For demonstration purposes, this guide assumes the following network parameters: LAN IP 192.168.0.1, IP range 192.168.0.xx (xx=2--253), subnet mask 255.255.255.0, and default gateway 192.168.0.1.
Note:
- When choosing a static IP, ensure it is not currently assigned to any other device on your network to avoid an IP conflict, which can cause connection instability.
- Configuration guidance outlined in this guide for Apple macOS, iOS, and Android platforms may differ based on specific system specifications. Should you encounter challenges modifying network settings through these instructions, we recommend contacting your device vendor's technical support for tailored assistance.
Step 1. Click Start > Control Panel > select and double-click Network and Internet Connections> select and double-click Network Connections.
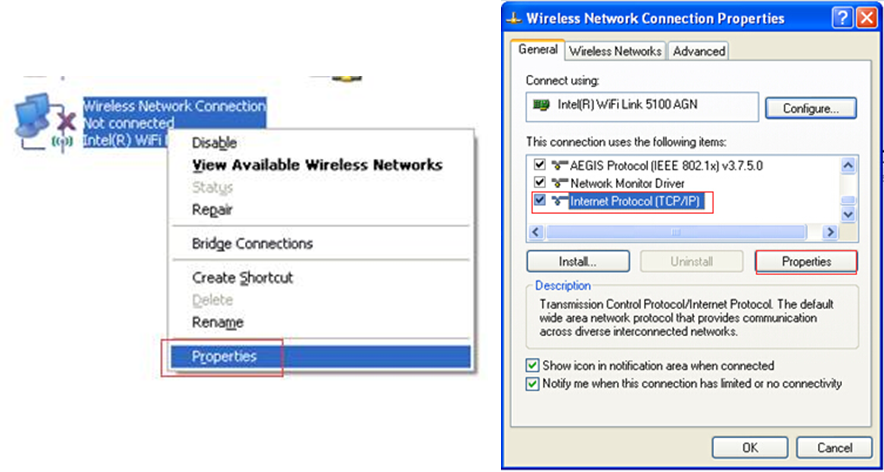
Step 2. Select Wireless Network Connection, right-click it, and select Properties. Highlight the Internet Protocol (TCP/IP) tab in the Wireless Network Connection Properties window, and click the Properties option.
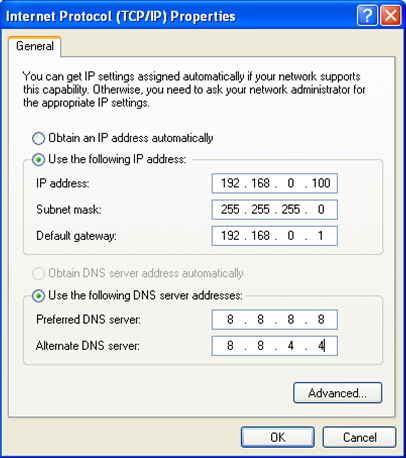
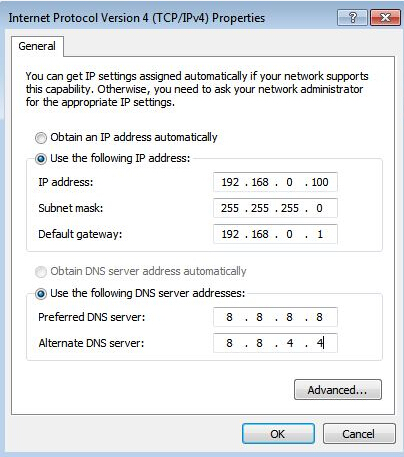
Step 3. Select Use the following IP address and Use the following DNS server addresses, and enter the network parameters, then click OK to save it.
Note: In most cases, enter the IP addresses of your local DNS servers. The Preferred DNS server is the same as the default gateway. For the secondary DNS server, you can leave it blank or enter 8.8.8.8.
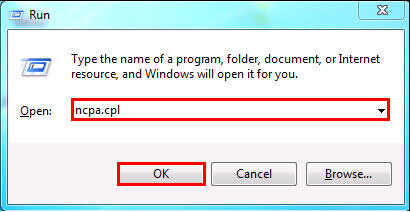
Step 1. Press the Windows key and R key together, then type ncpa.cpl in the Open box and press OK.
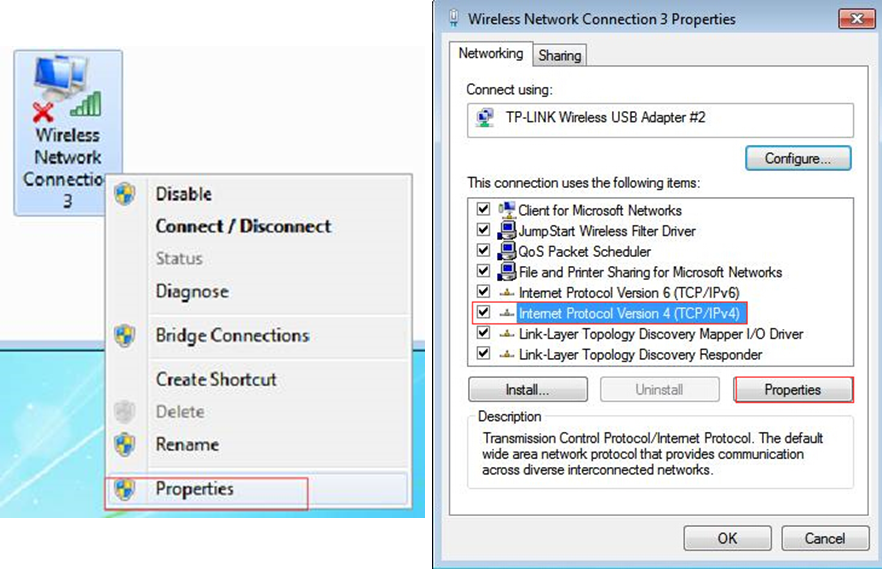
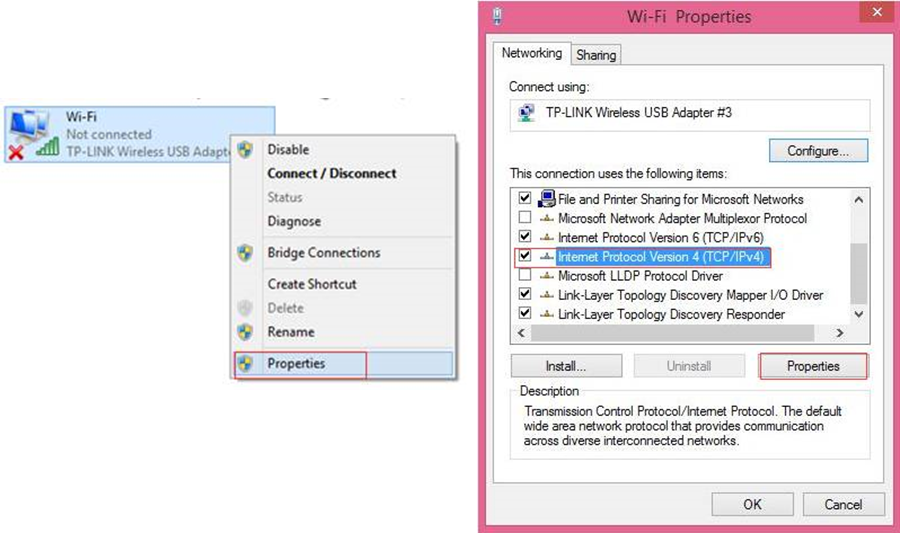
Step 2. Select the Wireless Network Connection, right-click it, and select Properties. Highlight the Internet Protocol Version 4 (TCP/IPv4) tab in the Wireless Network Connection Properties window, and click the Properties option.
Step 3. Select Use the following IP address and Use the following DNS server addresses, and enter the network parameters, then click OK to save it.
Note: In most cases, enter the IP addresses of your local DNS servers. The Preferred DNS server is the same as the default gateway. For the secondary DNS server, you can leave it blank or enter 8.8.8.8.
Step 1. Press the Windows key and the R key together. There will be a “run” box in the control panel; enter the control panel and press Enter/OK.
Step 2. Click on Network and Internet > Network and Sharing Center > Change Adapter Settings (on the left).
Step 3. Right-click on Wi-Fi, go to Properties, and then select Internet Protocol Version 4(TCP/IPv4), double-click it or click Properties.
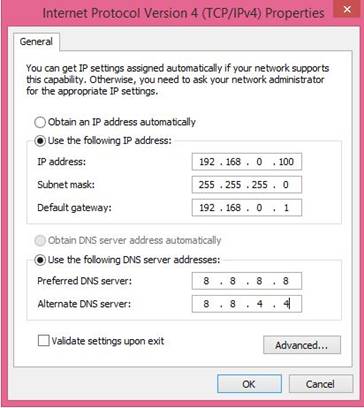
Step 4. Select Use the following IP address and Use the following DNS server addresses, and enter the network parameters, then click OK and OK again to save it.
Note: In most cases, enter the IP addresses of your local DNS servers. The Preferred DNS server is the same as the default gateway. For the secondary DNS server, you can leave it blank or enter 8.8.8.8.
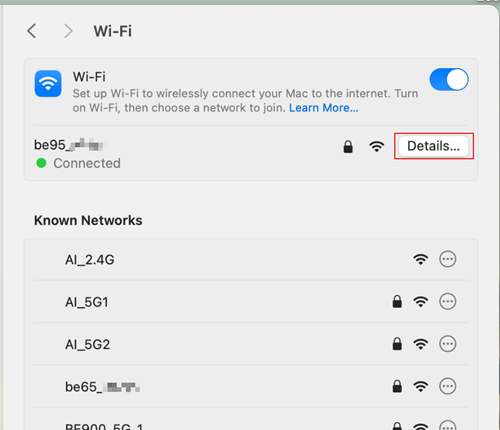
Step 1. Click the Apple menu > System Settings > Network > Wi-Fi.
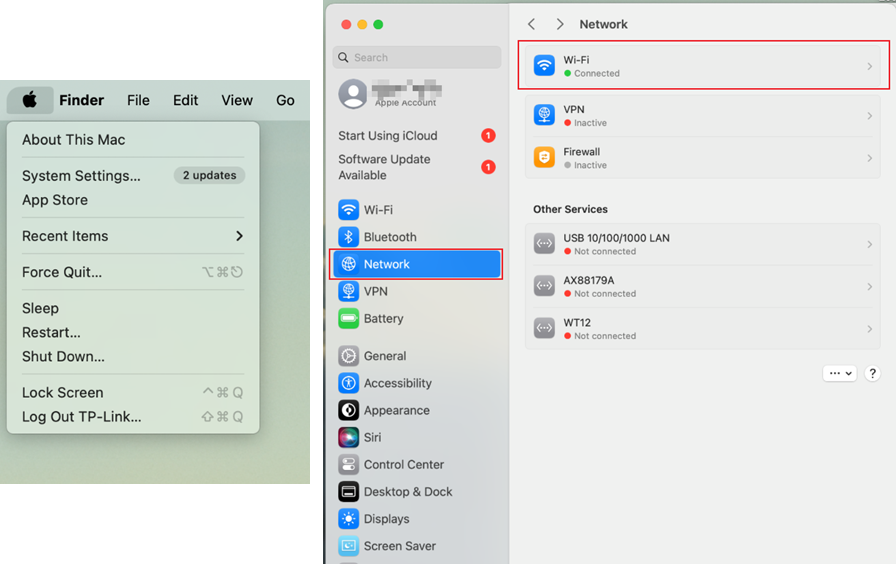
Step 2. Click Details to access the Wi-Fi settings page.
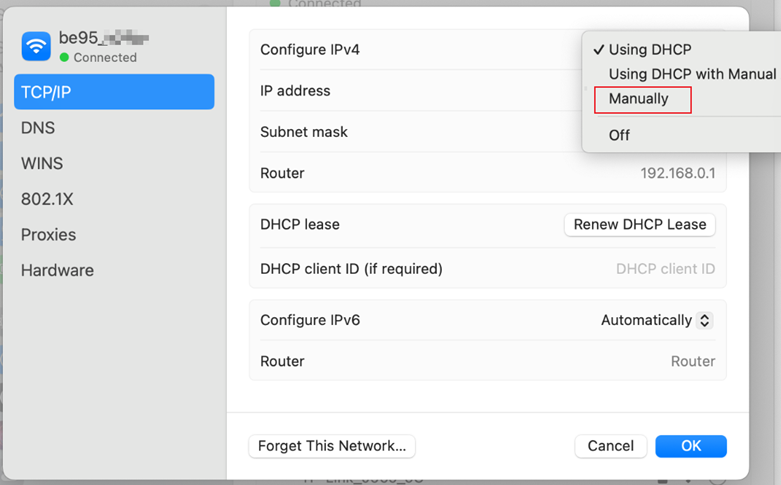
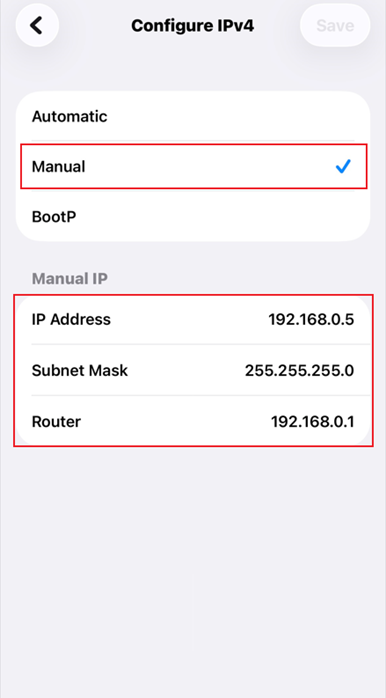
Step 3. Switch to TCP/IP, select Manually in the Configure IPv4 box, enter the IP address, Subnet mask, and Router (the default gateway), then click OK to save the settings.
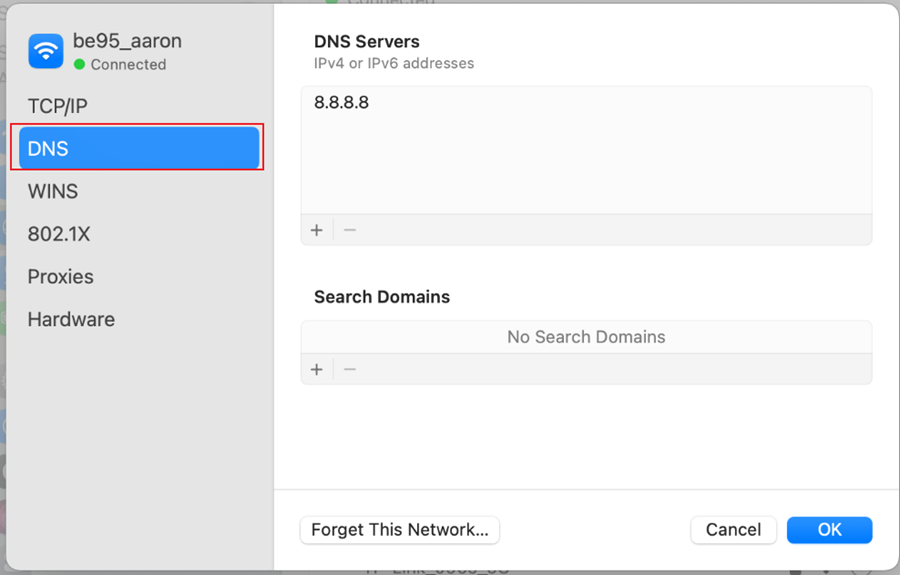
Step 4. To configure DNS manually, switch to DNS, click +, enter the DNS address, then click OK to apply the settings.
Note: In most cases, enter the IP addresses of your local DNS servers. The Preferred DNS server is the same as the default gateway. For the secondary DNS server, you can leave it blank or enter 8.8.8.8.
Step 1. Open the Settings app, and tap WLAN.
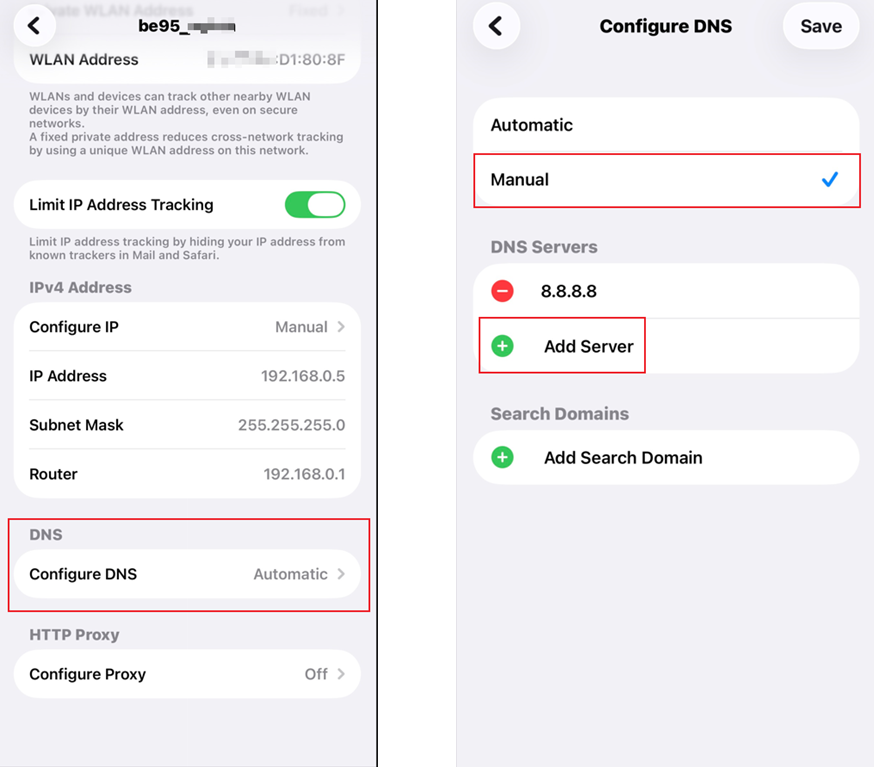
Step 2. Tap the info icon (blue i) next to the Wi-Fi network you are connected to. Then scroll down and tap Configure IP.
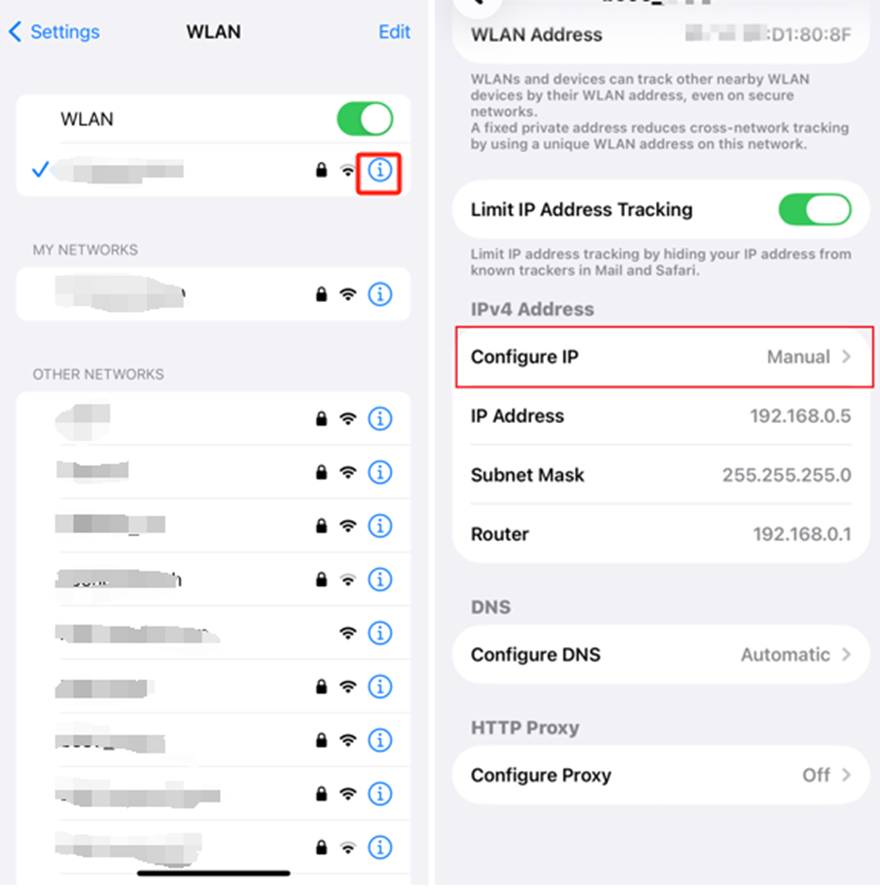
Step 3. Change the setting from Automatic to Manual, and enter the network parameters, then click Save to apply the settings.
Step 4. To configure DNS manually, tap Configure DNS, change the setting from Automatic to Manual, tap Add Server to enter the DNS address, then tap Save to apply the settings.
Note: In most cases, enter the IP addresses of your local DNS servers. The Preferred DNS server is the same as the default gateway. For the secondary DNS server, you can leave it blank or enter 8.8.8.8.
Step 1. Open the Settings app, and tap WLAN (or Network & Internet > Wi-Fi).
Step 2. Long-press your connected Wi-Fi network, then tap Modify network (or the gear/arrow icon).
Step 3. Tap Advanced options, scroll down, select IP settings, then change from DHCP to Static.
Step 4. Then enter the network parameters and click Save to apply the settings.
QA
Q1: How can I identify the version of the operating system of my Windows computer?
A1: You can click the Start menu, select Settings > System > About. Or press the Windows key and the "R" key simultaneously, then type “winver” and press Enter. And a pop-up window will appear with your operating system information.
Is this faq useful?
Your feedback helps improve this site.