How to set Gmail or Hotmail as sender Email address in cloud camera Notification Delivery Function
Note:Here we take NC200 as example to show you how to set Gmail or Hotmail as sender Email address in cloud camera notification delivery function.
1. Connect your IP camera and your PC to your router.
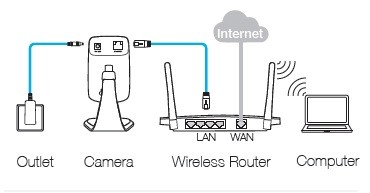
2. Check your Camera’s IP address via this link How can I find the IP address of the camera?. Then open a web browser and type its IP address into the address bar, then press Enter.

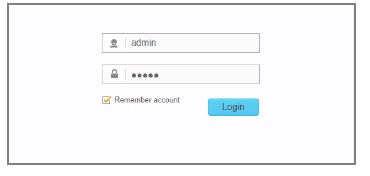
3. Input the username and password (default username and password are both admin), and log in to the management webpage of your camera.
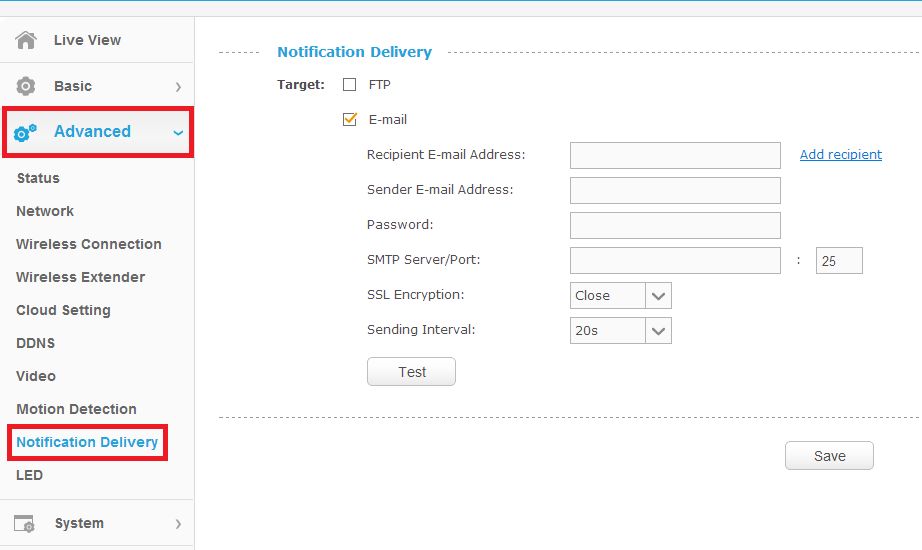
4. Select Advanced—>Notification Delivery.
A. Set Hotmail as sender Email address
(a). Set SMTP Server/Port as smtp-mail.outlook.com:25, and SSL Encryption as STARTTLS.
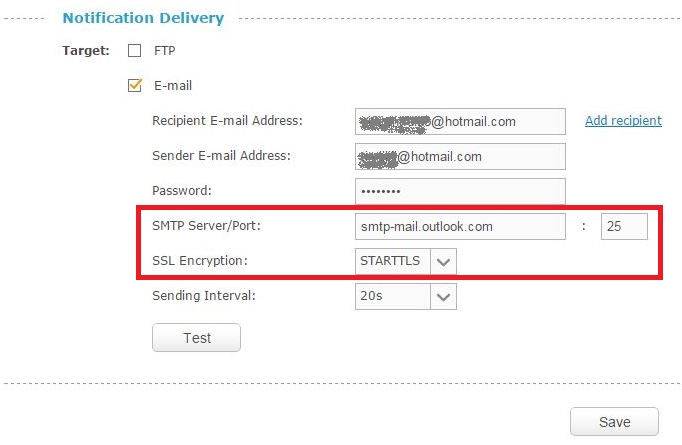
Or set SMTP Server/Port as smtp-mail.outlook.com:587, and SSL Encryption as STARTTLS.
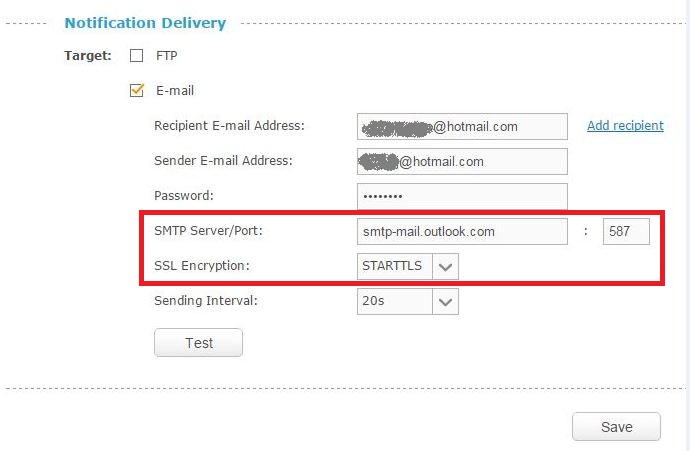
(b). At last, please click ‘Save’ to save the settings, and click ‘Test’ to confirm whether the settings are working.
B. Set Gmail as sender Email address
(a). First you need to modify some settings of your Gmail account before you set it as NC200’s sender Email address.
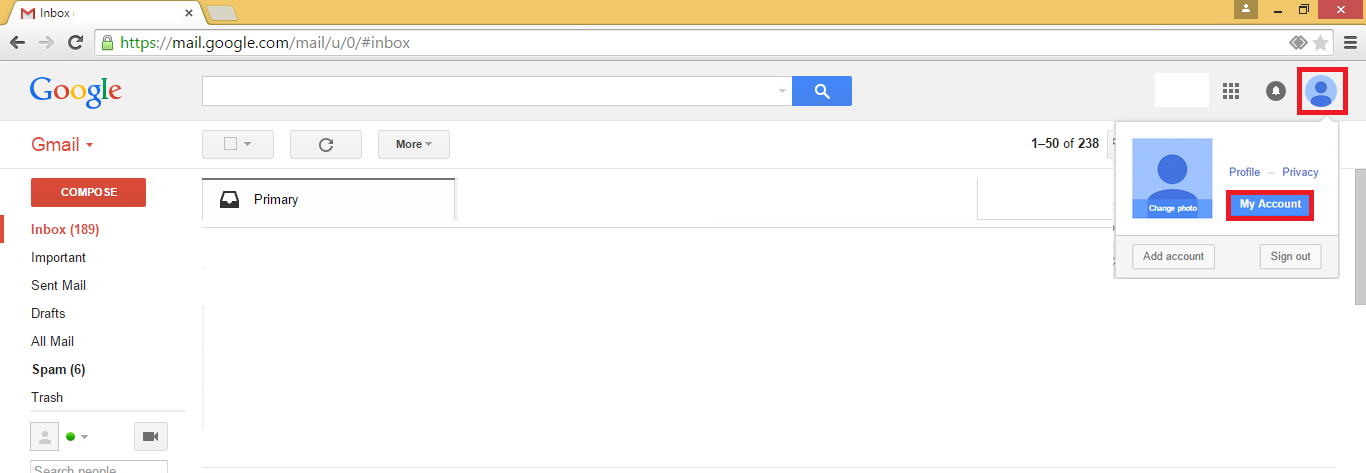
(b). Log in to your Gmail account via Web browser, and click on your Email head portrait in the upper right, choose ‘My Account’.
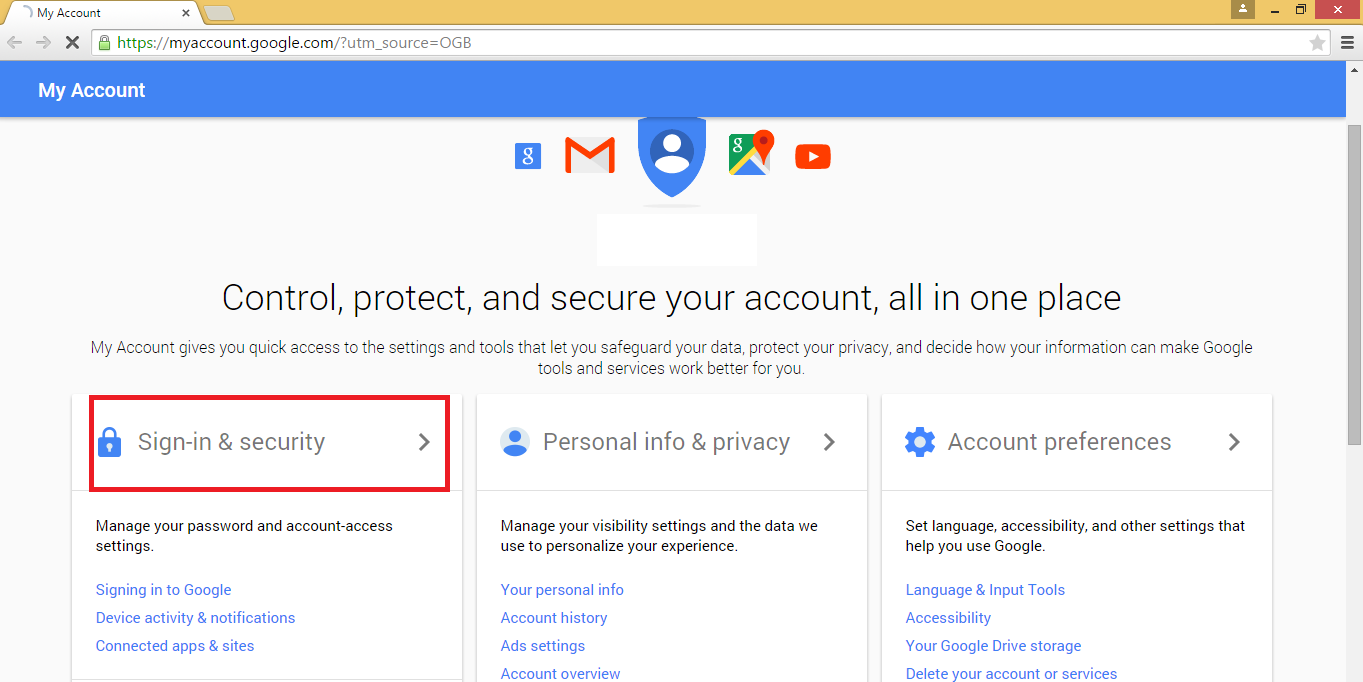
(c). In My Account interface, please choose ‘Sign-in & security’ column and enter its interface.
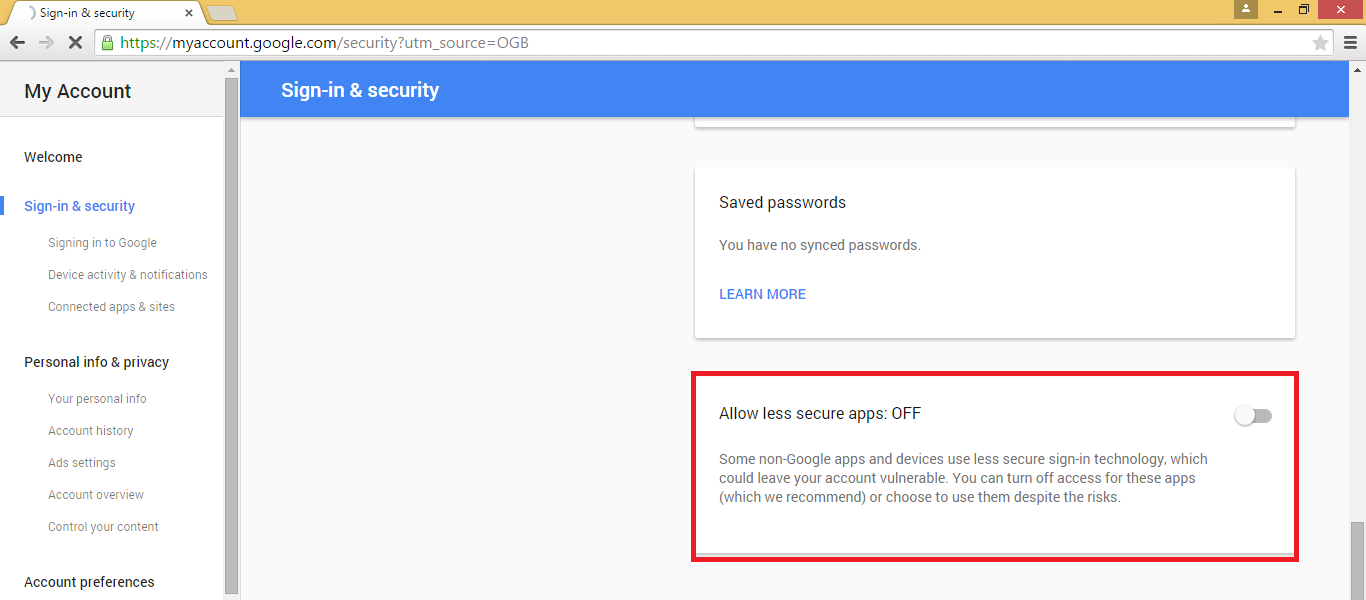
(d). Please find ‘Allow less secure apps’ column, it is off by default. Please change its status to ‘on’.
(e). Now please go to NC200’s Notification Delivery interface after you finish the Gmail settings above. Then you can set your Gmail as NC200’s sender Email address. Just set SMTP Server/Port as smtp.gmail.com:465, and SSL Encryption as TLS.
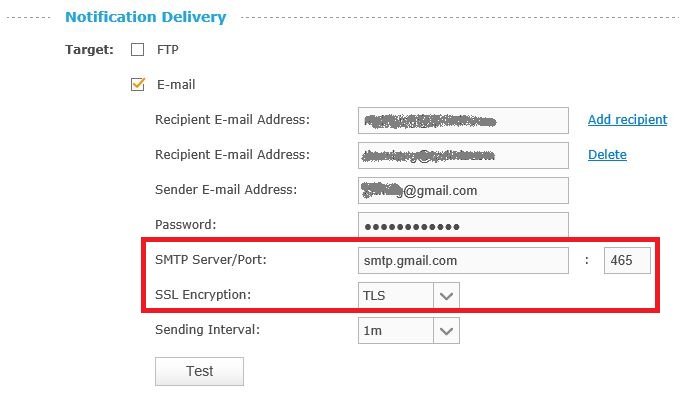
(f). At last, please click ‘Save’ to save the settings, and click ‘Test’ to confirm whether the settings are working.
Is this faq useful?
Your feedback helps improve this site.
TP-Link Community
Still need help? Search for answers, ask questions, and get help from TP-Link experts and other users around the world.