How to setup and use the FTP Server Function on the Wi-Fi router(new designed blue UI)
Note: Here take Archer C2600 as an example.
You may also refer the below articles to know:
How to access my USB storage device on the TP-Link Routers from my Android and iOS phone
How to access USB storage device on the TP-Link Routers from Windows or Mac OS
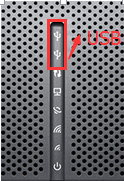
Step 1
Plug a USB Storage device into the USB port,make sure the USB light lit up on the router.

Step 2.
Access to the management interface of the router.
Please click here to access the web interface.
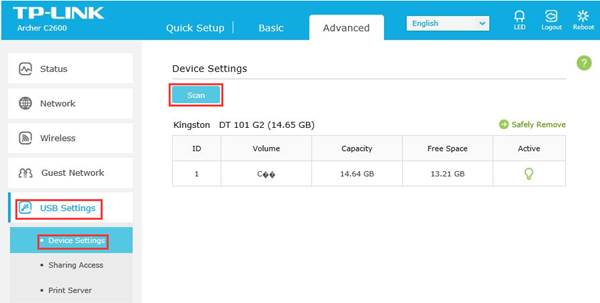
Step 3
Click Advanced on the top, then click USB Settings -> Device Settings on the left side menu. Check whether the USB device is identified by Archer C2600.If there is no device listed on this page, please click Scan and you may try unplug the USB device and plug it back in.
Step 4.
Check the options FTP and FTP(Remote) to enable FTP server function.
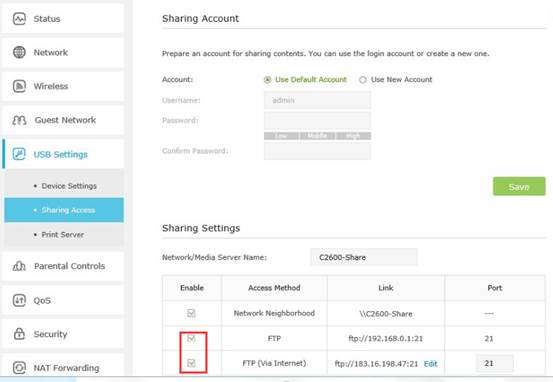
On the Sharing Settings apart below, the Network/Media Server Name can be changed to something else.

Switch on Enable Authentication on the bottom. This takes effect when Share All is on.
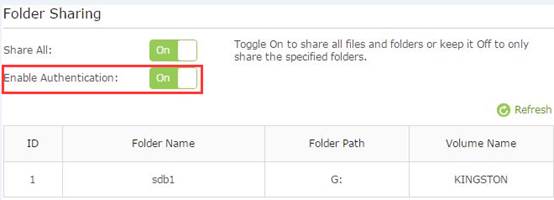
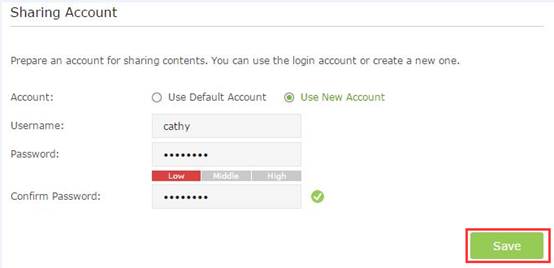
Go to Sharing Account on the top to Use New Account to create a separate login account for the USB device or Use Default Account to use the same account as the router’s management page login account, then click on save.
Step5.
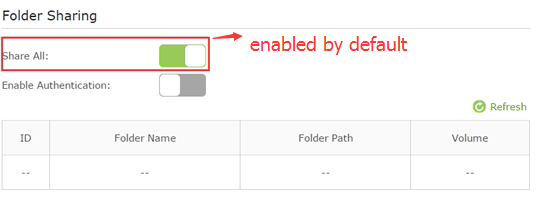
It is set to share all the files by default. If you want to customize the shared content, switch off Share All, and click on add to choose specific folder.
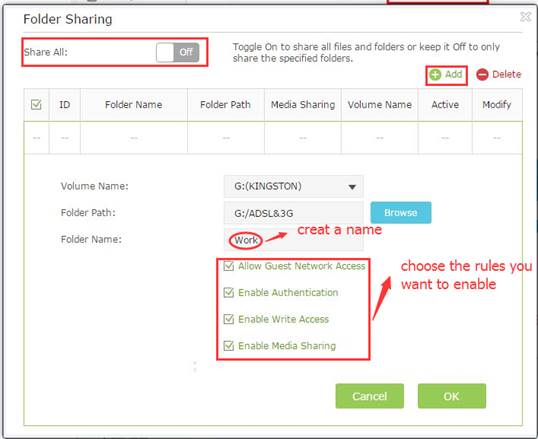
Below are explanations for the options:
Volume Name - From the pull-down list, select which volume to save the file under.
Floder Path- Path to the folder is determined by where the file is saved.
Folder Name - Name of the shared folder, customized by users.
Allow Guest Network Access - Select the check box to allow the Guest Network to have access to the shared folder.
Enable Authentication - Select the check box to require users to log in with a username and password.
Enable Write Access - Select the check box to allow users to make changes to the folder content.
Enable Media Sharing - Enable media server function, you may click here to get more info.
Step 6
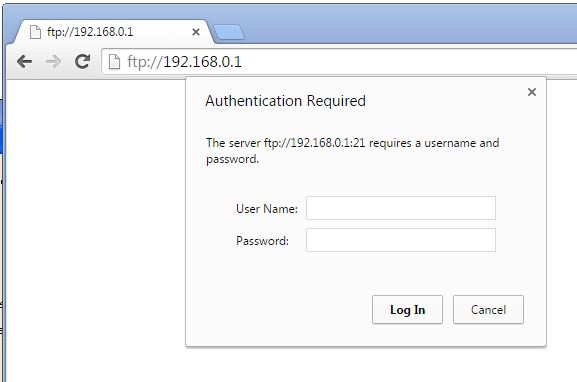
Now the FTP server can be accessed by local network. Please open the web browser and type in address ftp://LAN IP, press enter. Then type in your account to access to the FTP server. Here the LAN IP address of the router is 192.168.0.1.
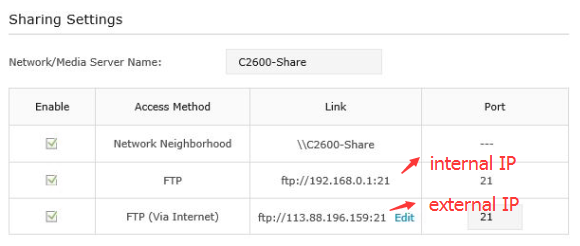
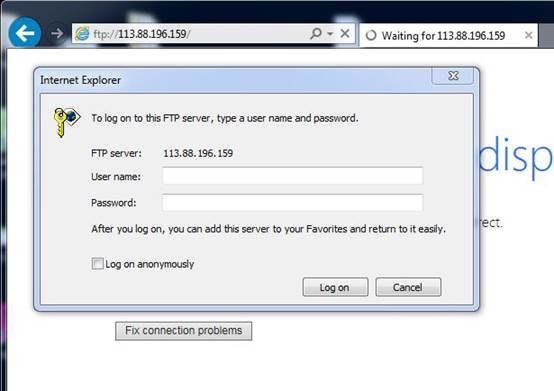
You can also access the FTP server by external network. Please type in address ftp://WAN IP to access to it.
Get to know more details of each function and configuration please go to Download Center to download the manual of your product.
Полезен ли беше този ЧЗВ?
Вашите отзиви помагат за подобряване на този сайт.
2.0&(US)3.0&A1200(EU)1.0-F_normal_1584493601459k.png)