Как да конфигурирате Tapo камерата
Въведение
Тази статия има за цел да предостави подробни инструкции стъпка по стъпка за ефективно конфигуриране на камерата.
Изисквания
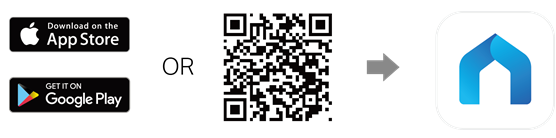
- Изтеглете приложението Tapo, като посетите Google Play Store, App Store или сканирате QR кода.
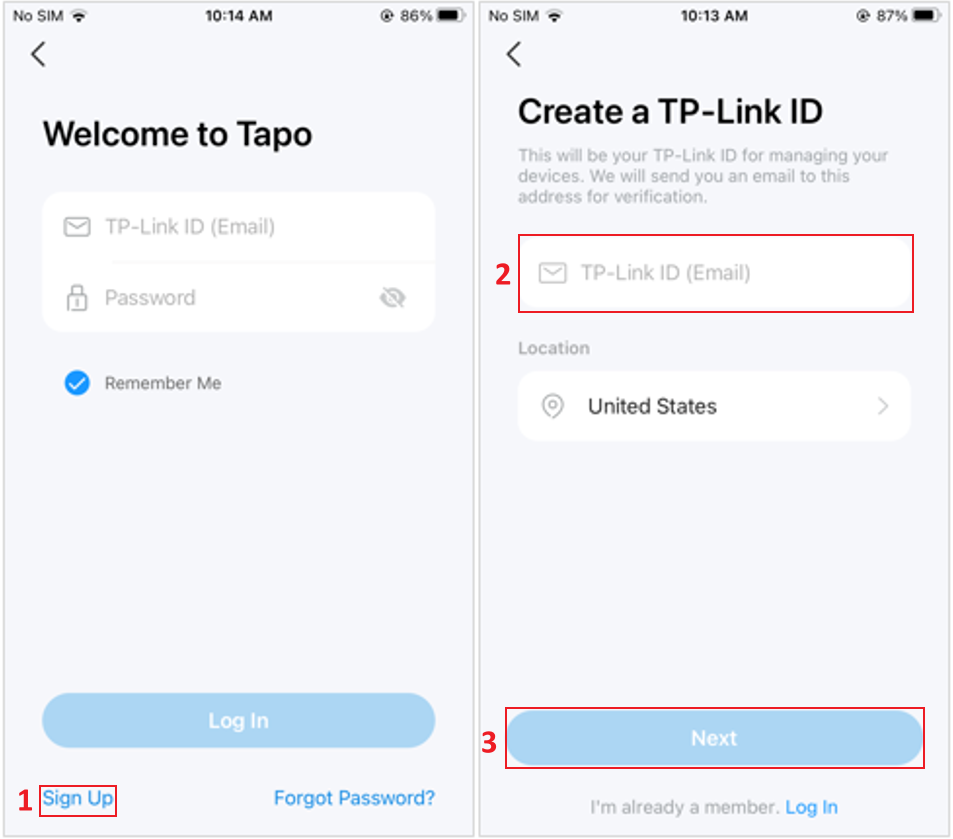
- Уверете се, че имате TP-Link ID. Ако нямате, докоснете „Sign Up“, за да създадете такъв в приложението Tapo.
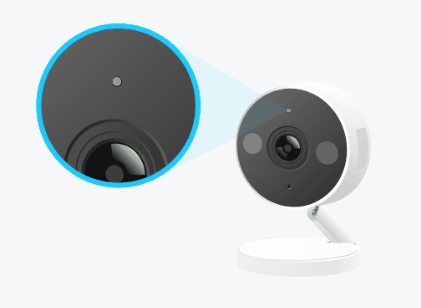
- Включете камерата и проверете дали индикаторната светлина показва, че устройството е в режим на конфигуриране (вижте ръководството за потребителя за подробности). Повечето камери показват това чрез мигаща червено-зелена светлина.
Конфигурация
Можете да следвате стъпките по-долу за конфигуриране на камерата, които са същите като тези в ръководството в приложението.
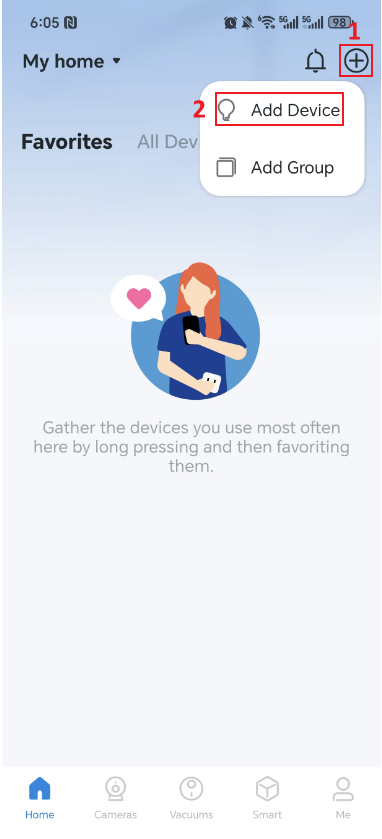
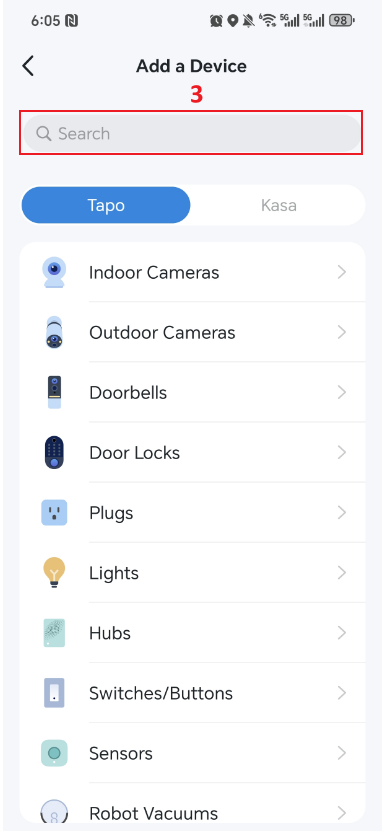
Стъпка 1. В приложението докоснете иконата ![]() > Add Device (Добавяне на устройство), след което следвайте стъпките, за да потърсите модела на устройството или да го изберете чрез типа продукт.
> Add Device (Добавяне на устройство), след което следвайте стъпките, за да потърсите модела на устройството или да го изберете чрез типа продукт.
Стъпка 2. След като инсталацията на вашата Tapo камера приключи, свържете я към захранване. Изчакайте устройството да се стартира и автоматично да влезе в режим „готово за конфигуриране“, което обикновено отнема около 30 секунди.
Можете да определите дали устройството е влязло в режим „готово за конфигуриране“ по състоянието на индикаторната светлина. В този режим повечето Tapo камери показват мигаща червено-зелена светлина, което означава, че можете да продължите към следващата стъпка. В противен случай натиснете и задръжте бутона Reset на камерата за повече от 5 секунди, за да я нулирате.
Съвети:
- По време на целия процес на конфигуриране дръжте мобилния си телефон или таблет близо до Tapo устройството.
- Правилата за индикаторната светлина и методите за нулиране може да се различават при различните модели. За повече информация вижте QIG (Quick Installation Guide – Ръководство за бърза инсталация) на устройството.
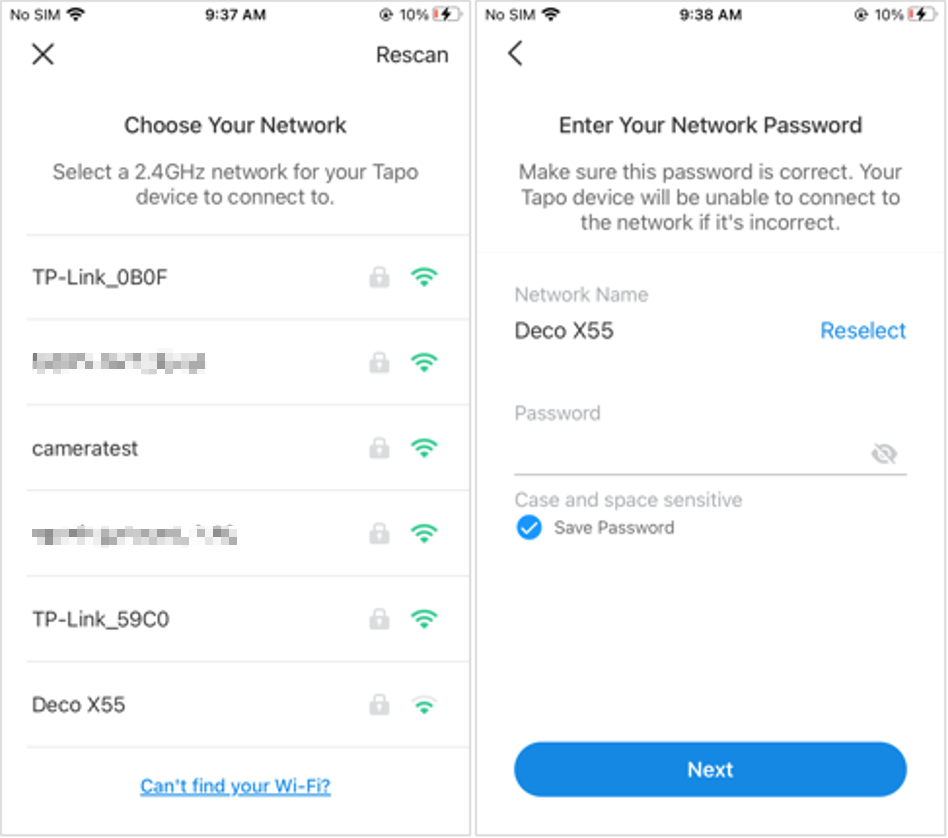
Стъпка 3. Свържете се с камерата чрез Wi-Fi или Bluetooth, като следвате указанията в приложението, за да продължите със следващите стъпки.
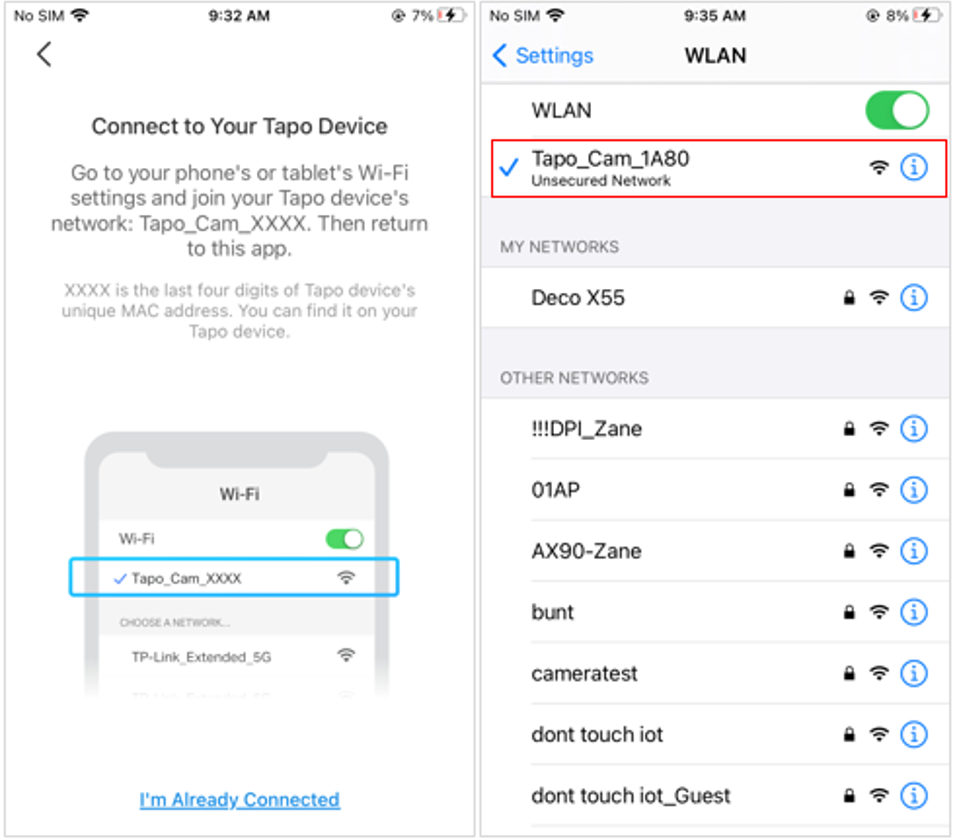
Ако страницата в приложението ви подканва да се свържете към Wi-Fi мрежата на камерата, имайте предвид, че процесът се различава леко при iOS и Android.
- За iOS: Отворете Wi-Fi настройките на телефона или таблета си и се свържете към мрежата на камерата: Tapo_Cam_XXXX. След това се върнете в приложението.
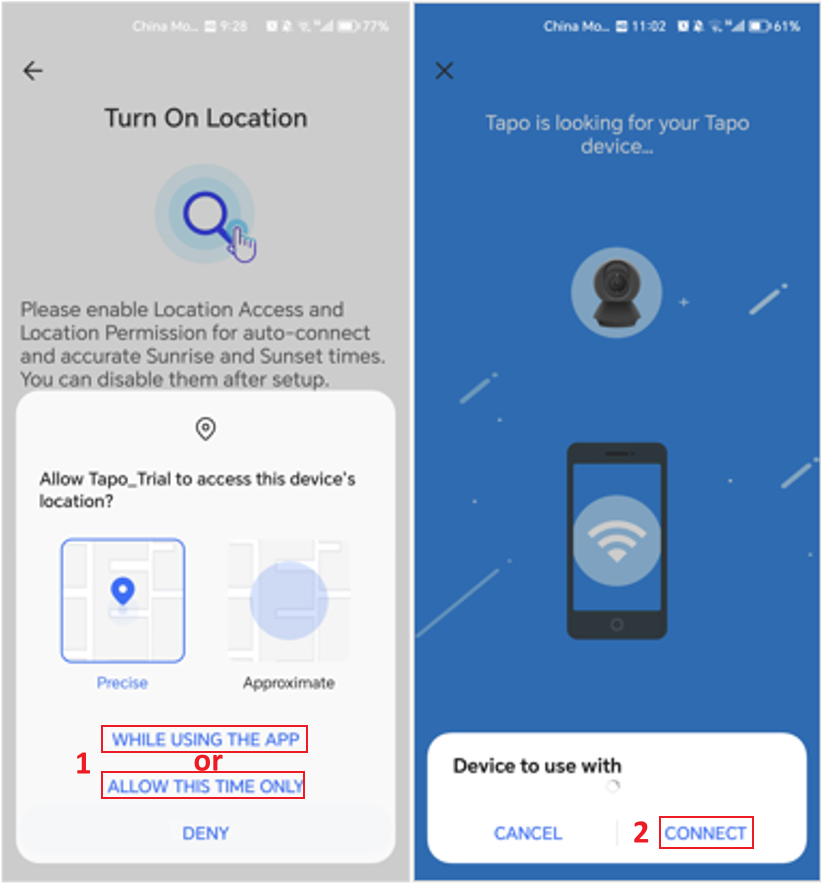
- За Android: Разрешете достъп до местоположението, за да бъде открита и свързана камерата. Можете да изберете „WHILE USING THE APP“ или „ALLOW THIS TIME ONLY“, след което докоснете „CONNECT“. След приключване на настройката можете да изключите достъпа до местоположение.
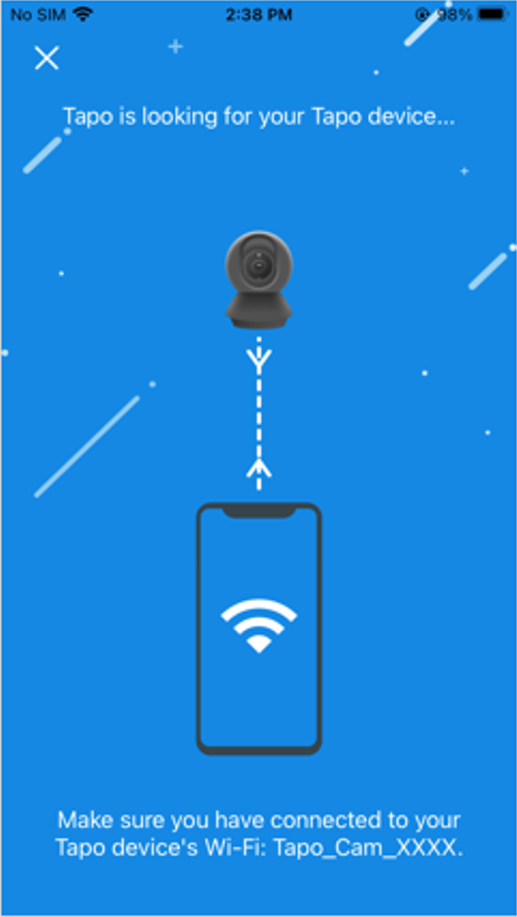
Стъпка 4. Приложението ще започне да търси вашата камера, което може да отнеме минута или две.
Стъпка 5. След като камерата бъде открита, свържете я към домашната си Wi-Fi мрежа и въведете паролата.
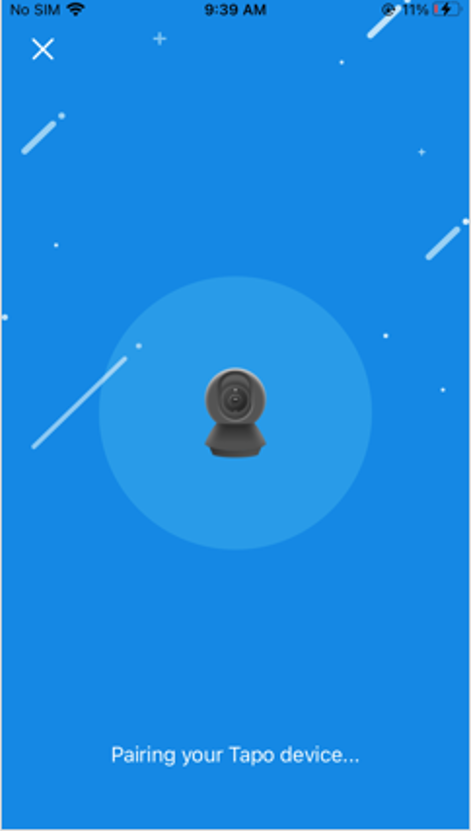
Стъпка 6. Докоснете „Join“ в изскачащия прозорец, за да започне сдвояването на камерата. Уверете се, че LED индикаторът остава постоянно светнал по време на процеса.
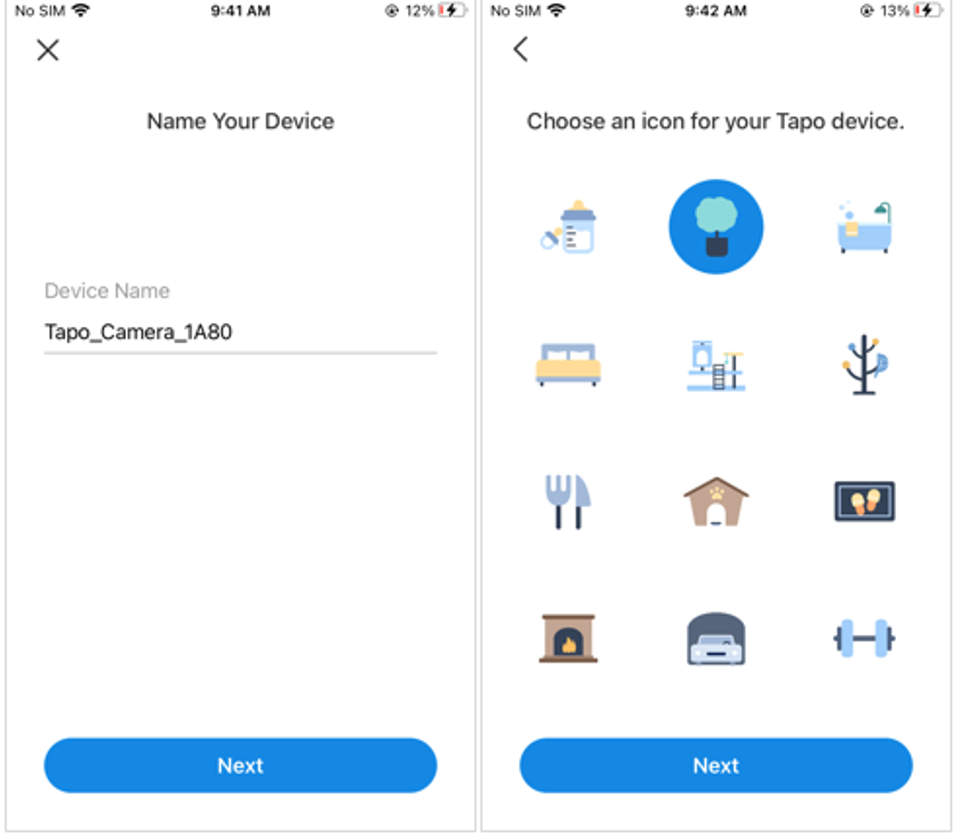
Стъпка 7. След като сдвояването приключи, задайте уникално име на камерата и посочете нейното местоположение за по-лесно разпознаване. Докоснете „Next“, за да завършите настройката.
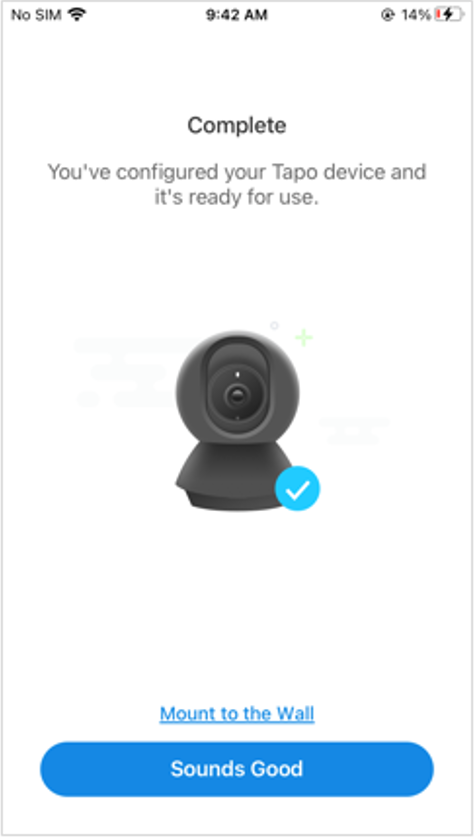
Стъпка 8. Страницата „Complete“ показва, че камерата е добавена успешно. Докоснете „Done“, за да започнете да я използвате.
Често задавани въпроси
В1: Какво да направя, ако не успея да конфигурирам Tapo камера?
О: Можете да се запознаете със следния ЧЗВ: https://www.tapo.com/faq/67/
В2: Как да включа или изключа зеления LED индикатор на предната част на Tapo камерата?
О: Ако искате да включите или изключите зеления LED индикатор на предната част на Tapo камерата, отидете в страницата Device Settings (Настройки на устройството) в приложението Tapo и намерете опцията Status LED.
В3: Мога ли да използвам Tapo камера без приложението Tapo и без акаунт?
О: Изискването за използване на приложението Tapo и TP-Link акаунт зависи от типа камера. Повечето Tapo камери изискват приложението Tapo и TP-Link акаунт за настройка и използване. Ако обаче разполагате с камера с поддръжка на HomeKit, можете да я настроите чрез приложението Home вместо чрез приложението Tapo и TP-Link акаунт.
В4: Може ли Tapo камерата да се използва и активира без Wi-Fi мрежа?
О: По време на процеса на конфигуриране Tapo камерите трябва да бъдат свързани към мрежа – кабелно или безжично. След конфигуриране Tapo камерите могат да работят дори когато са изключени от мрежата на рутера при ежедневна употреба.
Функциите за запис на SD карта, включително запис при засичане и 24/7 запис, ще продължат да работят. Имайте предвид обаче, че без Wi-Fi връзка няма да можете да гледате картина на живо, да възпроизвеждате записи или да получавате известия за засичане чрез приложението Tapo.
В5: Как мога да сменя безжичната мрежа?
О: Към момента единственият начин за смяна на безжичната мрежа е да нулирате камерата и да я конфигурирате отново.
За повече информация относно функциите и настройките посетете Download Center, за да изтеглите ръководството за вашия продукт.
Полезен ли беше този ЧЗВ?
Вашите отзиви помагат за подобряване на този сайт.
(EU)_2.0_Package_hc_normal_20250530062335k.png)