How to set up System Time of the TP-Link Wi-Fi Router
System time is the time displayed while the router is running. The system time you configure here will be used for other time-based functions like Parental Controls. You can choose the way to obtain the system time as needed.
Via Web
1. Log in to the web-based interface of the router. If you don’t know how to do that, please refer to How do I log into the web-based Utility (Management Page) of TP-Link wireless router?
2. Go to Advanced > System Tools > Time Settings.
A. To get time from the internet:
1. In the Set Time field, select Get automatically from the Internet.

2. Select your local Time Zone from the drop-down list.
3. In the NTP Server I field, enter the IP address or domain name of your desired NTP Server.
4. (Optional) In the NTP Server II field, enter the IP address or domain name of the second NTP Server.
5. Click Obtain to get the current Internet time and click Save.
B: To manually set the date and time:
1. In the Set Time field, select Manually.

2. Set the current Date (In MM/DD/YYYY format).
3. Set the current Time (In HH/MM/SS format).
4. Click Save.
C: To set up Daylight Saving Time:
1. Select Enable Daylight Saving Time.

2. Select the correct Start date and time when daylight saving time starts at your local time zone.
3. Select the correct End date and time when daylight saving time ends at your local time zone.
4. Click Save.
Note: The daylight saving time will take effect from the day (Monday to Sunday) of the week (First,2th,3th,4th and last week) in a given month. For example, if you want to set Daylight Saving Time from March 8,2019 on TP-Link router, you may set the Start Time as 2019,March,2nd,Friday.
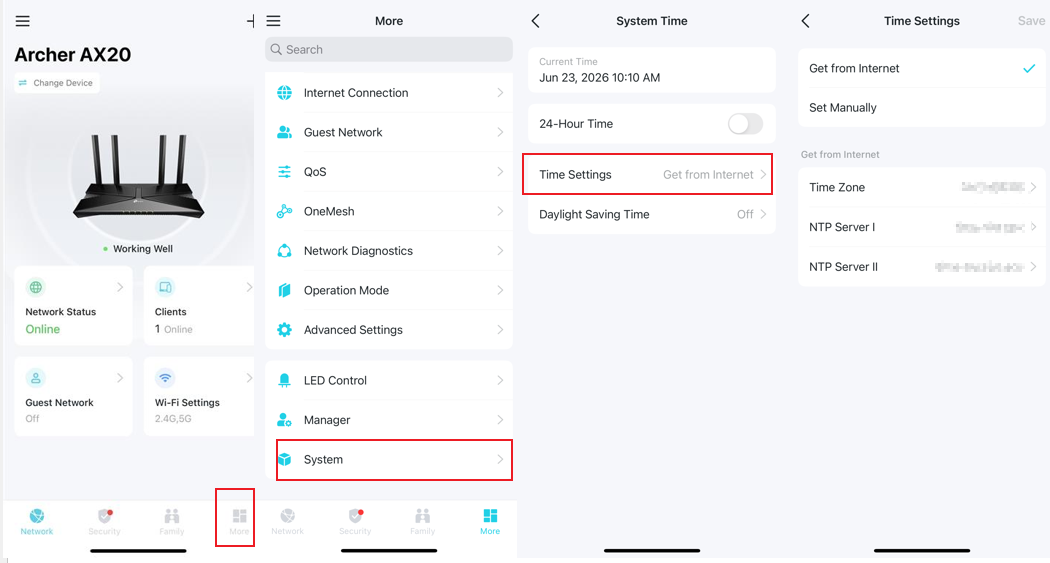
Via the Tether App
1. Ensure your smartphone is currently connected to your TP-Link router's main Wi-Fi network
2. Launch the TP-Link Tether app and tap on your router icon under the My Devices list
3. Enter the administrator login password you created for your router (if prompted)
4. Tap More at the bottom of the screen, then select System to configure the time settings.
Get to know more details of each function and configuration please go to Download Center to download the manual of your product.
Looking For More
Полезен ли беше този ЧЗВ?
Вашите отзиви помагат за подобряване на този сайт.

1.0_normal_1591236279433p.png)
1.0_normal_20240923021822p.png)
TP-Link Community
Still need help? Search for answers, ask questions, and get help from TP-Link experts and other users around the world.