How to configure the TP-Link Travel Router to access internet via the USB port
Introduction
The TP-Link Travel Routers provide dual-mode USB connectivity (configured as USB Modem Mode for 3G/4G dongles or USB Tethering Mode for mobile devices) to establish reliable internet access via their USB interface. This article provides step-by-step instructions for configuring the router to these two modes effectively.
Configuration
In 3G/4G/5G USB Modem mode, the router shares the data from a 3G/4G/5G USB modem with other devices. And in USB Tethering mode, the router shares a mobile device’s cellular data with other devices. The two modes are suitable for travel.
If it doesn’t match your network environment, identify which operation mode is suitable for you first.
Note: While this guide uses the TL-WR3602BE as a reference model to show the installation steps. The actual interface and the function options shown on this FAQ may vary slightly from your product model. For more details, please refer to your router's User Guide.
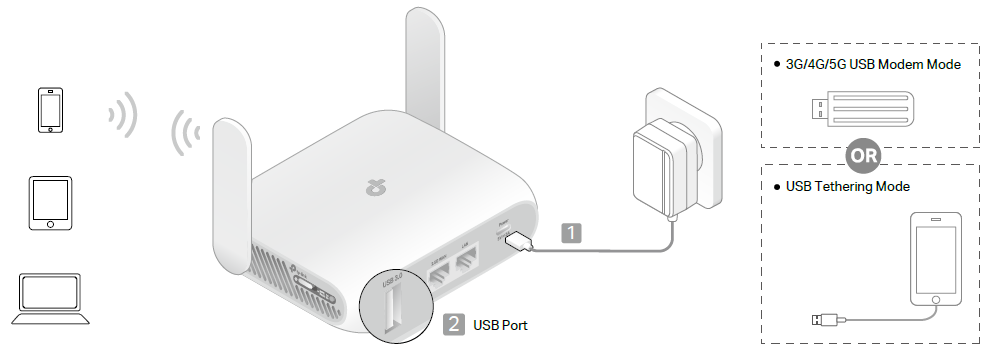
Step 1. Power on the travel router until the LED turns solid (red or blue) before moving on.
Step 2. Connect your USB modem to the router’s USB port. Then connect one computer to the travel router wirelessly or wired.
- Wirelessly: Connect your device to the router’s Wi-Fi. The default wireless network name (SSID) and wireless password are printed on both the Wi-Fi info card and the label at the bottom of the router.
- Wiredly: Turn off the Wi-Fi on your computer and connect to the LAN port of the router with an Ethernet cable.
Step 3. Open a browser, visit tplinkwifi.net or 192.168.0.1, and create a local password to sign in to the web management page, then refer to Step 4 to start the Quick Setup.
Note: If it asks you to enter the local password, it means the router has already been configured before. It is recommended to get a pin to press the reset hole for 6 seconds to perform a hard reset. Once finished, access the web management to start Quick Setup.
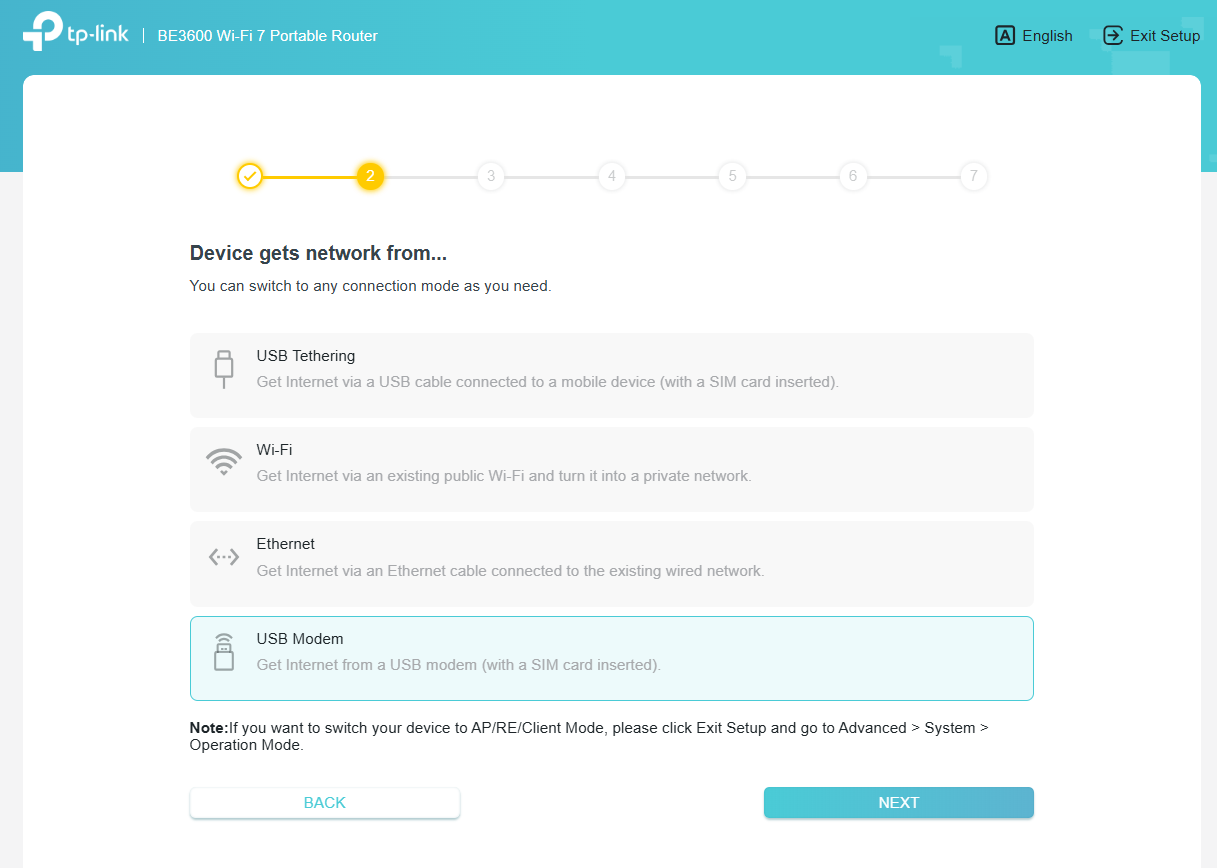
Step 4. After logging in, configure your time zone and set the USB Modem as the internet source. Then click NEXT.
Step 5. Select the Location and Mobile ISP to set up the SIM card.
Step 6. Either customize your local network SSID and Wireless Password for the 2.4GHz/5GHz network or click USE THE CURRENT Wi-Fi SETTINGS to keep the default ones, and then click NEXT.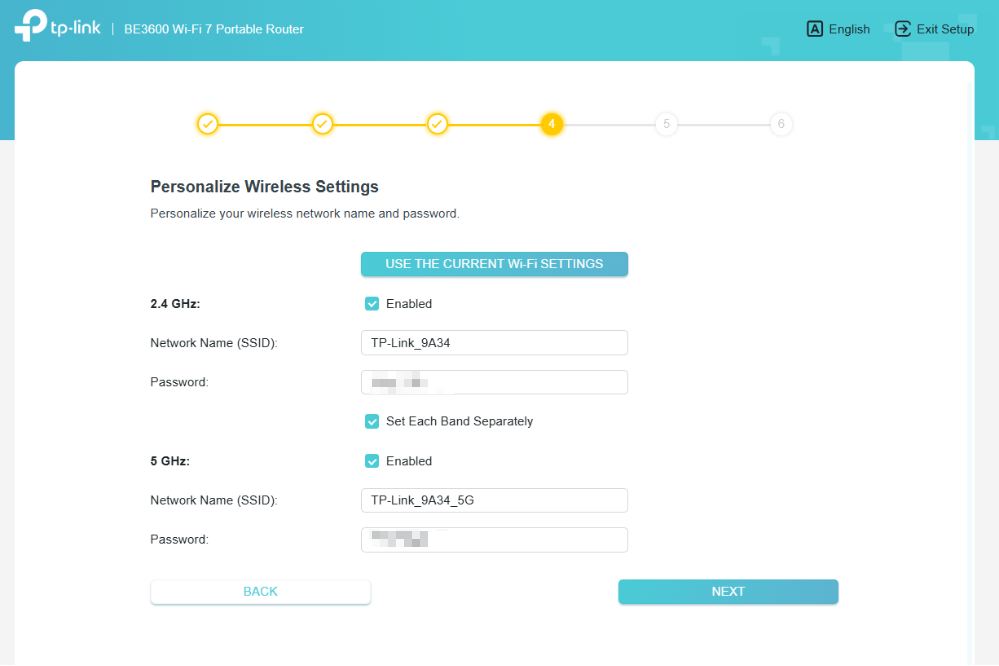
Step 7. Then complete the setup by following the on-screen instructions.
Step 1. Power on the travel router, and then wait until the LED turns solid (red or blue) before moving on.
Step 2. Then connect one device to the travel router wirelessly or wired.
- Wirelessly: Connect your computer to the router’s Wi-Fi. The default wireless network name (SSID) and wireless password are printed on both the Wi-Fi info card and the label at the bottom of the router.
- Wiredly: Turn off the Wi-Fi on your computer and connect to the LAN port of the router with an Ethernet cable.
Step 3. Open a browser and visit tplinkwifi.net or 192.168.0.1, and create a local password to sign in to the web management page, then refer to Step 4 to start the Quick Setup.
Note: If it asks you to enter the local password, it means the router has already been configured before. It is recommended to get a pin to press the reset hole for 6 seconds to perform a hard reset. Once finished, access the web management to start Quick Setup.
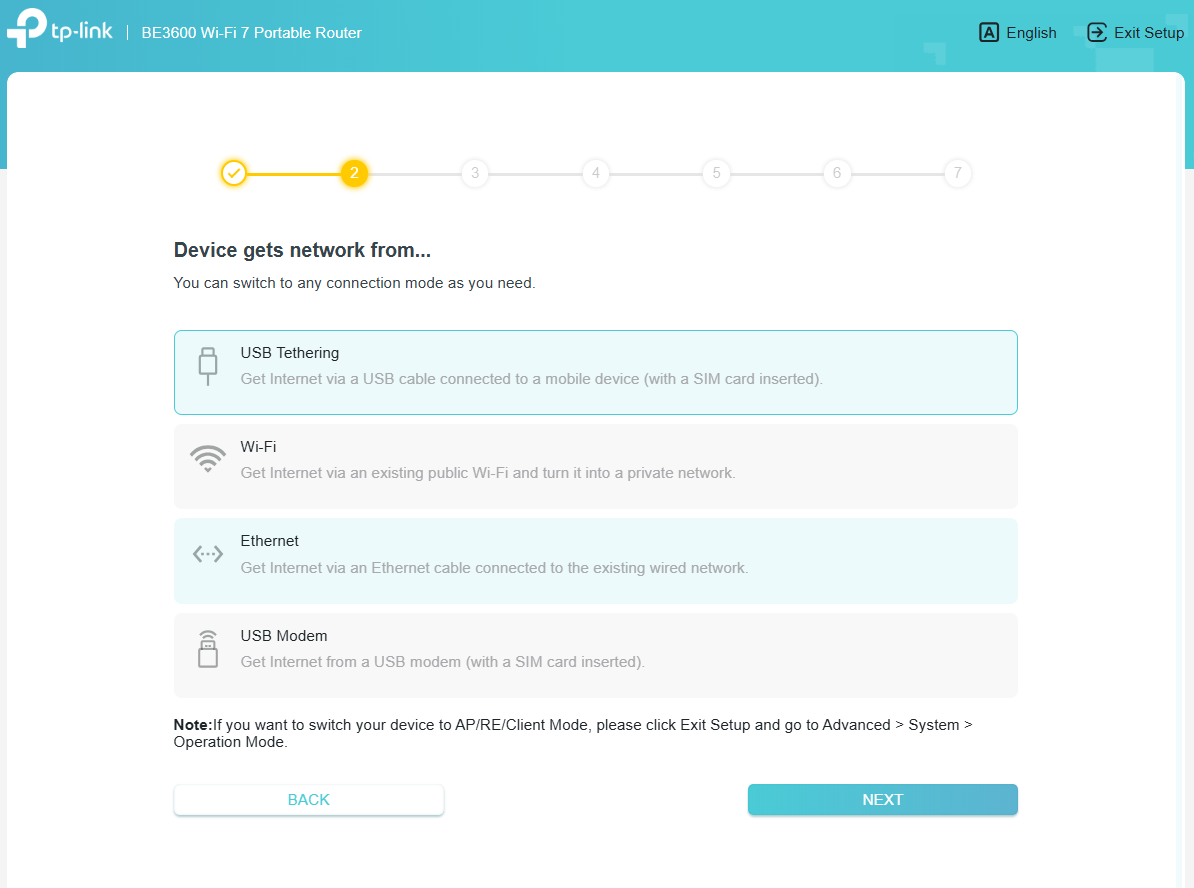
Step 4. After logging in, configure your time zone and set USB Tethering as the internet source. Then click NEXT.
Step 5. Connect the mobile device with a SIM card inserted to the router’s USB port via a USB cable, and enable the Tethering function as follows.
- iOS (iPhone 12 with iOS 16.7.1 is used for demonstration)
Wait for the Trust This Computer window to pop up, then click Trust. Go to Settings, make sure the Cellular Data is turned on, and tap on Personal Hotspot. Enable Allow Others to Join. Make sure the tethering mobile device does not connect to the router's Wi-Fi.
- Android (Samsung Galaxy S10 with Android 12 is used for demonstration)
Go to Settings > Connections > Mobile Hotspot and Tethering to enable USB Tethering. Make sure the tethering mobile device does not connect to the router's Wi-Fi.
Note: Configuration steps may vary depending on specific OS versions and device implementations, particularly across Android manufacturers. Should configuration issues persist, consult your device manufacturer's technical support for resolution.
Step 6. Either customize your local network SSID and Wireless Password for the 2.4GHz/5GHz network or click USE THE CURRENT Wi-Fi SETTINGS to keep the default ones, and then click NEXT.
Step 7. Then complete the setup by following the on-screen instructions.
QA
Q1: Can I still use the USB sharing function when the router is operating in USB Modem Mode/USB Tethering Mode?
A1: No, the USB sharing functionality is unavailable during USB Modem Mode or USB Tethering Mode operations.
Q2: When using a mobile phone to log in to the web management interface to configure Tethering mode, is it possible to use the same mobile phone as a tethering mobile device and connect it to the router's USB port via USB cable?
A2: No, the mobile phone cannot simultaneously function as both a configuration device for the router's management interface and a tethered internet source. When activating Tethering mode, the USB interface dedicates its resources exclusively to establishing modem functionality, which conflicts with the concurrent requirement for administrative access to the web interface.
To get to know more details of each function and configuration, please go to the Download Center to download the manual for your product.
Чи була ця стаття корисною?
Ваш відгук допомагає вдосконалити цей сайт.
