Tapo Camera Account: How to Create, Change, or Delete It
Your Tapo camera account is a separate login from your TP-Link ID, used specifically for Tapo camera login on third-party platforms such as NAS devices, RTSP/ONVIF monitoring software, or PC-based camera viewers. This page covers three actions you can take on your Tapo camera account login through the Tapo app: creating a new account, changing an existing one, and deleting it.
Key Takeaways
- The Tapo camera account is a separate login from your TP-Link ID, used to access your Tapo camera on third-party platforms such as NAS devices, RTSP/ONVIF monitoring software, or PC-based camera viewers.
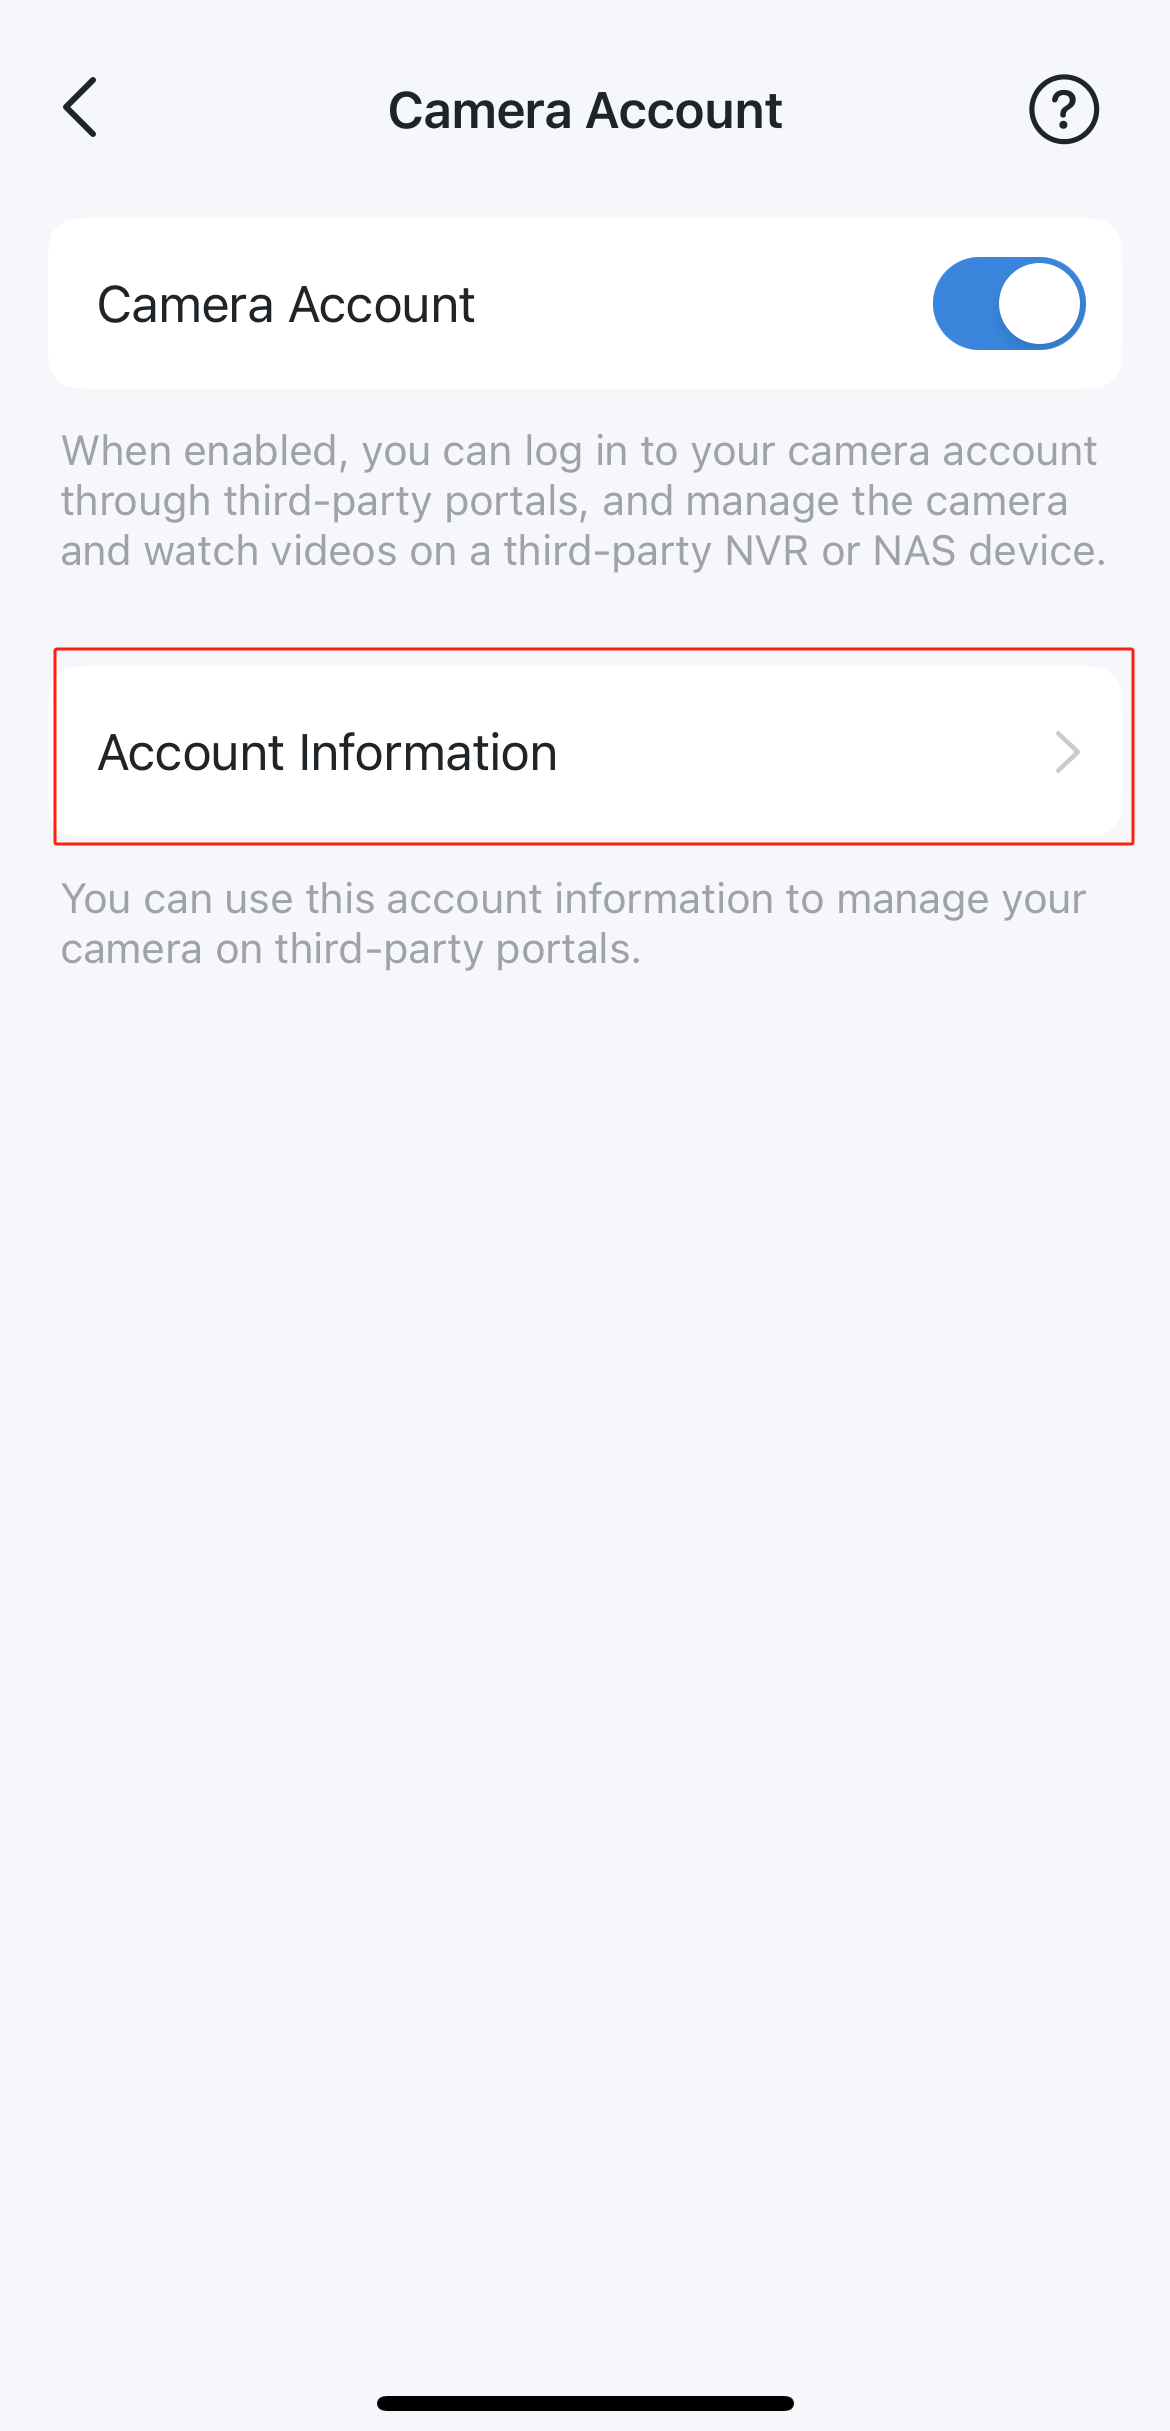
- To create or change your camera account, go to the camera's Live View page in the Tapo app, tap the settings icon, then go to Advanced Settings > Camera Account.
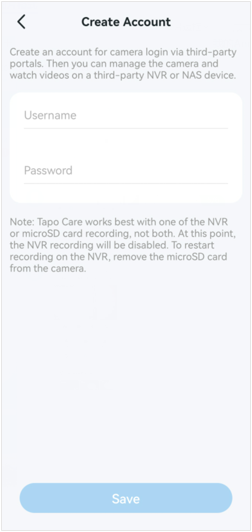
- If you are creating a camera account for the first time, enter a username and password to set it up.
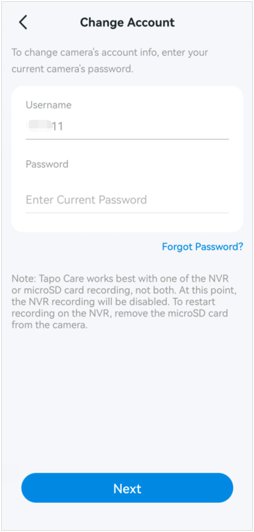
- If you already have a camera account, enter your current password to verify your identity before setting a new username and password.
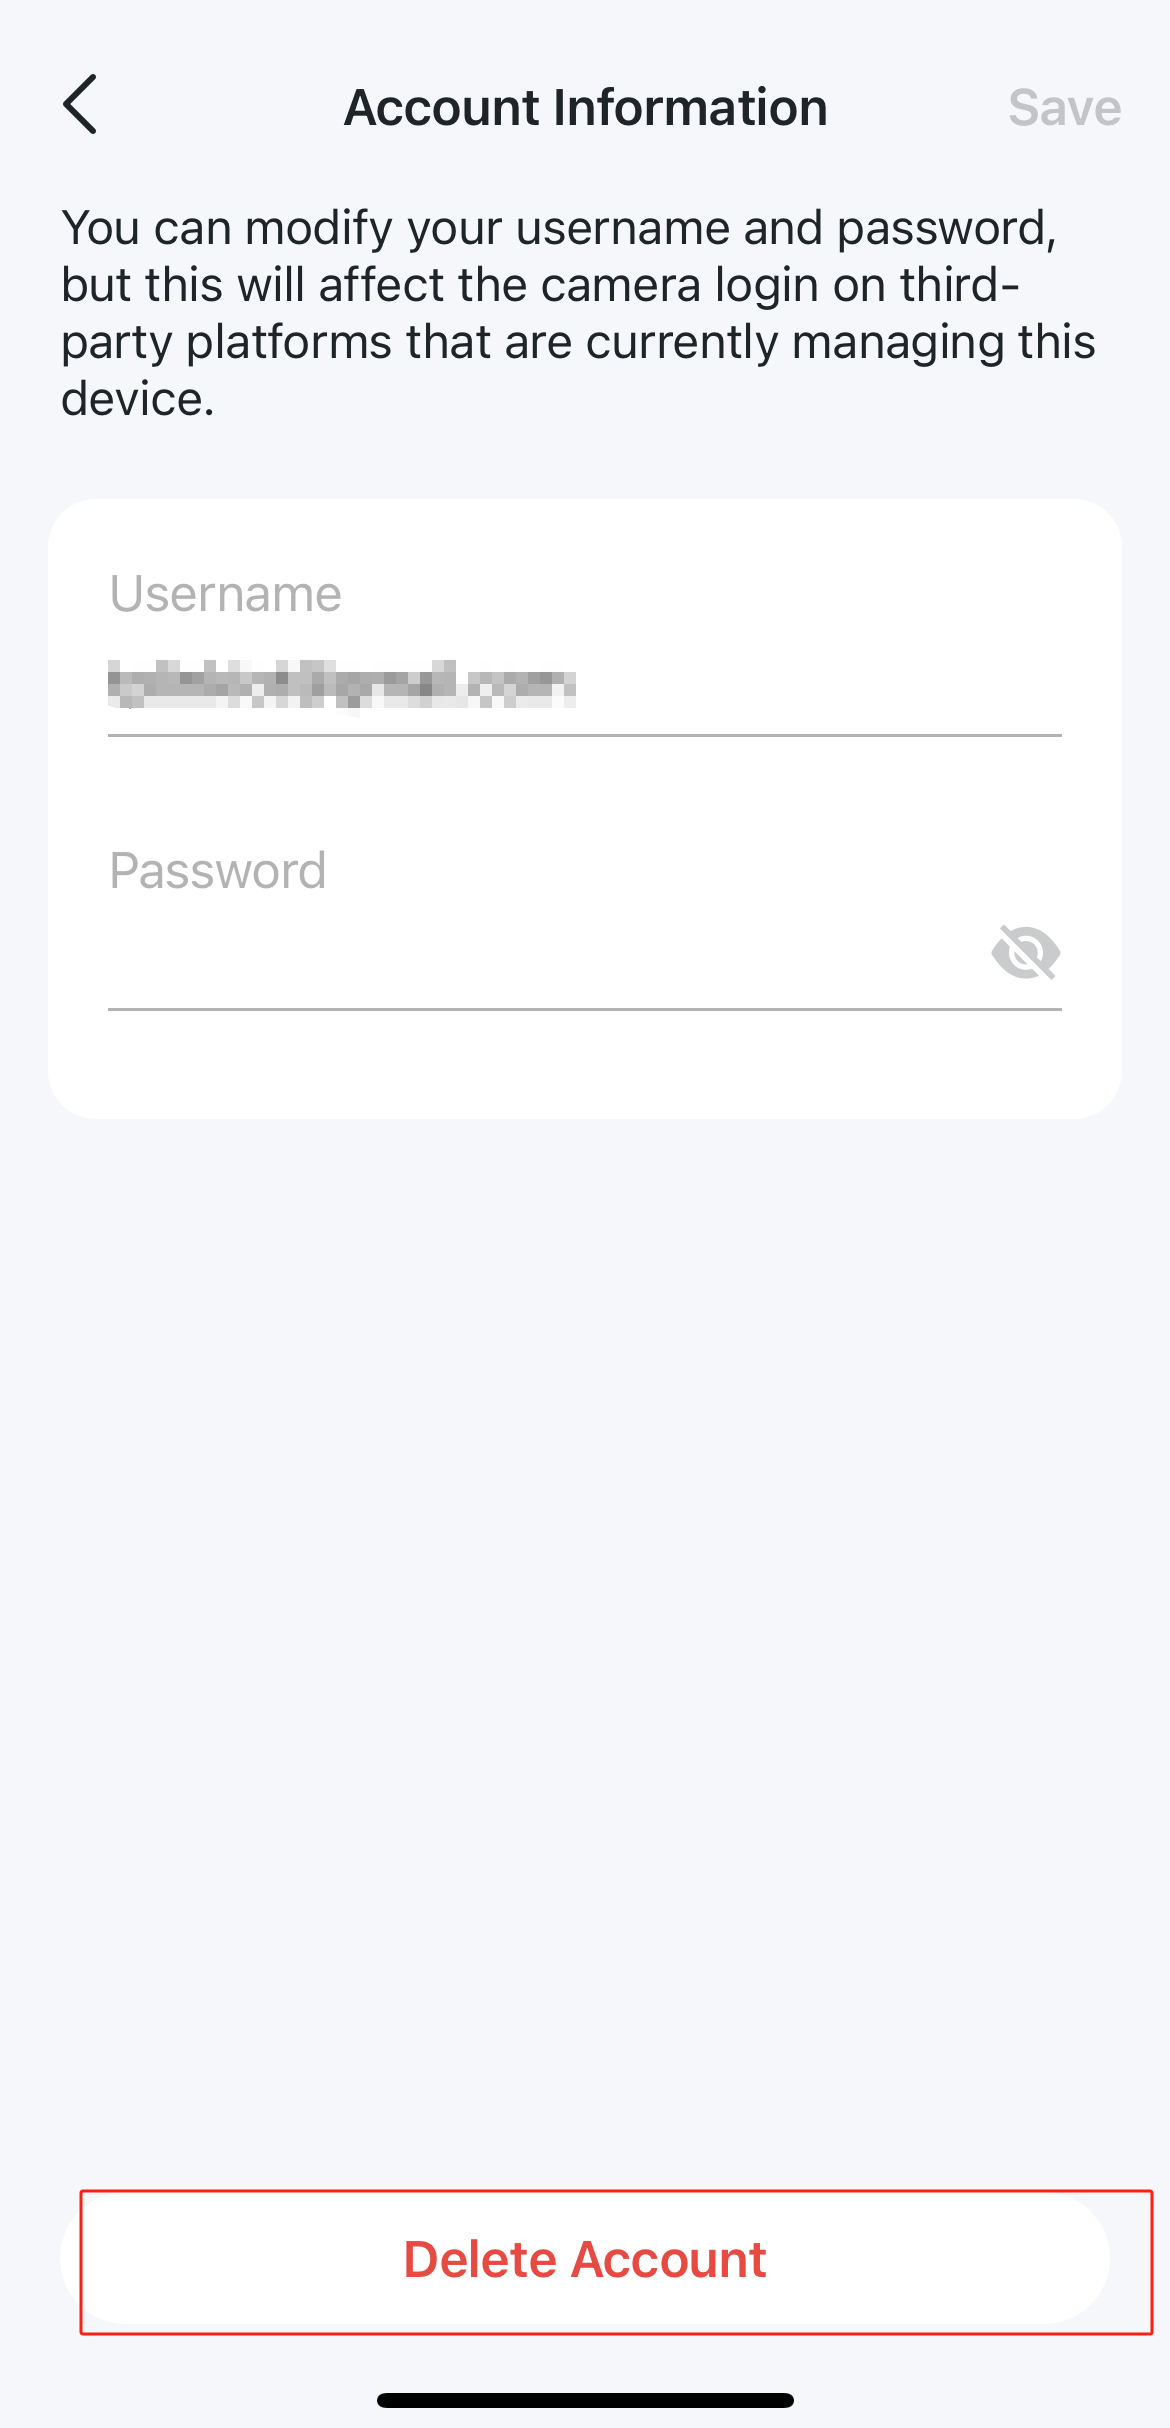
- To delete your camera account, go to Camera Account > Account Information, verify your account with your current password, then tap Delete Account.
Who Needs a Tapo Camera Account?
A Tapo camera account is only needed if you want to access your camera through a third-party platform such as a NAS device, RTSP/ONVIF monitoring software, or a PC-based camera viewer. Using a dedicated camera account for these platforms keeps your main TP-Link ID credentials separate and secure. If you only use the Tapo app to view your camera, you do not need to set up a camera account.
Part 1: Create or Change Your Camera Account
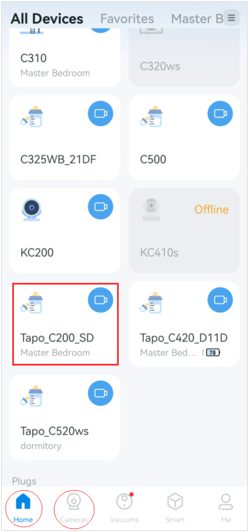
Step 1. On the Home page of the Tapo app, tap your camera model card, or tap the Cameras tab and select Manage on your camera model to go to the Live View page.
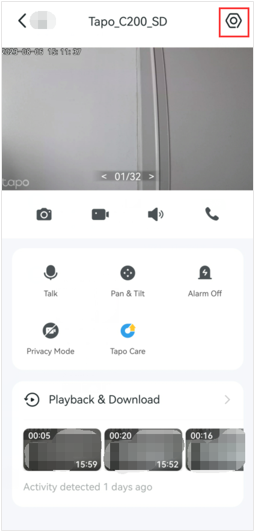
Step 2. On the Live View page, tap the icon in the top right corner to enter the Device Settings page.
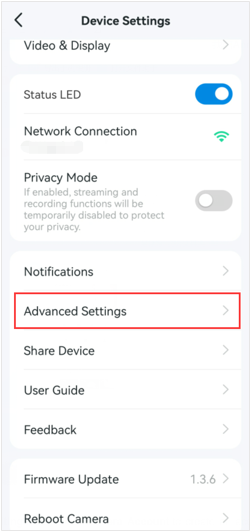
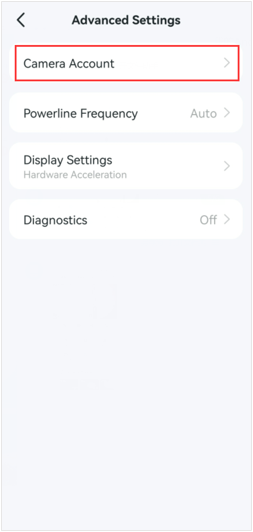
Step 3. Tap Advanced Settings on the Device Settings page, then tap Camera Account to create or change the camera account.
If you haven’t created a camera account, enter the username and password to create one.
If you already have one, enter your current password to verify your account, then set a new username and password.
Part 2: Delete Your Camera Account
Tap the Account Information on the Camera Account page, and enter the Camera Account’s password to Verify Your Account; then, you will see the Delete Account option. Tap on it to delete your account.
Citește despre:
A fost util acest FAQ?
Părerea ta ne ajută să îmbunătățim acest site.
TP-Link Community
Still need help? Search for answers, ask questions, and get help from TP-Link experts and other users around the world.