How to Enable Media Server on the TL-WR902AC (Standard Router and Hotspot Router Mode)
The Media Server feature allows to view photos, play music and watch movies on the
USB drive directly with DLNA-supported devices, such as on your computer, pad and
PS2/3/4.
Step 1. Connect Your USB Disk
Insert your USB storage device into the router’s USB port directly or using a USB cable.
Wait several seconds until the USB LED becomes solid on.
Tips:
- If you use USB hubs, make sure no more than 2 devices are connected to the router.
- If the USB storage device requires using bundled external power, make sure the external power has been connected.
- If you use a USB hard drive, make sure its file system is FAT32 or NTFS.
- Before you physically disconnect a USB device from the router, safely remove it to avoid data damage: Go to Advanced > USB Settings > Storage Sharing and click Eject Disk.
Step 2. Access the web-based management interface of TL-WR902AC
Visit http://tplinkwifi.net, and log in with the username and password you set for the router.
Step 3. Manage Media Server
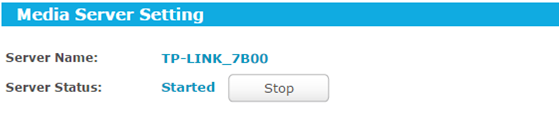
Go to Advanced > USB Settings > Media Server.
Click Start to enable the Media Server.
Click Add New Folder. Specify a name for the folder to be shared in the Display Name field. And select the folder you want to share or select Share entire partition to share all folders.
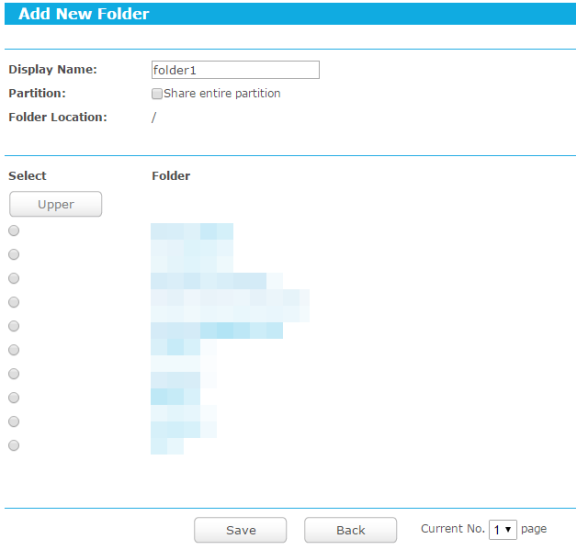
Click Save.
You can check which folder is shared and also edit or delete the folder.

Step 4. Access the Media Files on Your USB Disk
Now the DLNA-supported devices (such as your computer and pad) connected to the router can detect and play the media files on the USB disk.
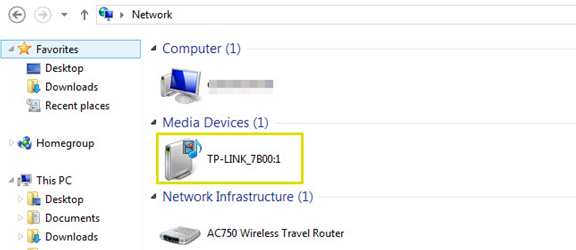
For windows computer:
Go to Computer > Network, and click the Media Server Name in the Media Devices section. (Here we take Windows 8 as an example.)
For tablet:
Use a third-party DLNA-supported player.
Get to know more details of each function and configuration please go to Download Center to download the manual of your product.
Este guia foi útil?
A sua resposta ajuda-nos a melhorar o nosso site.