-
Para Casa
Modems/ Gateways
A sua porta de acesso à internet
Expansão de Rede
Forma mais fácil para expandir e melhorar a sua rede
SOHO Switches
Conexões de qualidade através de cabo de rede
Adaptadores
Equipe os seus equipamentos com um acesso Wi-Fi mais rápido
Acessórios
Tudo o que precisa para um estilo de vida conectado
-
Smart Home
Câmaras Cloud
Um olhar no que é importante
Smart Plugs
Autonomia nos equipamentos domésticos
Smart Bulbs
Luz para todas as ocasiões
-
Para Empresas
JetStream Switches
Rede com fios de alta velocidade com e sem gestão L3
Omada EAP Series
Professional business Wi-Fi with centralized management
Omada Cloud SDN
A solução Wi-Fi Cloud inteligente para redes de negócios
Pharos Wireless Broadband
Ideal para redes Wi-Fi bridge ponto a ponto de longo alcance
SafeStream Router
Secure VPNs e Gateways de balanceamento de carga para negócios
-
Para ISP
DSL
Capable of high-speed network and integrated broadband applications
LTE/3G
Maintains internet access wherever you go.
PON
The leading technology for delivering gigabit Internet services
Powerline Adapter
Transforms electrical wiring to carry the network signal.
Range Extender
Easily expand your Wi-Fi coverage.
Switches
Boosts your business network with premium performance.
Business Wireless
Takes your enterprise Wi-Fi to new levels.
How to set up system time of Powerline ac Extender?
System time is the time displayed while the extender is running. The system time you configure here will be used for other time-based functions like Parental Controls, Wi-Fi Schedules, LED Schedules. You can manually set how to get the system time.
How can I do that?
Follow the steps below (here takes TL-WPA8630 as demonstration):
1. Please refer to How to log into the web-based management interface of Powerline ac Extender?
2. Go to System Tools > Time Settings page.
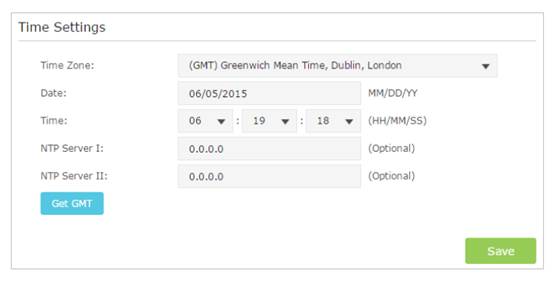
To automatically synchronize the time:
1. Select your local Time Zone from the drop-down menu;
2. Click Get GMT and click Save.
To manually set the date and time:
1. In the Time Settings field, select your local Time Zone;
2. Enter the current Date;
3. Set the current Time (In 24-hour clock format, e.g. 16:00:00 is 04:00PM);
4. Click Save.
Note: leave NTP Server I and NTP Server II field as default unless necessary.
Get to know more details of each function and configuration please go to Download Center to download the manual of your product.
A sua resposta ajuda-nos a melhorar o nosso site.