How to Set Up Wireless Schedule on TP-Link Router
The Wireless Schedule feature allows you to automatically turn off your TP-Link router’s Wi-Fi during specific time periods, helping you manage network usage and save energy.
Step 1. Connect to your router either via Wi-Fi or with an Ethernet cable. Open a web browser and enter https://tplinkwifi.net/. Log in with your router’s password.
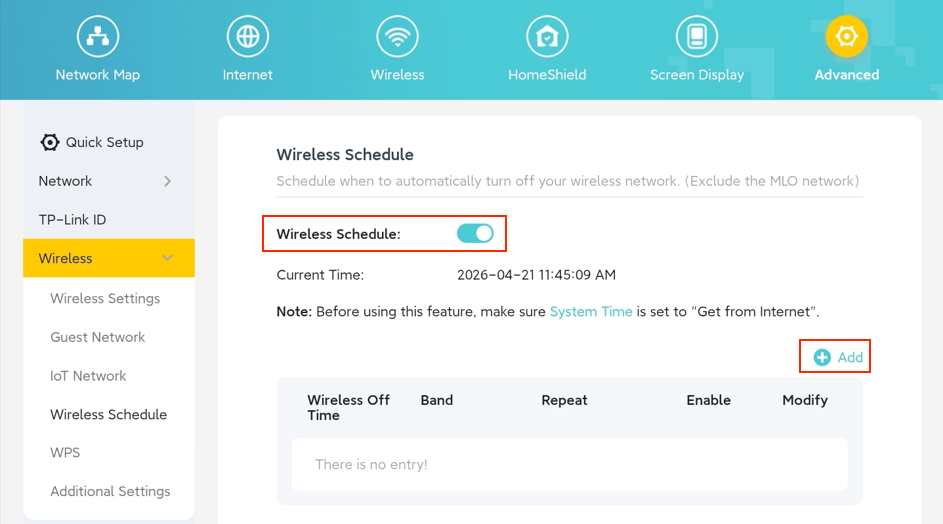
Step 2. Navigate to Advanced > Wireless > Wireless Settings, enable Wireless Schedule, and then click Add.
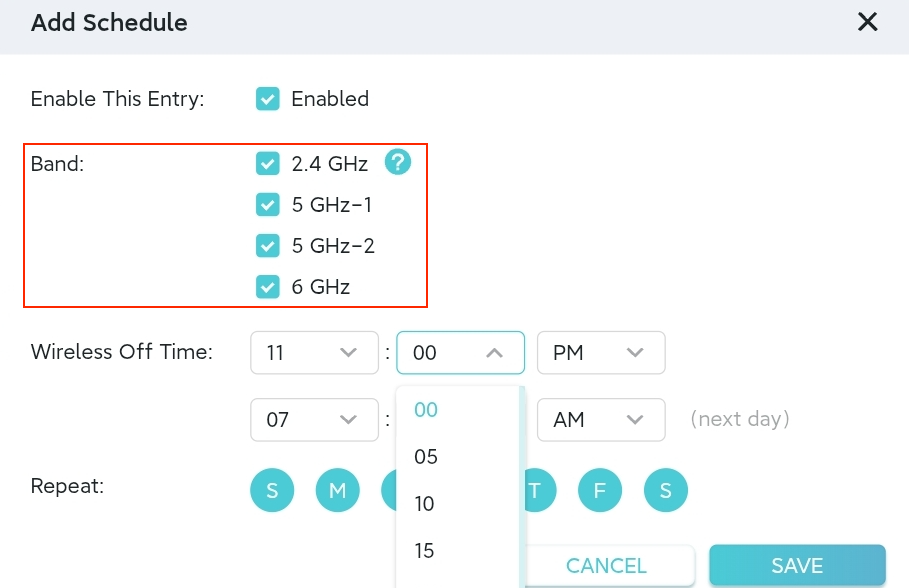
Step 3. In the pop-up window, set the start and end times and the repeat interval for turning off the Wi-Fi, then click Save. You can add multiple schedules if needed.

Note: The layout and options on the Add Schedule page may vary depending on your router model. Some models also allow you to keep certain Wi-Fi bands active during the scheduled off-time. Please refer to your router’s web interface for the exact settings available for your device.
Looking For More
Is this faq useful?
Your feedback helps improve this site.
3.0_A_RGB_normal_1584493572647x.png)


TP-Link Community
Still need help? Search for answers, ask questions, and get help from TP-Link experts and other users around the world.