Comment configurer la fonction WDS sur les routeurs Wi-Fi TP-Link
Qu'est-ce que WDS ?
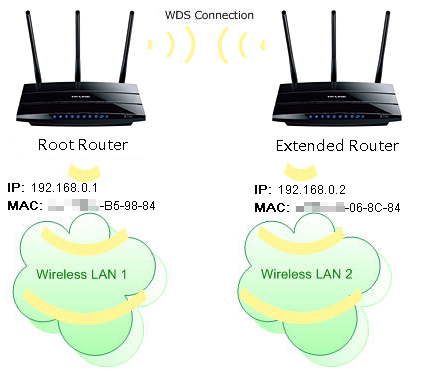
Un système de distribution sans fil (WDS) permet l'interconnexion sans fil de points d'accès au sein d'un réseau IEEE 802.11. Il permet d'étendre un réseau sans fil grâce à plusieurs points d'accès, sans nécessiter de liaison filaire traditionnelle. Pour plus d'informations sur les WDS, veuillez consulter Wikipédia . Les instructions ci-dessous proposent une solution de connexion WDS pour les petites entreprises et les particuliers.
Pour établir une connexion WDS réussie entre différents appareils, il est impératif que ces derniers utilisent le même format d'adresse MAC sans fil. Par exemple, le site A utilise une adresse MAC à 4 octets en mode pont WDS passif, et le site B utilise également une adresse MAC à 4 octets en mode pont WDS actif.
Mon routeur est-il compatible avec WDS ?
Le pontage WDS ne nécessite qu'une configuration sur le routeur étendu. Assurez-vous que votre routeur prend en charge WDS. Si cette fonctionnalité n'est pas disponible sur la page web de la dernière mise à jour du micrologiciel, le routeur ne la prend pas en charge.
Le WDS peut être incompatible entre différents produits (même parfois d'un même fournisseur) car la norme IEEE 802.11-1999 ne définit pas comment construire de telles implémentations ni comment les stations interagissent pour organiser l'échange de trames de ce format.
Remarques :
1. L'adresse IP LAN du routeur étendu doit être différente mais dans le même sous-réseau que le routeur racine ;
2. Le serveur DHCP du routeur étendu doit être désactivé.
3. Le pontage WDS ne nécessite que le paramètre WDS sur le routeur racine ou sur le routeur étendu.
Pourquoi dois-je configurer WDS ?
Par exemple, ma maison est très étendue. La couverture Wi-Fi de mon routeur principal est limitée. Je souhaite utiliser un routeur d'extension pour étendre le réseau Wi-Fi de ce routeur principal.
Comment configurer WDS
La fonction de pontage WDS peut être activée sur la fréquence 2,4 GHz ou 5 GHz pour un routeur bi-bande. Nous utiliserons ici la fonction de pontage WDS à la fréquence 2,4 GHz à titre d'exemple.
Étape 1. Connectez-vous au routeur
Connectez-vous à la page de gestion de votre routeur en saisissant tplinkwifi.net dans la barre d'adresse de votre navigateur après vous être connecté au routeur. Pour plus d'informations, veuillez consulter le guide « Comment se connecter à votre routeur TP-Link ».
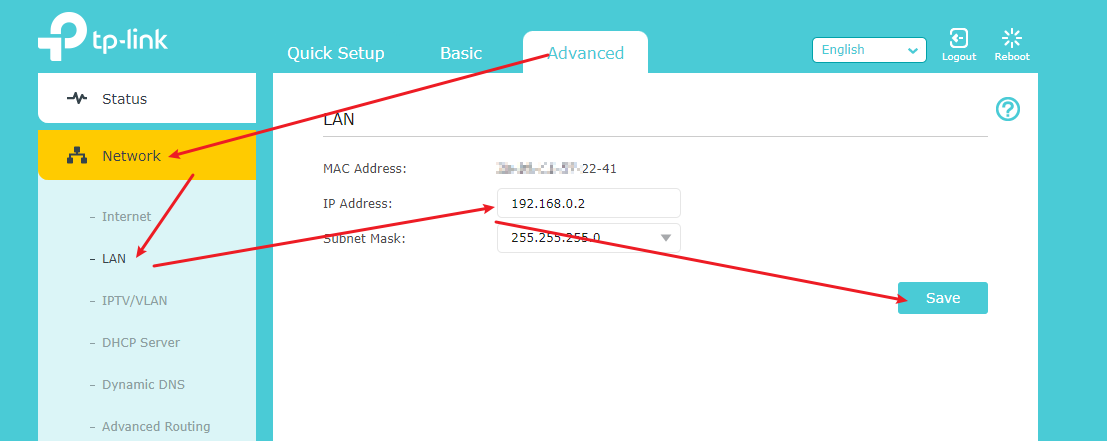
Étape 2. Configurez l'adresse IP LAN du routeur.
Accédez à Avancé > Réseau > LAN et configurez l'adresse IP du routeur étendu pour qu'elle appartienne au même sous-réseau que le routeur principal. (Par exemple, si l'adresse IP 101 du routeur principal est 192.168.0.1 et que l'adresse IP du routeur étendu peut être comprise entre 192.168.0.2 et 192.168.0.254, prenons 192.168.0.2 comme exemple.)
2) Cliquez sur Enregistrer .
Remarque : Connectez-vous à nouveau à la page de gestion Web si l'adresse IP du routeur est modifiée.
Étape 3. Activer la fonction WDS
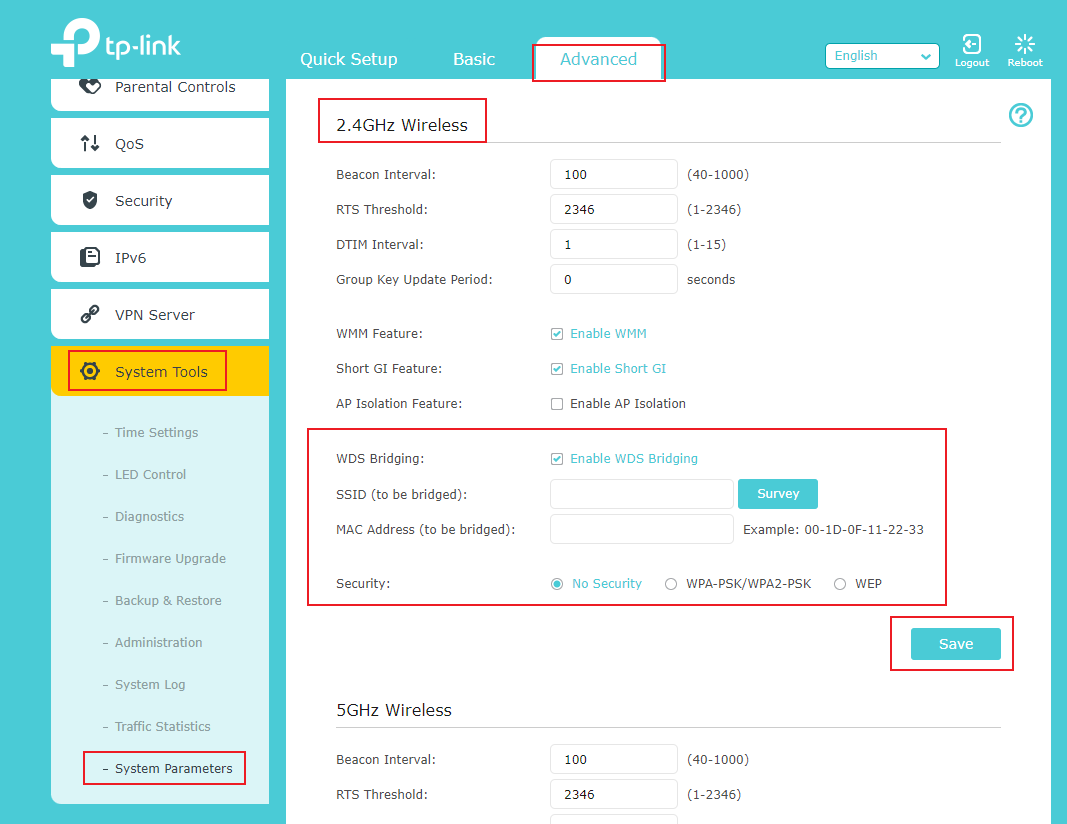
Accédez à Avancé > Outils système > Paramètres système et concentrez-vous sur la section Sans fil 2,4 GHz, puis cliquez sur Activer le pontage WDS .
Étape 4. Analyser le SSID à ponter
1) Cliquez sur « Recherche » pour afficher tous les signaux Wi-Fi détectables, repérez le SSID du routeur principal et cliquez sur « Choisir ».
2) Si le routeur principal possède un mot de passe sans fil, vous devez saisir ce mot de passe.
3) Cliquez sur Enregistrer .
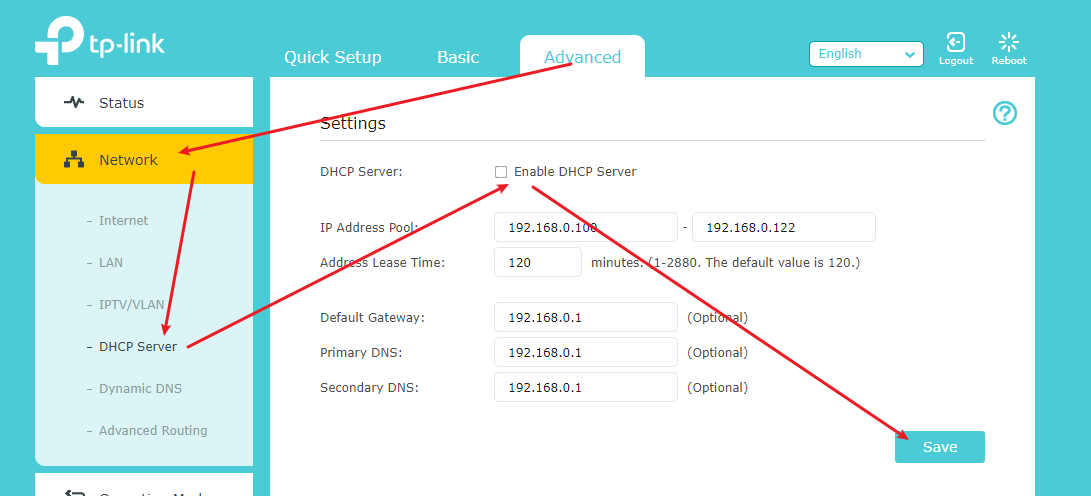
Étape 5. Désactiver le DHCP
1) Allez dans Réseau > Serveur DHCP .
2) Décochez Activer le serveur DHCP et cliquez sur Enregistrer .
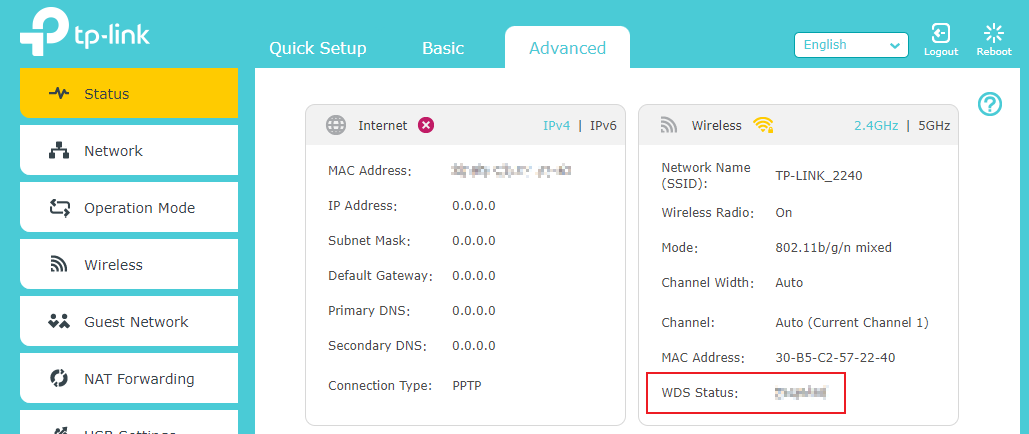
Étape 6. Confirmer l'état du WDS
1) Vous pouvez maintenant accéder à Avancé > État > Sans fil pour vérifier l'état du WDS. Lorsque l' état du WDS est « Exécuté » , cela signifie que le pont WDS a été établi avec succès.
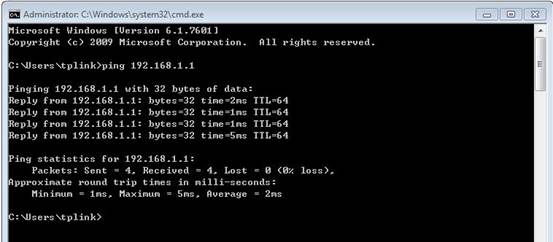
2) Vous pouvez également effectuer une simple vérification à l'aide de la commande Ping. Si le ping aboutit (ce qui signifie que le WDS fonctionne correctement), vous verrez un écran similaire à celui ci-dessous : (dans cet exemple, 192.168.1.1 est l'adresse IP du routeur racine).
Veuillez vous référer à la section « Comment utiliser la commande Ping » .
Pour en savoir plus sur chaque fonction et configuration, veuillez consulter le Centre de téléchargement pour télécharger le manuel de votre produit.
Pour en savoir plus
Est-ce que ce FAQ a été utile ?
Vos commentaires nous aideront à améliorer ce site.
3.0_A_RGB_normal_1584493572647x.png)


TP-Link Community
Still need help? Search for answers, ask questions, and get help from TP-Link experts and other users around the world.