Automatic Installation of TP-Link Adapters under Windows 7
This Article Applies to:
Most of TP-Link adapters can be installed automatically by Windows 7. There are two cases wherein Windows 7 can automatically install the adapters by itself:
Case 1: Drivers have already been embedded in Windows 7.
Case 2: Drivers are not embedded, but Windows 7 will automatically search and download from the update servers. (Internet connection is required.)
NOTE: If you have an Internet connection on your computer, we strongly suggest you to try Instructions for Case 2 first.
Instructions for Case 1:
Step 1
Before starting the computer, please plug your TP-Link adapter into a functional port or slot.
Step 2
When the adapter is detected by Windows 7, you will see the message in the taskbar.

Step 3
When the adapter is installed successfully, Windows 7 will display a message “Device driver software installed successfully”.
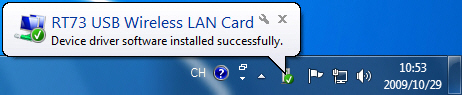
The model or vendor name of the chipset will be displayed in this message.
Step 4
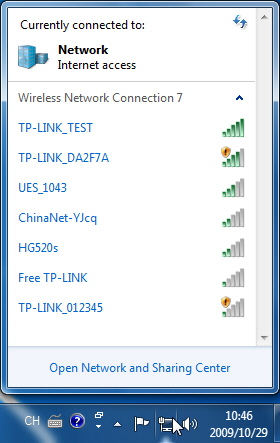
Once the adapter has been installed successfully, if you click the network icon on the taskbar, you will see available networks in the Wireless Network Connection list. (If your adapter is not a wireless adapter, you will not see this window)

Instructions for Case 2:
Step 1
Make sure that your computer can get Internet access when it’s started.
Step 2
Before you start the computer, please plug your TP-Link adapter into a functional port or slot.
Step 3
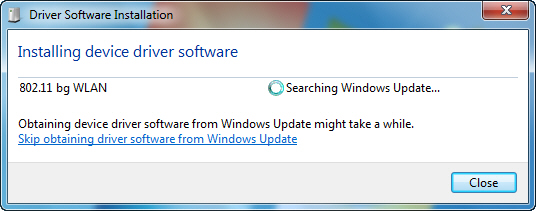
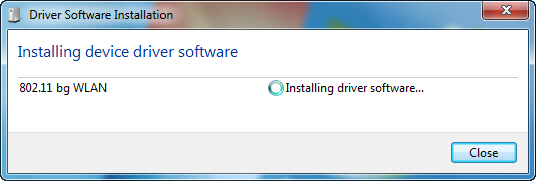
When the adapter is detected by Windows 7, you will see the message from the taskbar.

If you click on the message above, you will see the exact progress of the installation:
Step 4
When the adapter is installed successfully, Windows 7 will display a message on the taskbar.

The model or vendor name of the chipset will be displayed in this message.
Step 5
Once the adapter has been installed successfully, if you click the network icon on the taskbar, you will see available networks in the Wireless Network Connection list. (If your adapter is not a wireless adapter, you will not see this window)
Here until, the installation of TP-Link adapter is completed. If there is any further, please click here to get technical support.
Is this faq useful?
Your feedback helps improve this site.


TP-Link Community
Still need help? Search for answers, ask questions, and get help from TP-Link experts and other users around the world.