How to set up QoS on the TP-Link Deco
Introduction
QoS is a network management feature that gives you control over your internet experience. Think of it as a traffic director for your home network. With QoS, you can assign priority levels to your most important devices and online activities—like video calls, gaming, or streaming—ensuring they get the bandwidth they need.
This means that even when your network is busy with other downloads or devices, your high-priority tasks will run smoothly and responsively, with minimal lag or buffering. In short, QoS helps your critical connections perform at their best, exactly when you need them to.
Please note that the available QoS features differ between Deco models:
- For Deco models with HomeShield: You have access to two distinct QoS modes: Scene Acceleration (prioritizing specific online activities) and Client Acceleration (prioritizing specific devices).
- For Deco models with HomeCare: The current QoS functionality allows you to designate specific devices as high-priority and activate a High-Priority Mode to ensure optimal performance.
The following section provides a detailed guide on configuring these settings for your specific Deco model.
Requirements
- A well-configured Deco network
- The latest version of the Deco app
Configuration
Scenario 1: For Deco models with HomeShield
Here we take Deco X50 as an example.
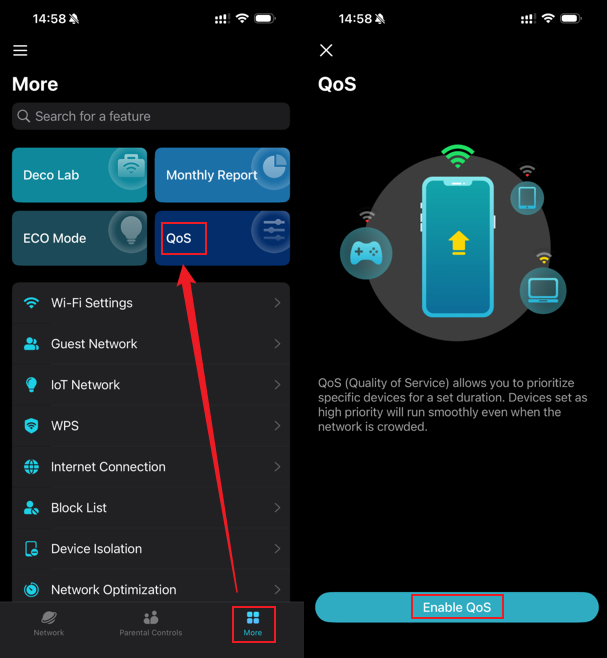
Step 1. To begin, open the Deco app and navigate to More > QoS, then toggle the switch to Enable the feature.
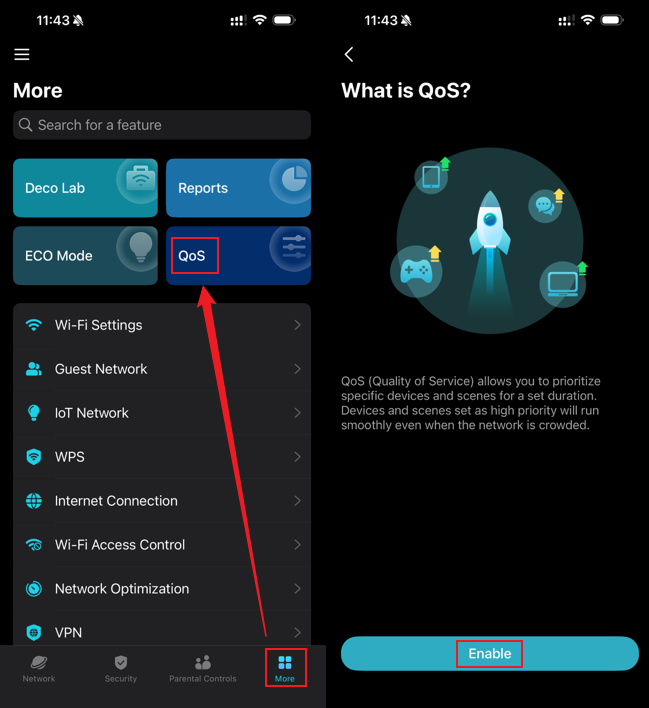
Step 2. After enabling QoS, you will see two acceleration options: Scene Acceleration and Client Acceleration. Select the one you wish to configure, then set your priorities.
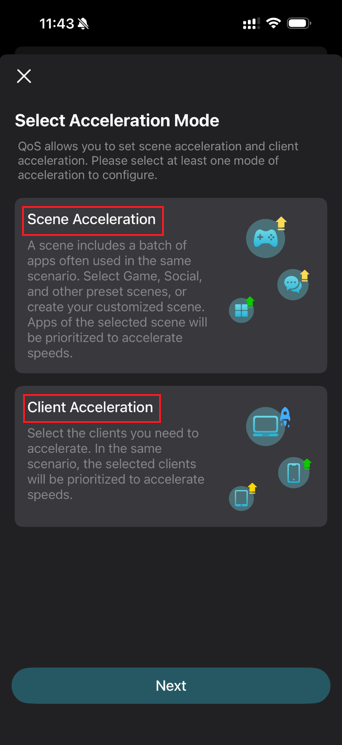
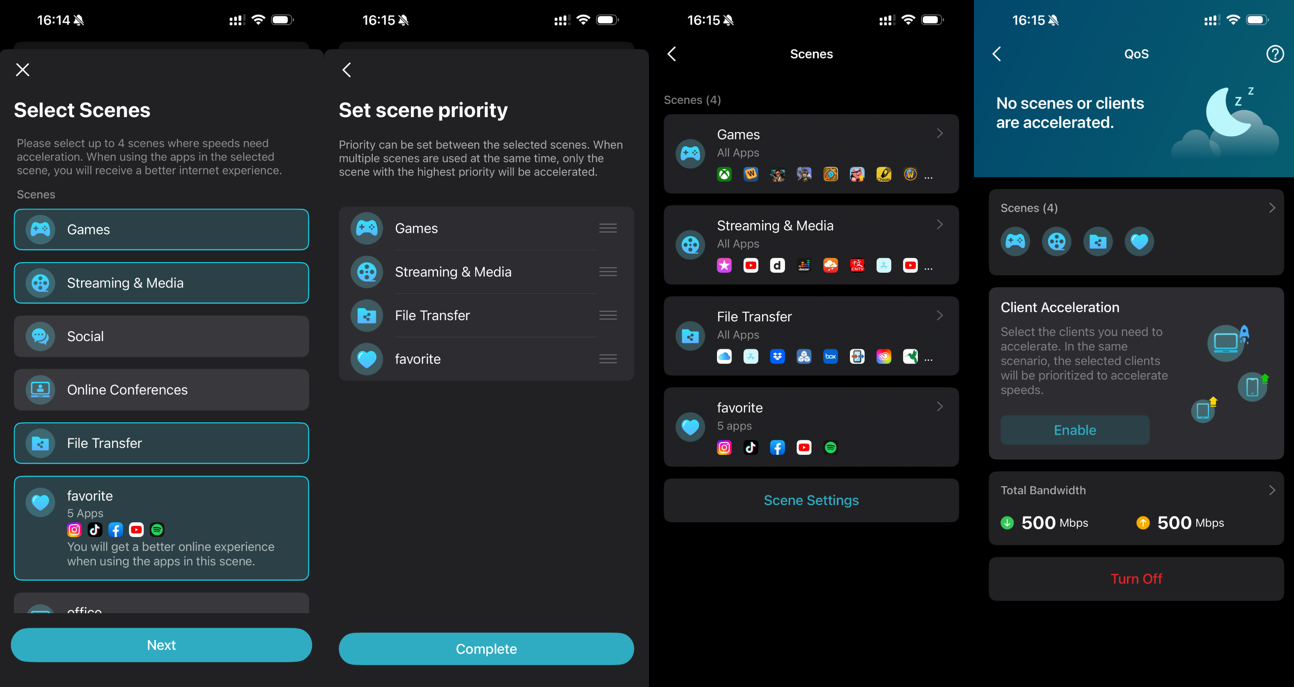
- Scene Acceleration:
Select the Scene Acceleration, enter your network’s Total Bandwidth, and choose the specific online activities (such as Gaming or Video Conferencing) that you want to prioritize for optimal performance.
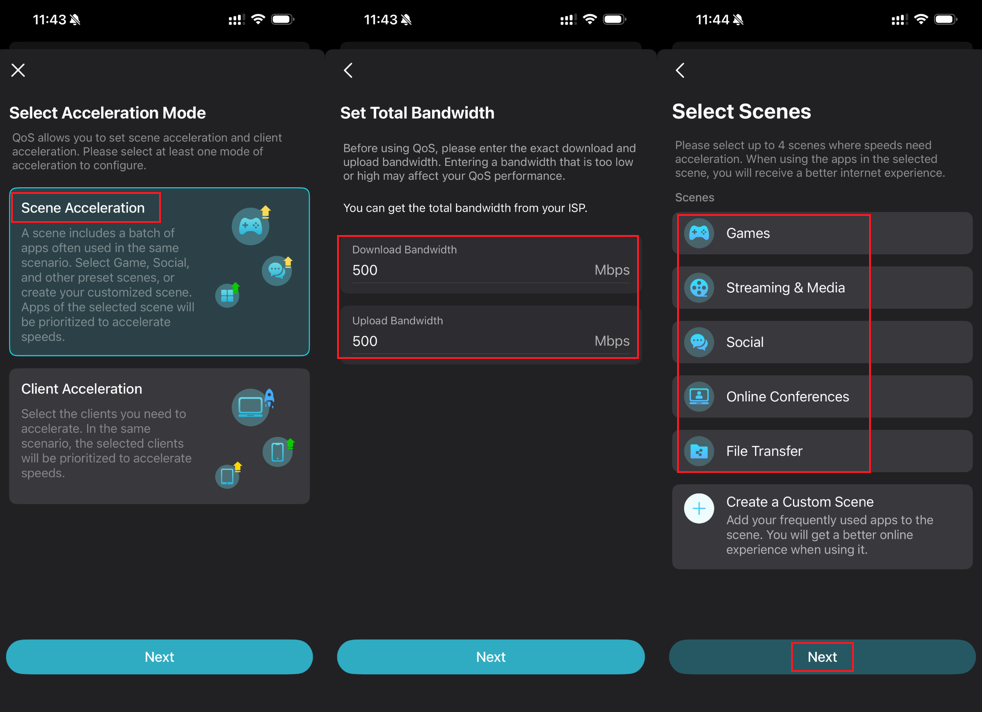
In addition to the built-in activity options, you can create your own priority scene. Simply tap Create a Custom Scene, then manually Select Apps, customize an icon and name for it, and finally click Done to save your personalized scene.
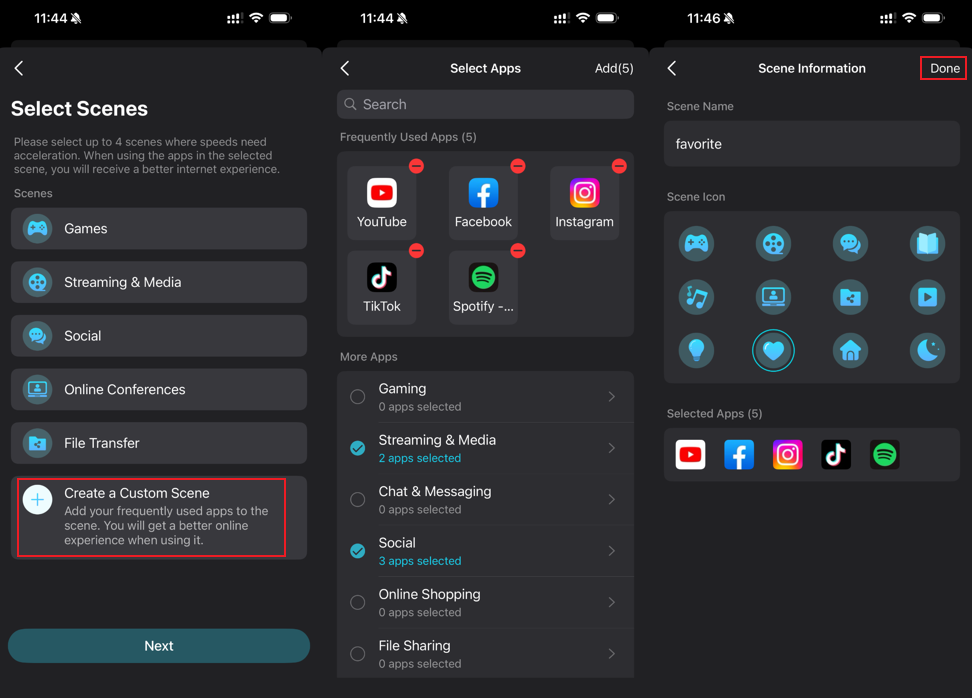
After selecting all the scenes you wish to prioritize, tap Complete to save and apply your settings.
- Client Acceleration:
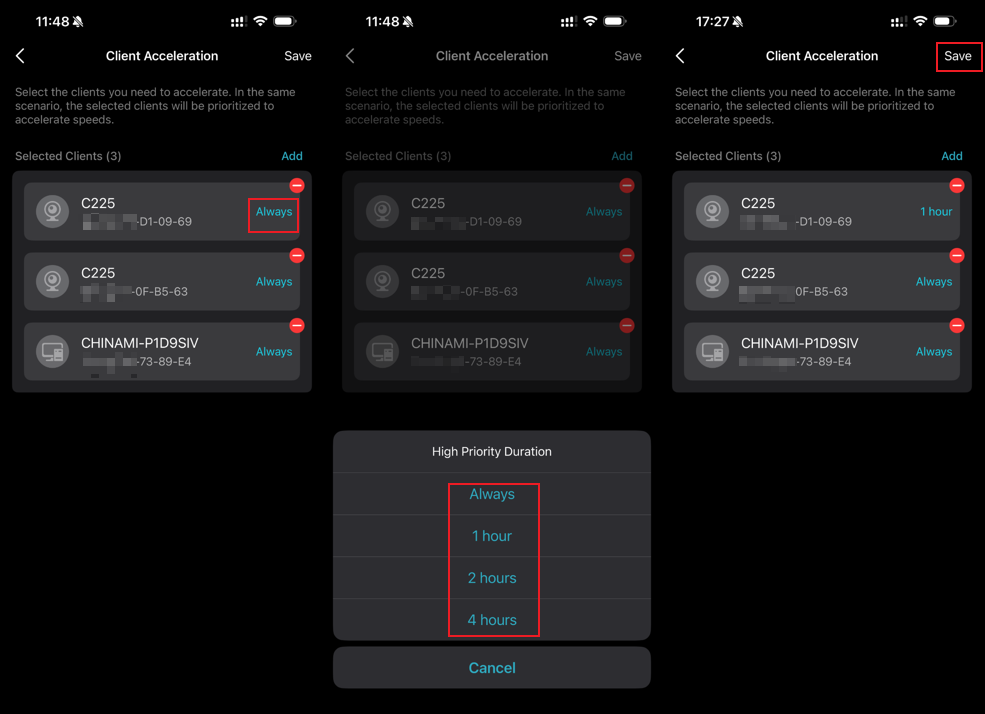
To prioritize specific devices, first select Client Acceleration, then tap Add Clients to choose all the devices you want to prioritize, and finally click Save to apply your settings.
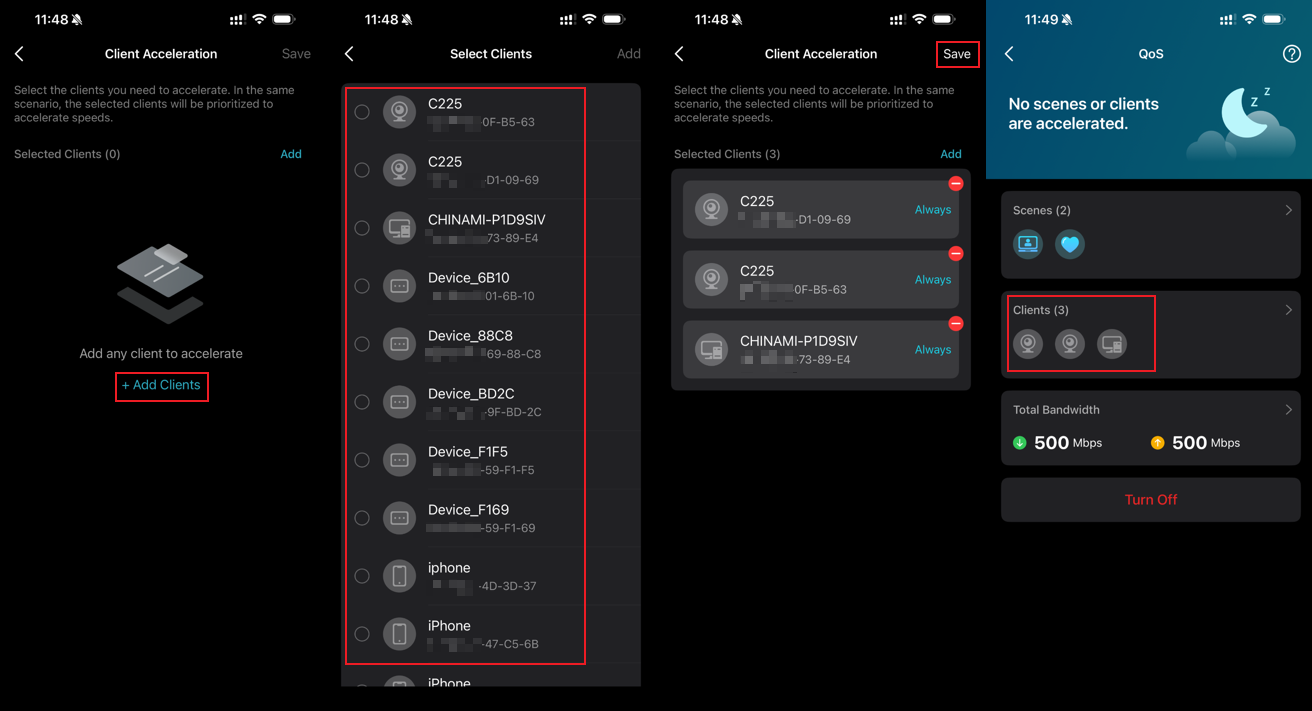
To change how long a specific device stays prioritized, simply tap the Always button next to it, select your preferred duration from the options, and then tap Save to confirm the change.
Scenario 2: For Deco models with HomeCare
Here we take Deco M5 as an example.
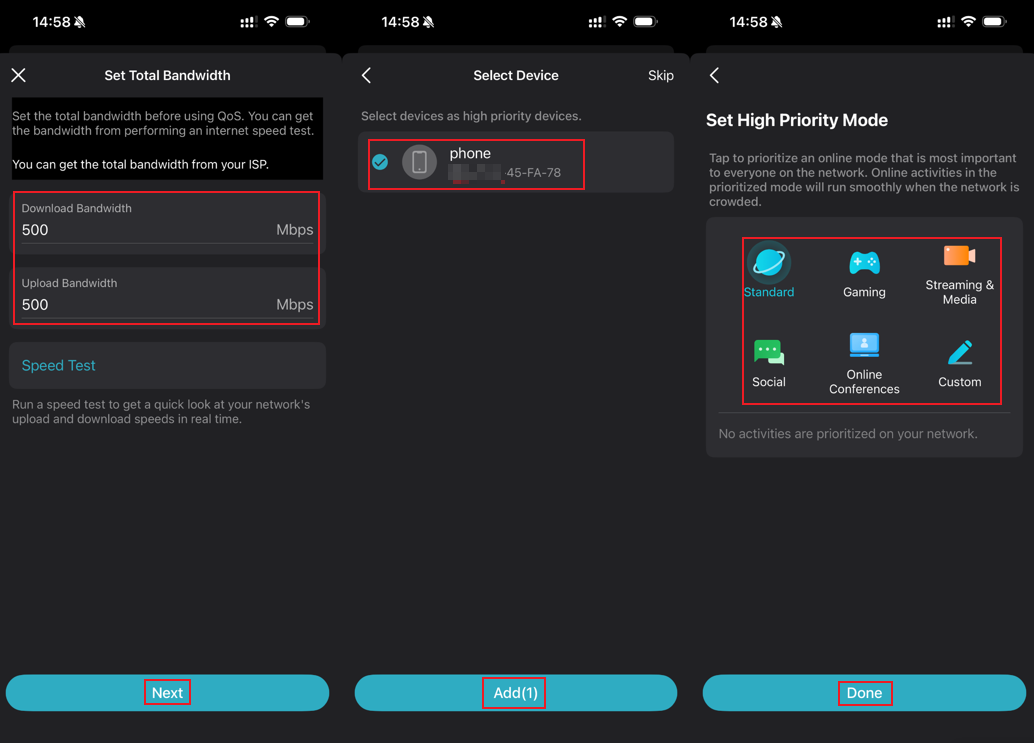
Step 1. Open the Deco app and navigate to More > QoS, then click Enable QoS.
Step 2. After setting the Total Bandwidth, click Next. Then, select the client devices you wish to prioritize and click Add. Finally, choose a High Priority Mode and confirm by clicking Done.
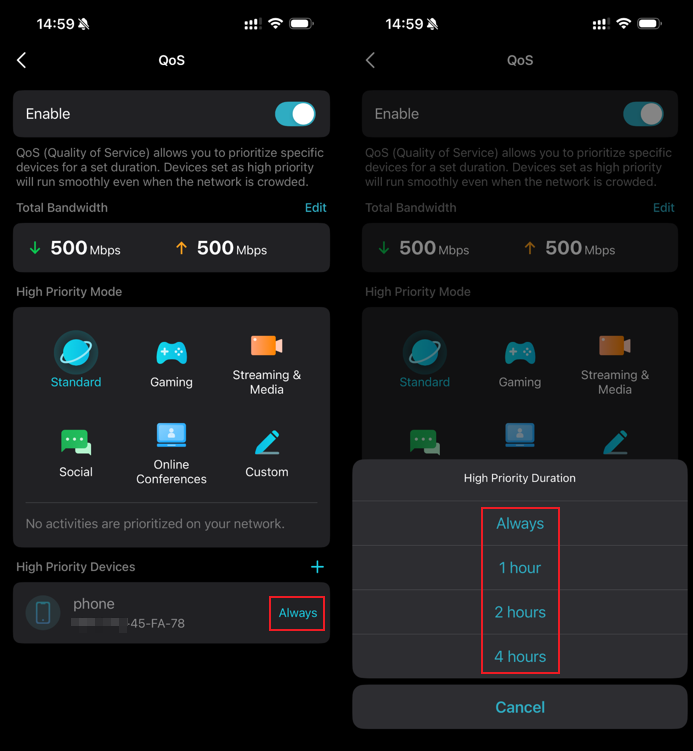
To change the priority duration for a specific device, click the Always button next to it, then select your desired time limit from the menu.
To get to know more details of each function and configuration, please go to the Download Center to download the manual for your product.
Is this faq useful?
Your feedback helps improve this site.


TP-Link Community
Still need help? Search for answers, ask questions, and get help from TP-Link experts and other users around the world.