How to configure Address Reservation on TP-Link 11N wireless router (new logo)
When you specify a reserved IP address for a PC in the LAN, the PC will always receive the same IP address each time when it connects the DHCP server. If there are some PCs in the LAN that require permanent IP addresses, please configure Address Reservation on the router for the purpose.
Step 1
Log into the router’s web management page:
How do I log into the web-based Utility (Management Page) of TP-Link wireless router?
Step 2
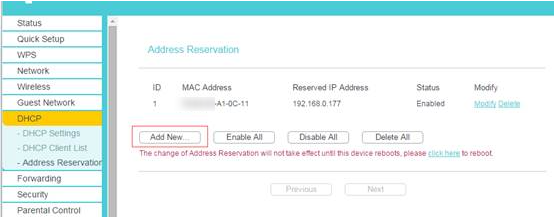
Click DHCP->Address Reservation on the left side and click Add New button.
Step 3
Input the MAC address and IP address; select Status as Enabled.
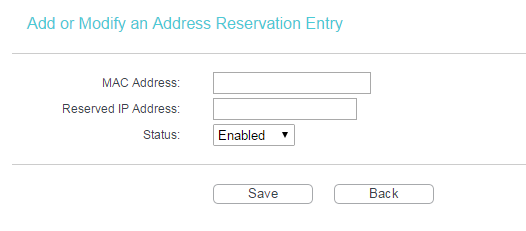
MAC Address: The MAC address of the device where you want to reserve IP address.
Reserved IP Address: The IP address of the device which will be reserved by the router.
Status: The status of this entry is either Enabled or Disabled.
Note:
1. The format of the MAC Address is XX-XX-XX-XX-XX-XX.
2. If you don’t know the MAC address and IP address or your computer, please refer to the following steps to find it.
1) For Windows, select Start -> Programs -> Accessories -> Command Prompt.
For MAC, go to Hard Drive -> Applications -> Utilities -> Terminal.
For Linux, open a Telnet/TERMINAL window.
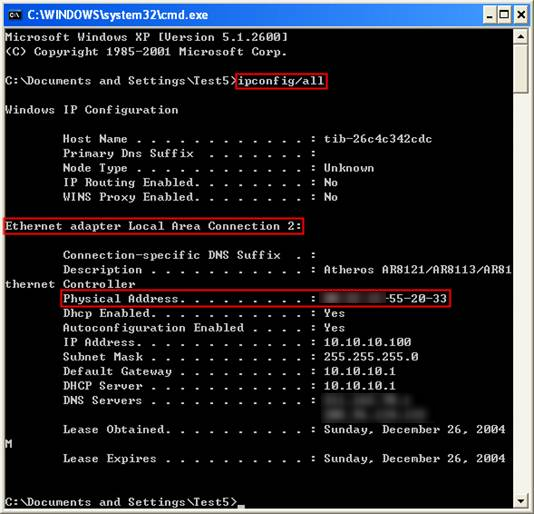
2) Type ipconfig/all at the prompt window, and press Enter. It will show the MAC address (physical address) and IP address of this computer.
Step 4
Click Save button to save the settings.
Then the PC whose MAC address is XX-XX-XX-A1-0C-11 will always receive IP address 192.168.0.177 when it connects to the router.
Get to know more details of each function and configuration please go to Download Center to download the manual of your product.
Полезен ли беше този ЧЗВ?
Вашите отзиви помагат за подобряване на този сайт.
3.0-A_normal_1584497085776k.png)

14.0-A_normal_1584497163963a.png)