Network Video Recorder User Guide

System Management

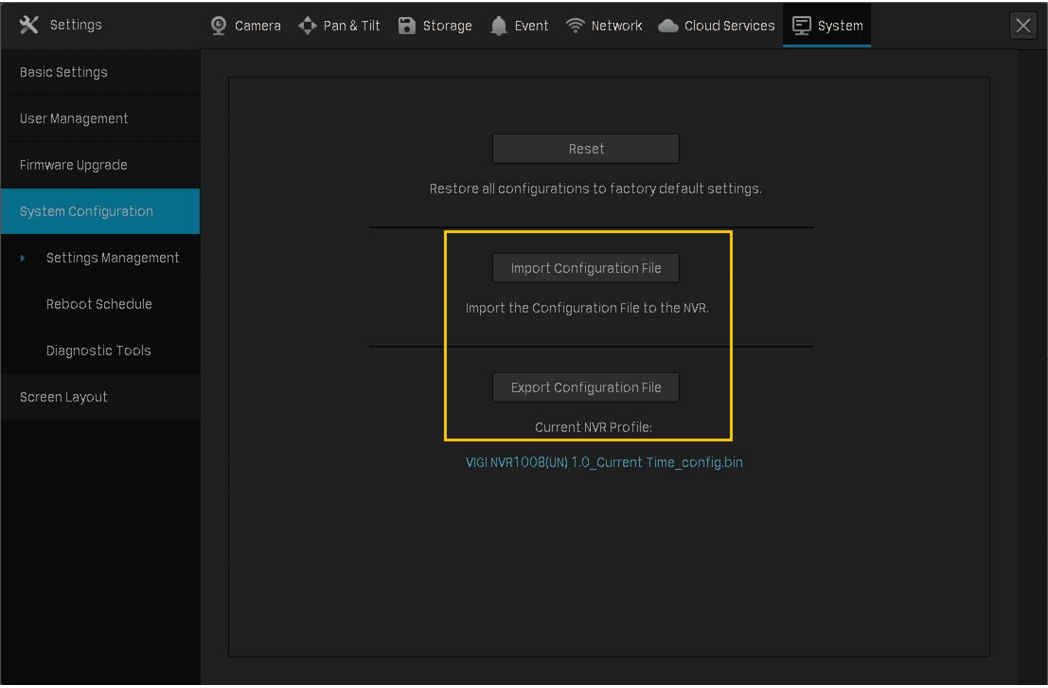
This chapter guides you to configure the basic and advanced settings of your NVR, export and import settings, and view system logs and messages on NVR. VIGI NVR allows users to create and modify administrator accounts based on their needs. This chapter includes the following sections:

? Configure Basic Settings

? Modify System Time

? Configure Interface Output

? Manage User Accounts

? Import and Export Settings

? View System Logs

? View System Messages

9. 1 Configure Basic Settings

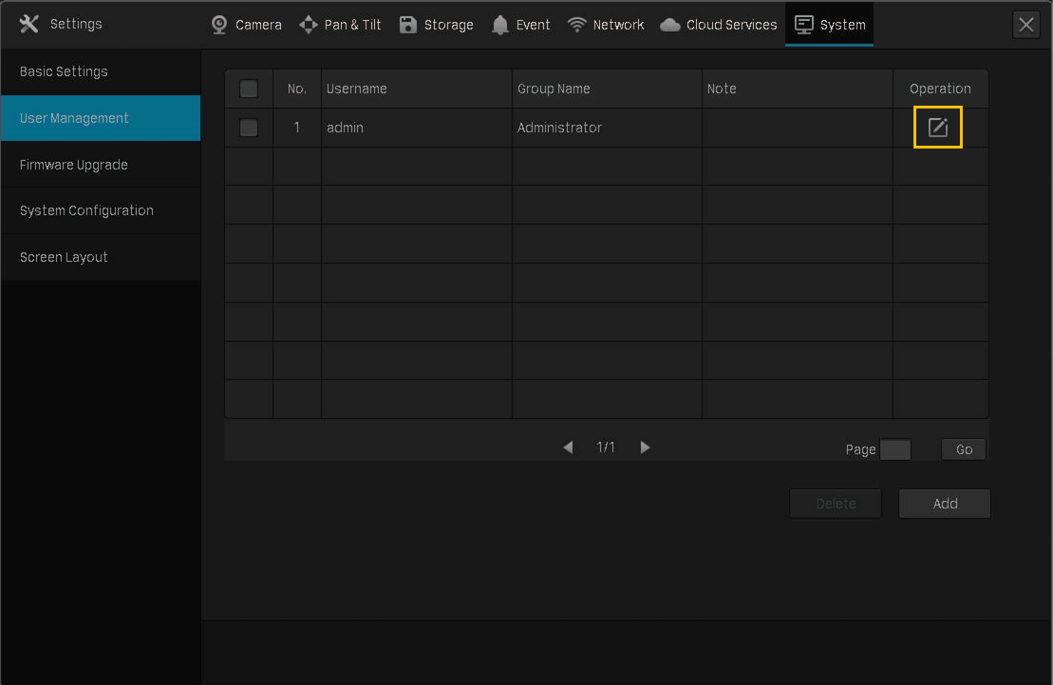
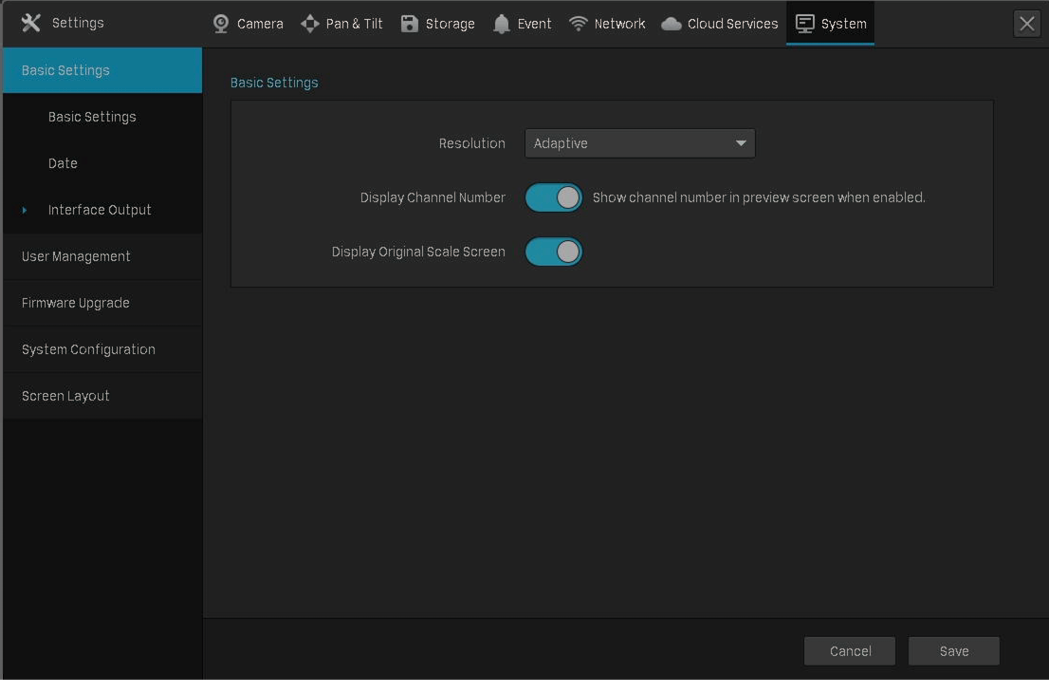
To configure the settings for your NVR, right click on the Live View screen and click Settings in the pop-up main menu, then go to System > Basic Settings > Basic Settings.

Device (NVR) Name

Login Timeout

Switch Interval

in the Main Menu to start switching. The range is from 5s to 120s.

Alarm Full Screen Display Time

Setup Wizard

Mouse Sensitivity

9. 2 Modify System Time

VIGI NVR provides two methods to modify the system time. You can also select the time zone according to your region. To configure these settings, right click on the Live View screen and click Settings in the pop-up main menu, then go to System > Basic Settings > Date.

? NTP

NTP (Network Time Protocol) can automatically get the system time from the Internet. It is recommended to keep the default server address.

? Manually

You can set the system time manually.

9. 3 Configure Interface Output

In Interface Output, you can select the display resolution for your monitor and choose to display the channel number on the Live View screen and the images in the original scale. To configure these settings, right click on the Live View screen and click Settings in the pop-up main menu, then go to System > Basic Settings > Interface Output.

Resolution

Adaptive selected, the NVR automatically selects the highest resolution supported by the screen.

Display Channel Number

Display Original Scale Screen

9. 4 Manage User Accounts

You can modify the default user account (admin) and create user accounts based on your needs. The administrator has the permission to add and delete other user accounts. The Administrator user name is admin and the password is set when you set up your NVR for the first time. To configure these settings, right click on the Live View screen and click Settings in the pop-up main menu, then go to System > User Management.

? Modify Administrator Account

For the administrator account, you have all the permissions to manage the NVR. Administrator user name is admin and the password is set when you set up your NVR for the first time. Click 
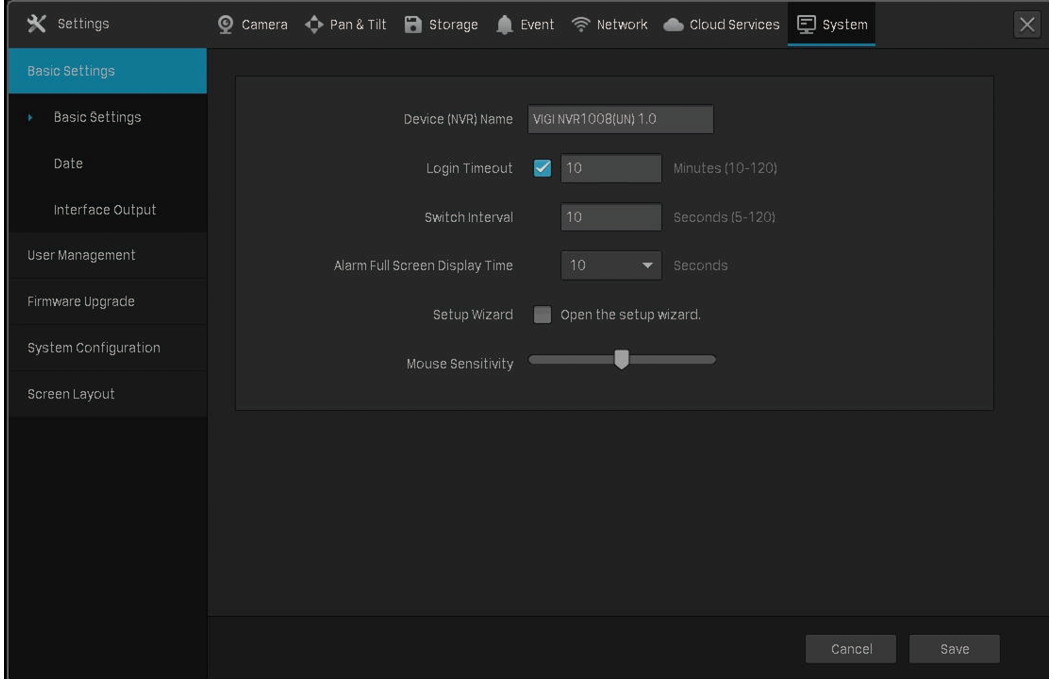
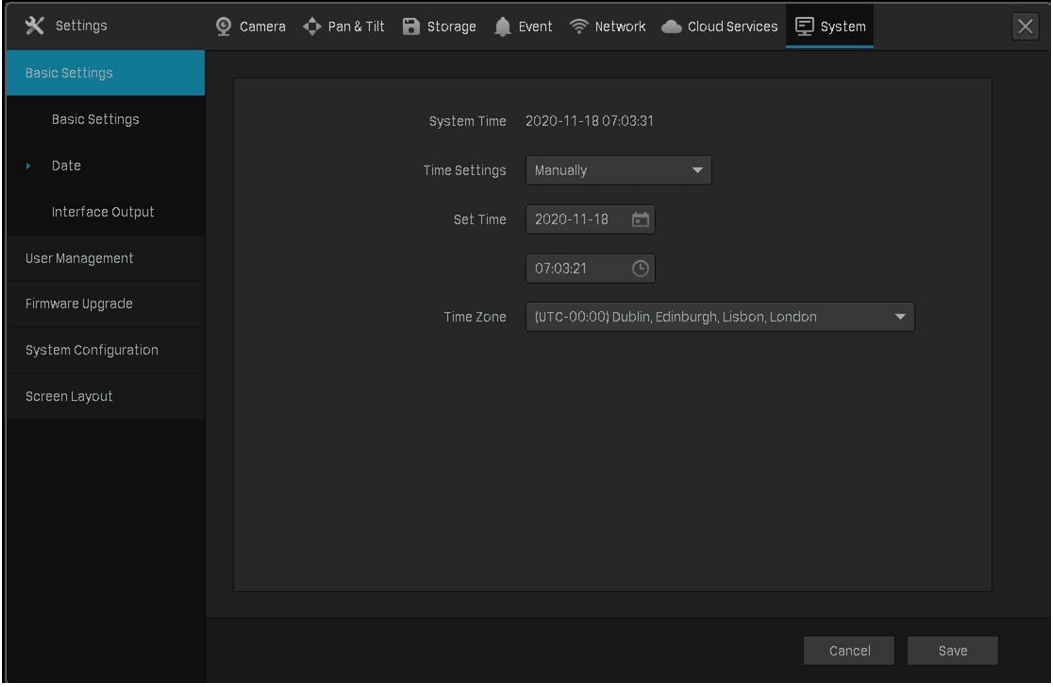
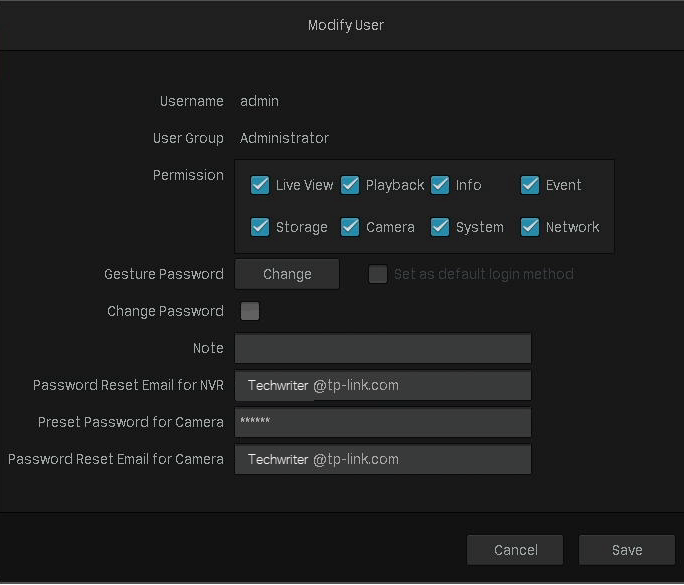
to modify the settings.
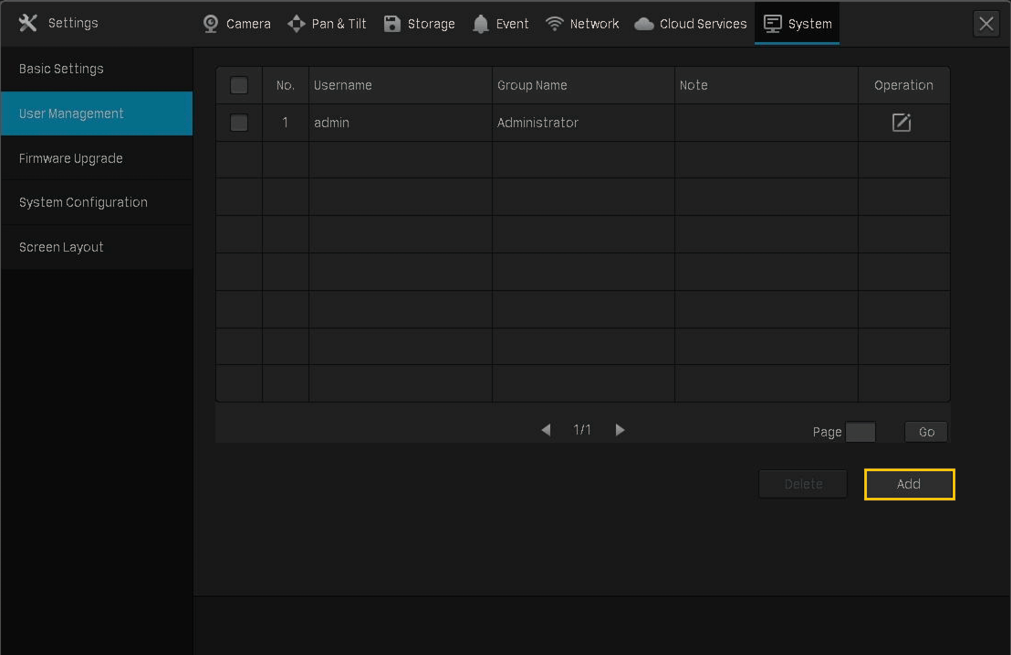
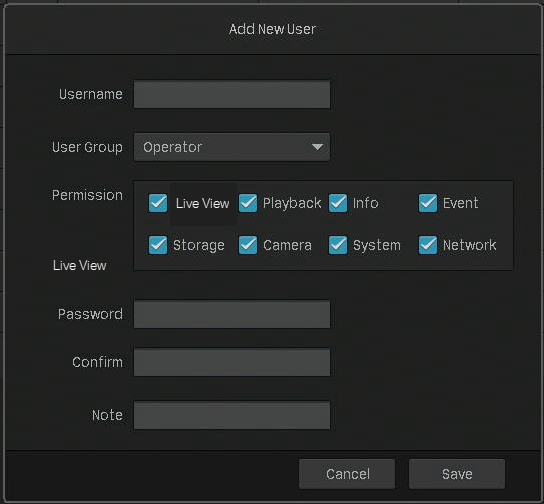
You can change the gesture password, the login password of NVR, the preset password for cameras and the email address for resetting NVR and cameras.

? Add an Account

You can create user accounts with different permissions to manage the NVR. Follow the steps below to add a new user account.

1. Click Add .

2. Enter the username and set the user level to Operator or User . The operator shares the same permissions as the administrator account. The user only watches the live view and playback, add cameras in Live View screen and check the logs of your NVR.

3. Set the password for logging in the account.

4. Click Save .

9. 5 Import and Export Settings

Follow the steps below to import and export the configuration file of your NVR.

Note: Before your operation, prepare an external storage device and plug it into the USB slot on the front panel of your NVR.

1. Right click on the Live View screen and click Settings in the pop-up main menu, then go to System > System Configuration > Settings Management.

2. Click Import Configuration File or Export Configuration File .

3. For configuration file import, select the file and click Import Configuration .

4. For configuration file export, select the file and click Export Configuration .

9. 6 View System Logs

The NVR uses logs to record, classify, and manage the messages of the system and devices. You can search, view, and export the logs.

Note : To export logs, an USB external storage device is required.

Follow the steps below to search and export the logs.

1. Right click on the Live View screen and click Log in the pop-up Main Menu. Go to System Logs > System Logs .

2. Specify the time range and log types and click Search . The filtered logs appear in the table. To view detailed information, click View Details .

Start/End Time

Specify a time range to filter the logs based on the recording time.

Type

Select a main type from the drop-down list to filter the logs. You can also click Select Subtypes to specify subtypes.

All : All types of logs.

Alarm : Alarms triggered by events, such as tampering, line crossing, and area intrusion.

Exception : Abnormal events that may influence NVR’s functions, such as video signal lost and errors of hard drive.

Operation : Operations that take place on the NVR, such as login and upgrade.

Information : Informational messages, such as local drive information and RTSP progress.

3. Click Export Log and select a file path in the pop-up window. Click Export Log .

9. 7 View System Messages

You can view the information about the devices, storage, internet and event in System Messages. Right click on the screen and click Log in the pop-up main menu, then go to System Message.

? Basic Information

You can view the basic information about the NVR, internet and storage.

? Channel Information

You can view the channel number, channel name, network connection status, the IP address of camera and the status of motion detection.

? Stream Information

You can view the recording parameters of a certain camera.

CH No.

Recording Status

Stream Type

Substream: Refer to the standard definition quality for your live view and the smaller size of recording files.

Video Frame Rate

Resolution

Bite Rate

? Hard Drive Information

Disk No.

Disk Capacity

Free Space

Status

Type

Read and write: The data on the hard drive can be read and written.

Read-only: The data on the hard drive can be only be read.

? Internet Information

You can view the internet information of your NVR and the current network resources statistics.

IP

MAC Address

of your NVR.

Connection Status

MTU

Port Mode

For example, 100M Full Duplex means the Ethernet port of the NVR can send and receive one million bits per second in both directions.

IP Channel Access Bandwidth

Bandwidth of Net Receive Idle

? Event Information

You can view the event type, occurred time, and the channel which detects events.