Network Video Recorder User Guide
Network Management
With proper network configurations, you can connect your NVR to the internet, build up mapping between internal and external ports, and manage it remotely via Cloud Services. This chapter contains the following sections:
7. 1 Configure Network Connection
7. 1. 1 Configure Basic Settings.
In Connection, you can view the connection status and configure the NVR to obtain a dynamic or static IP address.
Follow the steps below to configure the basic settings.
1. Right click on the Live View screen and click Settings in the Main Menu. Go to Network > Connection .
2. Select a mode and follow the instructions below.
�? To assign a static IP address to NVR, select Manually as the mode and configure the following parameters.
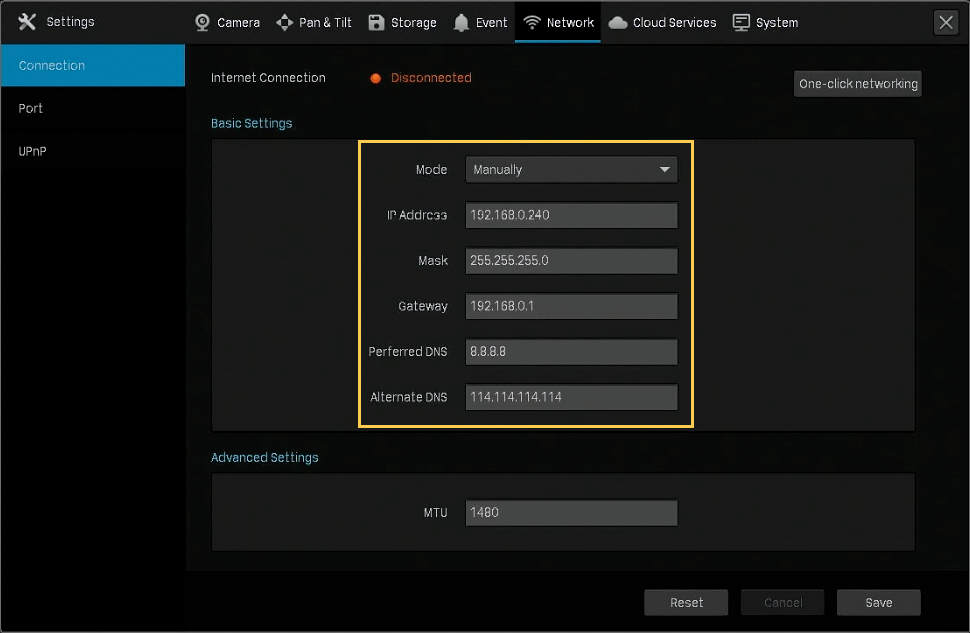
|
IP Address |
Specify an IP address for the NVR. The IP address should be in the same segment as the gateway; otherwise, the NVR cannot connect to the internet. |
|
Subnet Mask |
Enter the subnet mask. |
|
Gateway |
Enter the IP address of the gateway device to which the data packets will be sent. This IP address should be in the same segment as the NVR’s IP address. |
|
Preferred/Alternate DNS |
Enter the IP address of the DNS server. |
�? To configure the NVR to obtain a dynamic IP address, select Auto as the mode.
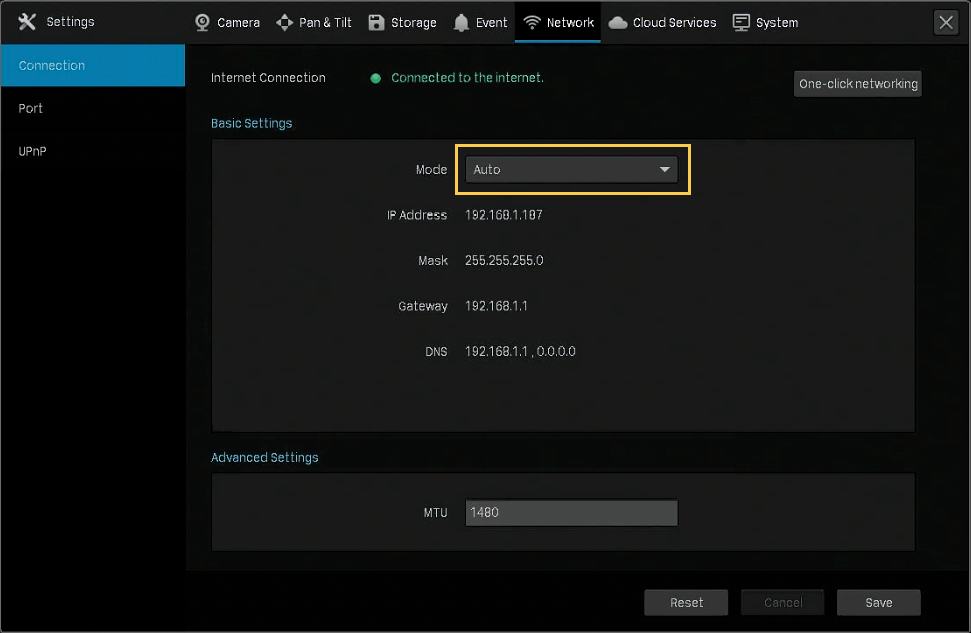
Note :
�? A DHCP server (usually a router) is needed for the NVR to obtain a dynamic IP address.
�? If the topology or subnet is changed, you should assign a new IP address to the NVR to keep the network connection. In Manually mode, configure the basic settings manually, while in Auto mode, click Save . Then follow step 3 below to change the IP addresses of cameras.
3. (Optional) If the network segment of NVR is changed, click One-Click Networking , and then select the channels to change the IP addresses of cameras in batches. Click Confirm .
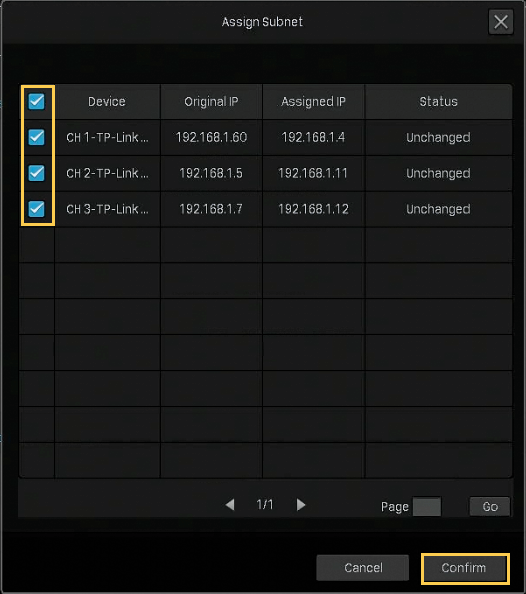
Note : The cameras should be in the same segment with the NVR, so that the NVR can discover and manage them.
4. Click Save .
If you want to reset to factory settings, click Reset .
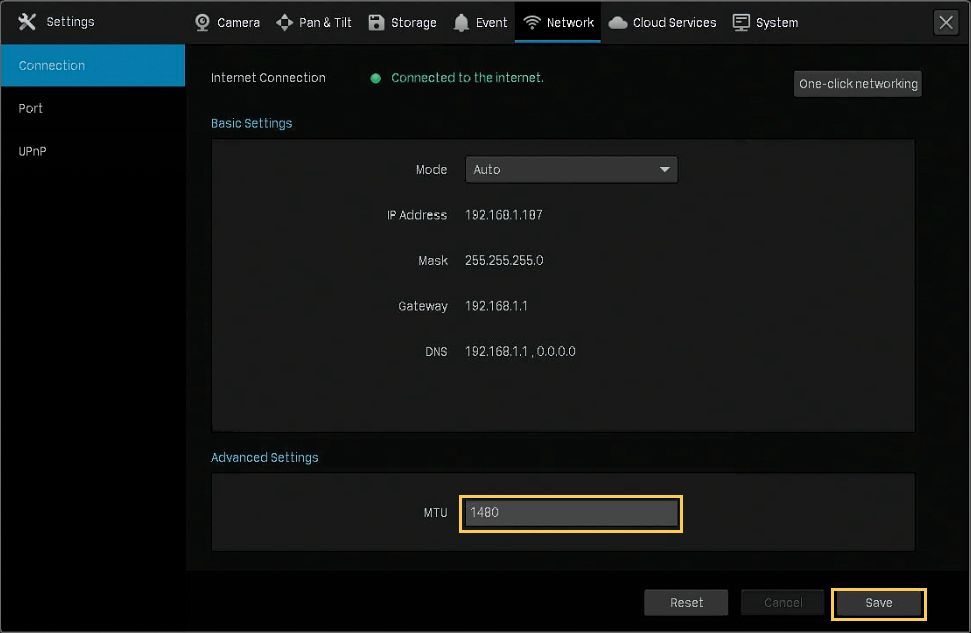
7. 1. 2 Configure Advanced Settings
In Advanced Settings, you can specify MTU (Maximum Transmission Unit) to decide the largest size of data unit that can be transmitted in the network. A larger unit can improve the efficiency with more data in each packets, but it may increase the network delay because it needs more time to transmit. Therefore, if you have no special needs, it is recommended to keep the default value.
To configure MTU, right click on the Live View screen and click Settings in the Main Menu. Go to Network > Connection . Specify MTU and click Save .
In Port, you can configure the HTTP port and service port of NVR that can be used to access the NVR through the network. When managing and monitoring the devices via VIGI Security Manager or the VIGI app, the ports configured here are used for communications of corresponding protocols.
To configure ports, right click on the Live View screen and click Settings in the Main Menu. Go to Network > Port . Specify HTTP port and service port. Click Save .

|
HTTP Port |
Specify a port for HTTP protocol. |
|
Service Port |
Specify a port for protocols of video services. |
UPnP is used to establish the mapping between the internal port and external port.
Note: The NVR and cameras should be connected to the internet, and UPnP should be enabled on the gateway.
Follow the steps below to configure UPnP.
1. Right click on the Live View screen and click Settings in the Main Menu. Go to Network > UPnP .
2.
Enable UPnP and specify a mapping type. If you select
Auto
as the mapping type, the mappings are established automatically. If you select
Manually
as the mapping type, click
 to specify the external port.
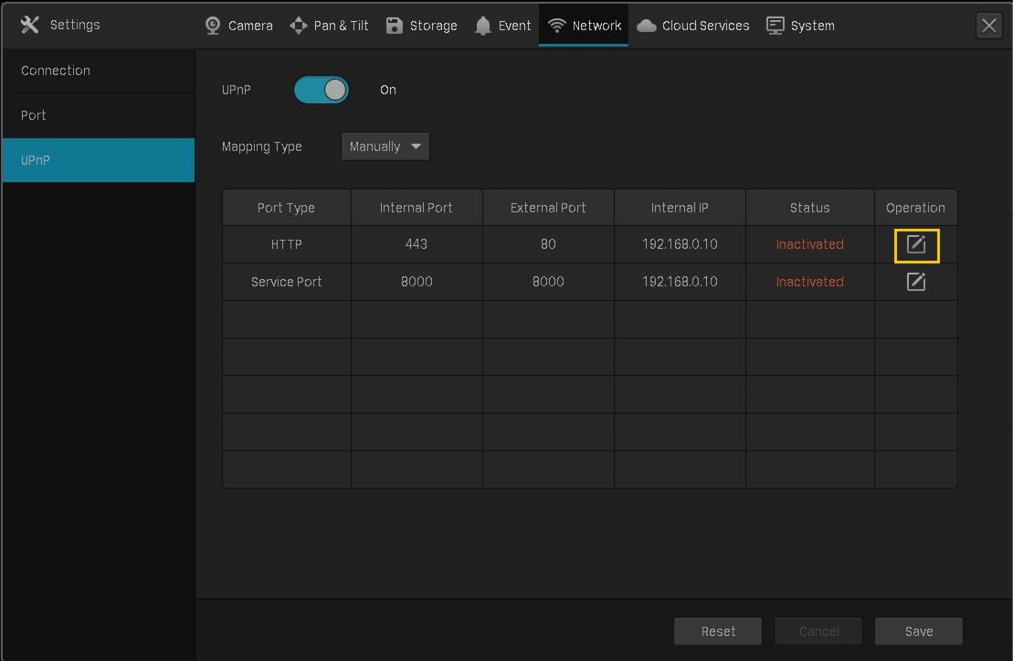
|
Port Type |
Displays the protocol type. |
|
Internal Port |
Displays the port of the NVR to be converted. |
|
External Port |
Displays the external port opened by the gateway. |
|
Internal IP |
Displays the IP address of the NVR that needs to be converted. |
|
Status |
Displays the status of mapping. |
3. Click Save .
If you want to reset to factory settings, click Reset .
7. 4 Enable Remote Management via Cloud Services
The NVR supports remote management with the support of TP-Link Cloud Services. With a TP-Link ID bound, you can remotely monitor your areas on multiple platforms, including computers and mobile phones.
Follow the steps below to bind your TP-Link ID to the NVR and download the VIGI Security Manager or VIGI app.
1. Right click on the Live View screen and click Settings in the Main Menu. Go to Cloud Services > TP-Link ID .
2. Click Bind . Enter your TP-Link ID and password and click Bind . If you do not have a TP-Link ID, click Sign Up to register.
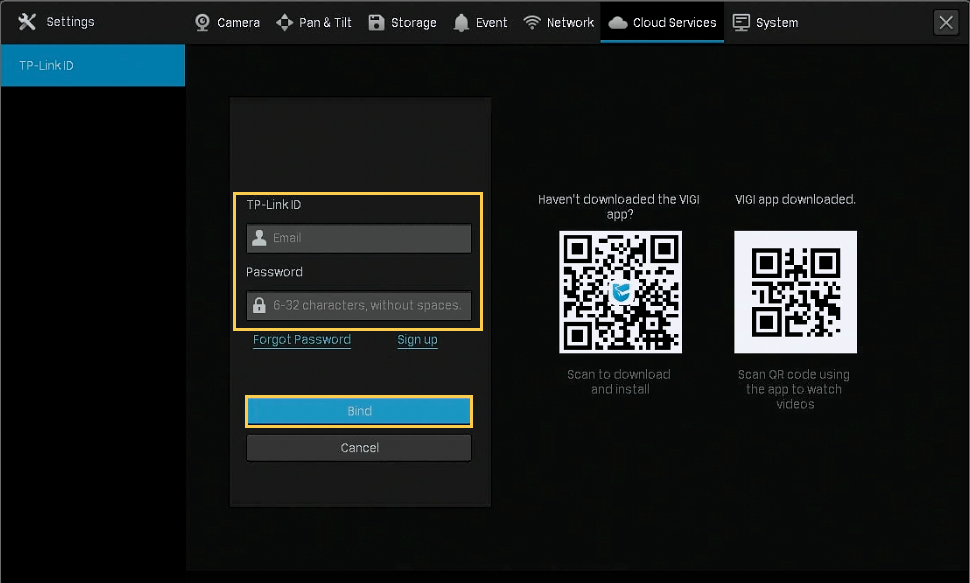
3. After binding your TP-Link ID, download VIGI Security Manager on the computer from Download Center , or download the VIGI app on your mobile phone by scanning the QR code below. Log in with your TP-Link ID. Then you can monitor the live view and manage the NVR remotely on your computer or mobile phone.

If you want to unbind the TP-link ID, click Unbind on the same page. Enter the password of the NVR in the pop-up window and click Unbind .