Network Video Recorder User Guide
Live View
In Live View, you can monitor the channels in real time and respond to abnormal conditions with quick operations, such as viewing instant playback, zooming in the image, and enabling real-time talk. This chapter contains the following sections:
3. 1 Configure the Screen Layout
The NVR displays the videos of each channel via several screens. You can flexibly configure the screen layout in both Live View and Settings.
3. 1. 1 Change the Screen Layout Quickly
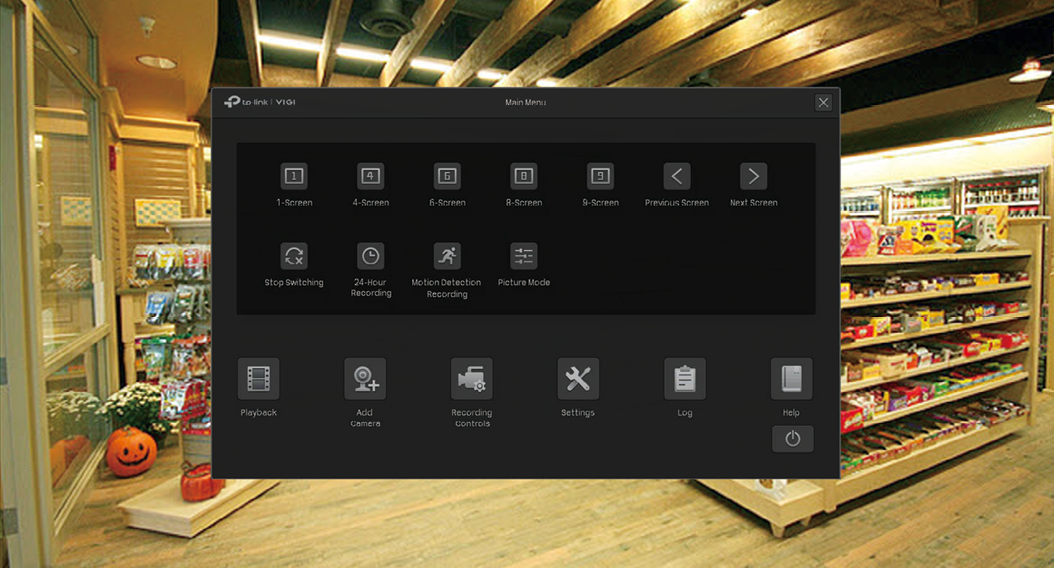
The NVR supports 5 layout modes (1/4/6/8/9-Screen), which display 1, 4, 6, 8, 9 screen(s) in one page separately. To change the screen layout quickly, right click on the Live View screen and click the buttons in Main Menu.
|
|
|
|
|
Switching . For example, 4 channels are displayed in Live View screen and 8 cameras are added to the NVR. When Switching is enabled, the NVR switch screens in Live View regularly to display the live view of 8 channels. To configure Switching Interval, click Settings and go to System > Basic Settings > Basic Settings. |


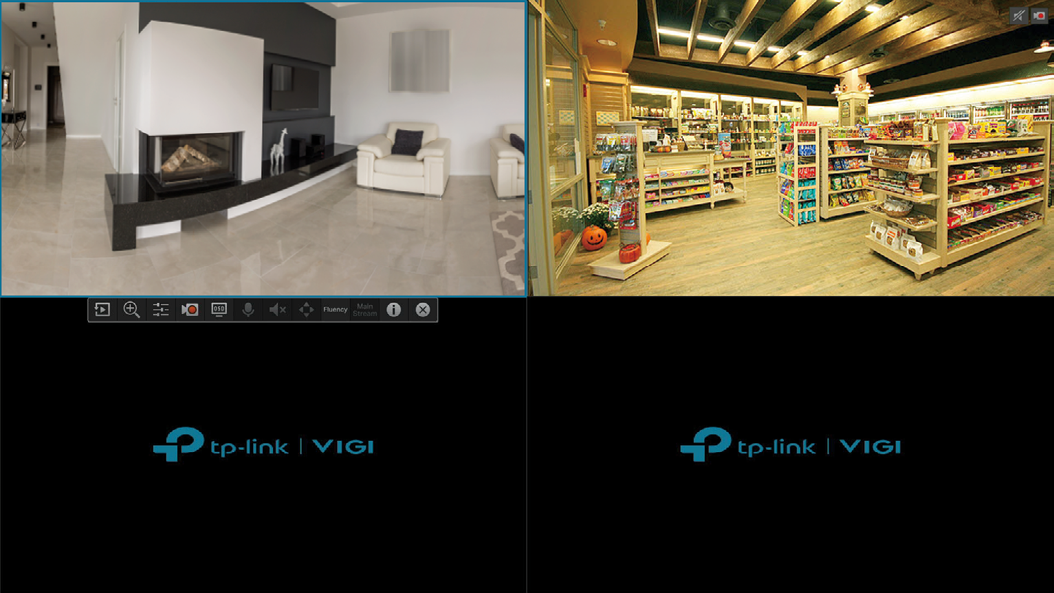
For the layout mode with multiple screens, you can change the location of a channel by clicking and dragging it to another location. To view a channel in the full screen, double click it. Double click it again to go back to multi-screen layout mode.
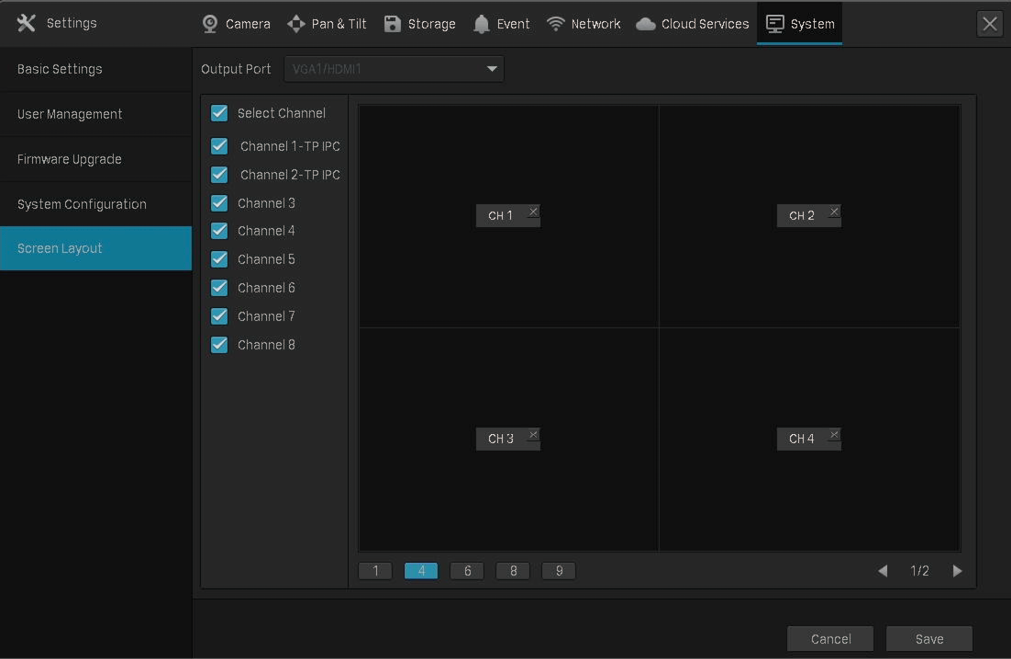
3. 1. 2 Rearrange Channels in Settings
In Settings, you can rearrange the channels in different layout modes more flexibly. Follow the steps below to rearrange the layout.
1. Right click on the Live View screen and click Settings in the Main Menu. Go to System > Screen Layout .
2. Select a layout mode (1/4/6/8/9) below and the current layout displays. Each square indicates a region on the screen. Click a square and click the checkbox of a channel to rearrange the channel in Live View. Click Save .
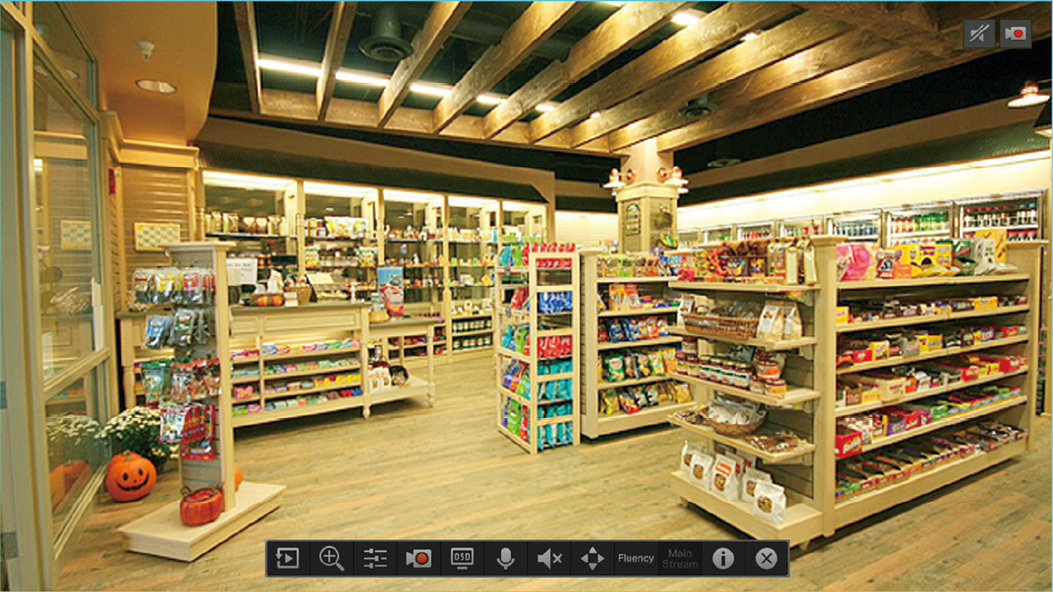
3. 2 Configure Live View Settings via Toolbar
Select a channel in Live View to reveal the toolbar. Click the following icons to configure Live View settings, such as digital zoom, image settings, OSD, stream, and strategy.
|
|
5-min Playback to view instant playback and History to search and view the recordings in Normal Playback, Tag Playback, and Event Playback. For detailed configuration, refer to Playback . |
||||||||||||
|
|
|
|
|
|
|
|
|
|
|
|
|
2. 7. 5 Preview Preset Settings . |
|
|
|
Shortest Delay : Display the latest image with the shortest delay, which may lower the video fluency. Fluency : Display each frame to guarantee the fluency. The video may be delayed. Balanced : Display the video with a balance between timeliness and fluency. |
||||||||||||
|
|
To view and configure stream settings, refer to 2. 6 Configure Stream Settings . |
||||||||||||
|
|
|
|
Feedback
Thank you for your feedback. Sorry, something went wrong! |


