Network Video Recorder User Guide
This function allows you to play the history recordings and edit them, such as adding tags and exporting clips. You can easily search the recordings based on the channel, date, tag, and event. This chapter contains the following sections:
NVR supports the following four playback modes:
�? Instant Playback
Play the video of a single channel recorded in the last five minutes.
�? Normal Playback
Play the recordings of one day, including the continuous and motion detection recordings.
�? Tag Playback
Play the recordings with tags added.
�? Event Playback
Play the recordings with events detected.
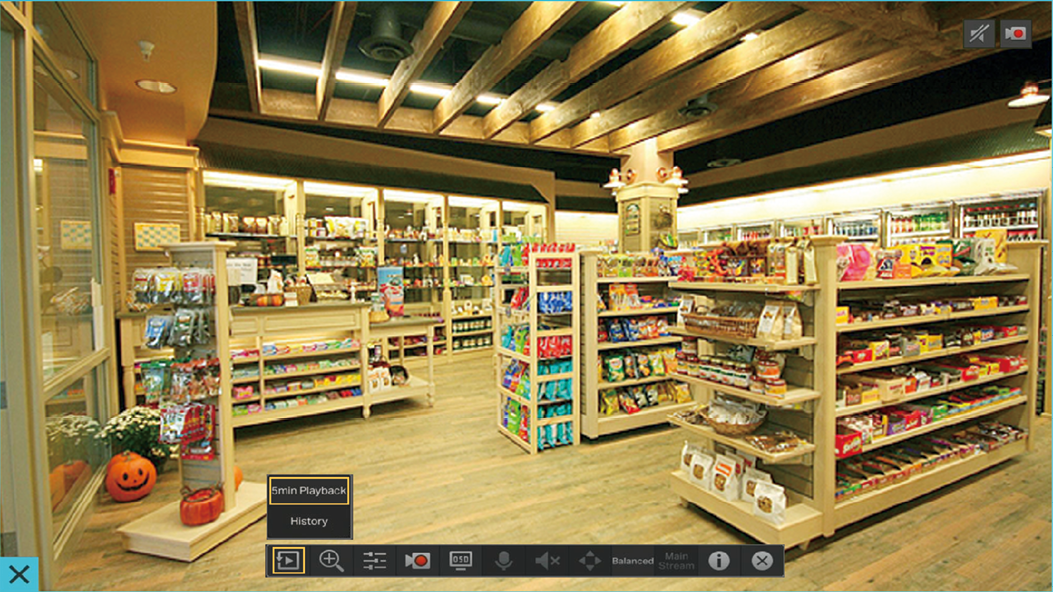
You can replay the video recorded in the last five minutes via Instant Playback. Click a channel on Live View to reveal the toolbar. Click
![]() and then
5 min Playback
to start instant playback.
and then
5 min Playback
to start instant playback.
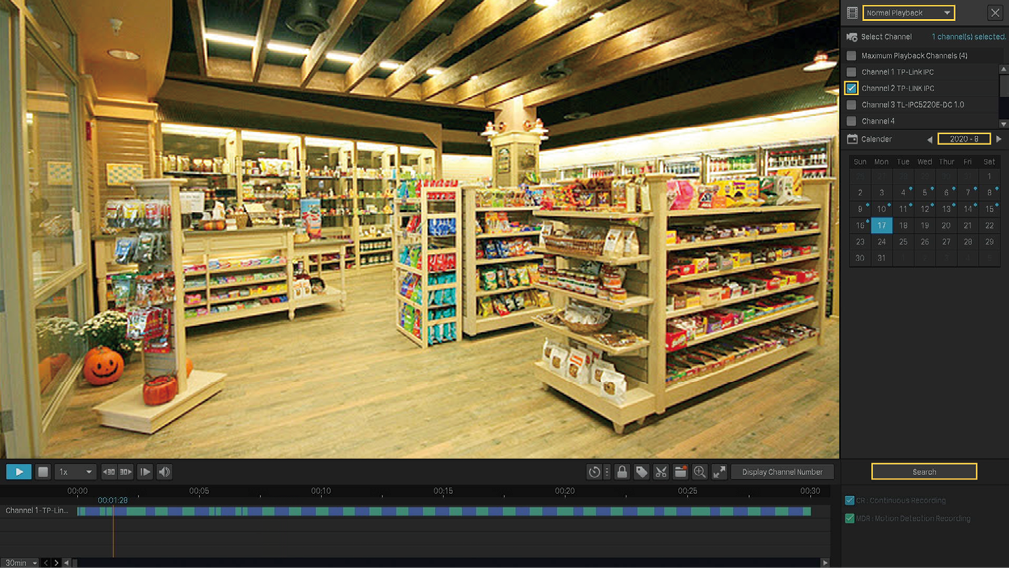
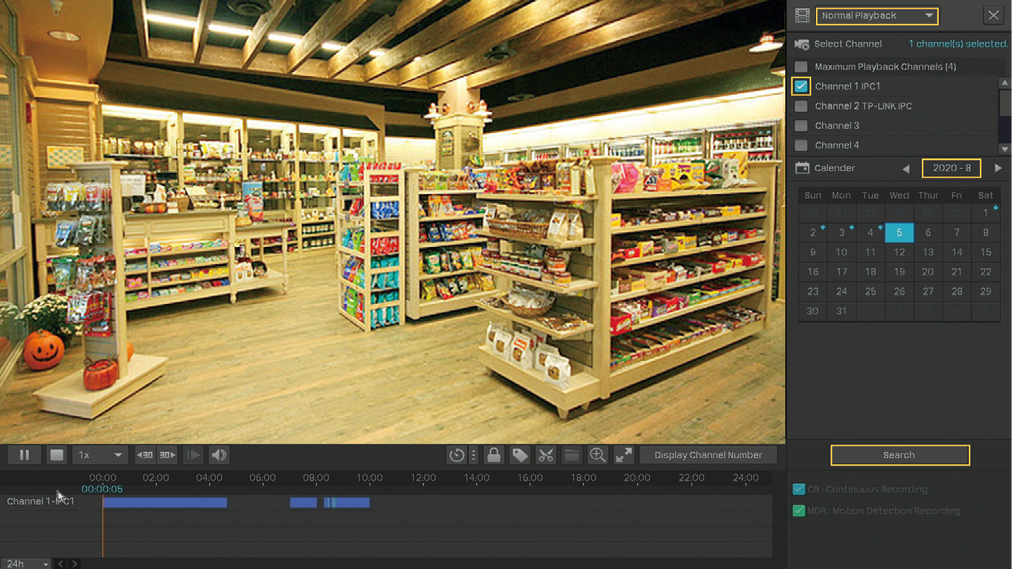
Normal Recordings are video files from the continuous and motion detection recordings. Follow the steps below to play normal recordings.
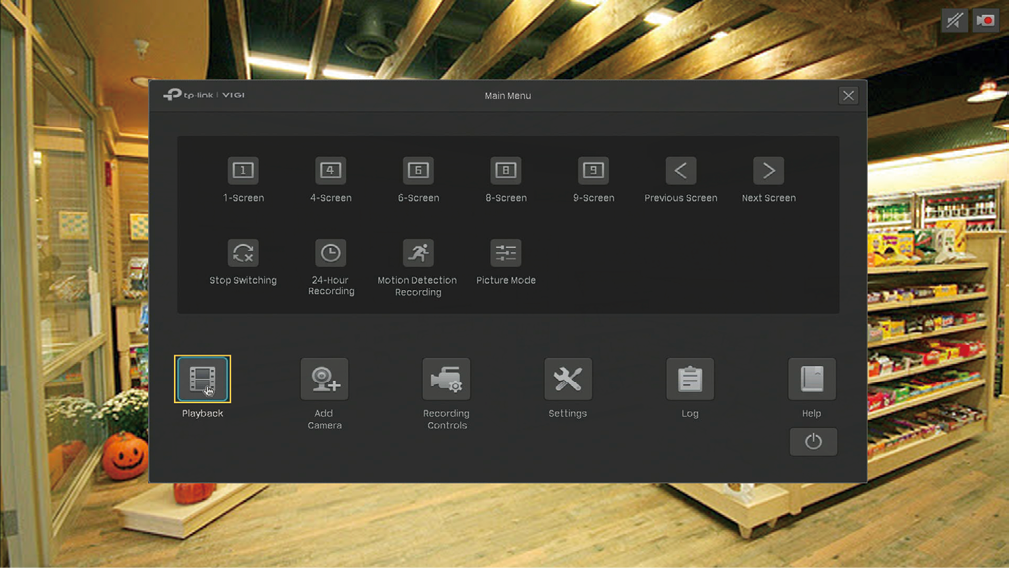
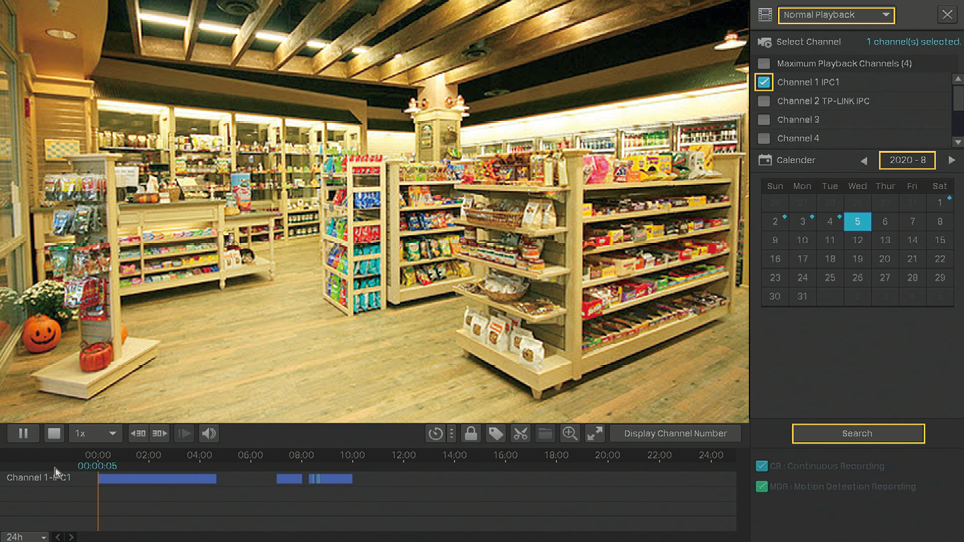
1. Right click on the Live View screen and click Playback in the pop-up Main Menu to open the Playback module.
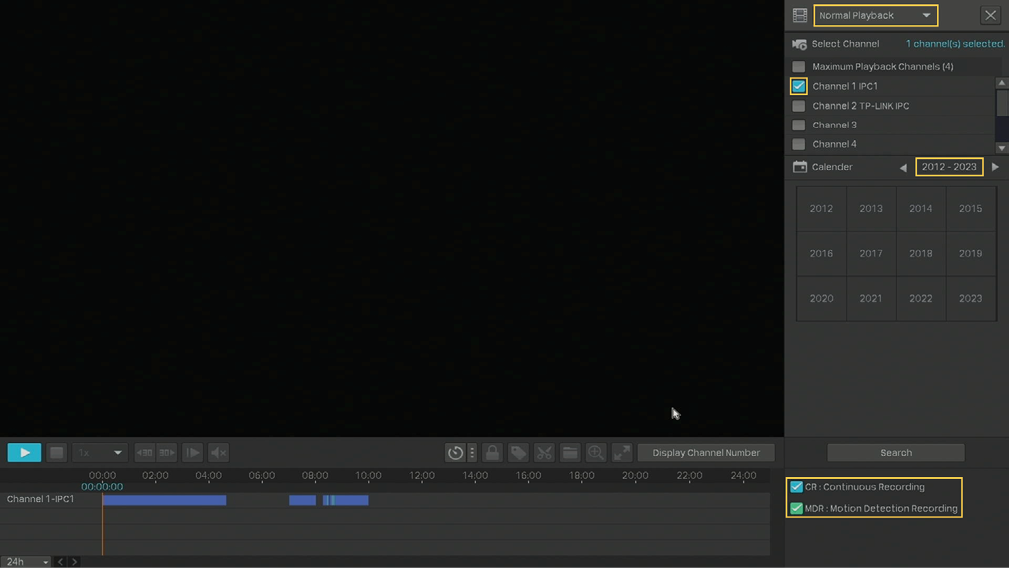
2. On the right panel, select Normal Playback , click the checkboxes to select channels, and select a date in the calendar. You can also click the checkboxes below to filter the recordings. Click Search .
3.
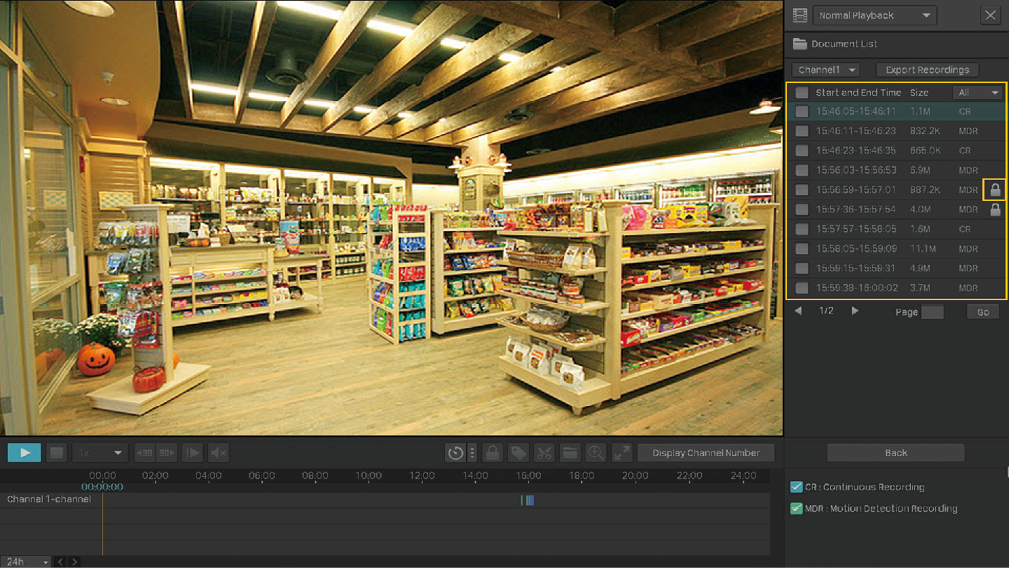
The recording files are listed both on the right panel and the time bar below. Double click a recording in the list or click
 to play the recordings. You can also click the
 to lock the recording. Once locked, the recording cannot not be overridden when Loop Recording is enabled.
For more playback operations, refer to 5. 5 Playback Operations .
Note: When playing multiple channels, some channels may be unavailable due to limited resources. To watch the channels, click Back to deselect a few channels on the right panel and try again.
5. 3 Play Recordings with Tags
Tags can be used to mark and search recordings. Follow the steps below to add tags and play recordings with tags.
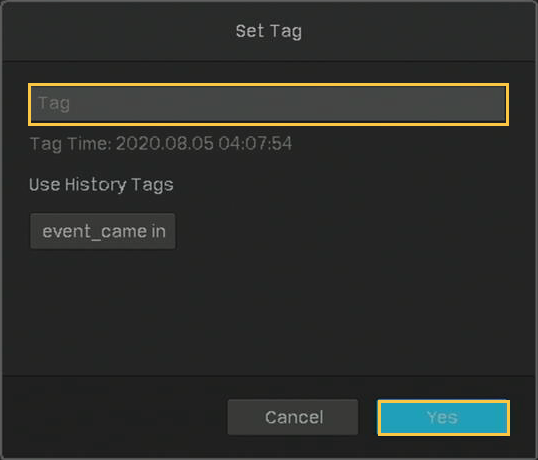
�? Step 1: Add Tags to Recording Files
1 ) Right click on the Live View screen and click Playback in the pop-up Main Menu to open the Playback module. In the Normal Playback mode, specify the channel and date on the right panel. Click Search .
2 )
Select a time point in the recording listed in the time bar and click
 in the toolbar. The following window pops up. Enter the tag manually or select one from history tags. Click
Yes
.
in the toolbar. The following window pops up. Enter the tag manually or select one from history tags. Click
Yes
.
�? Step 2: Search Tags
In the same module, select Tag Playback from the drop-down list on the right panel, click the checkboxes to select channels, and select a time range in the calendar. Click Search .
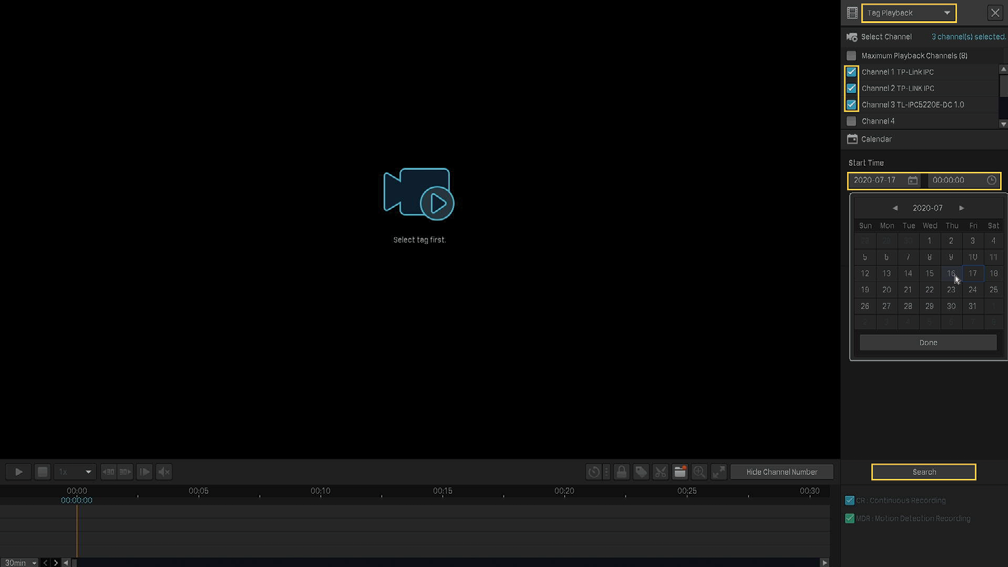
�? Step 3: Play the Recording File with a tag
The recording files with tags are listed on the right panel. Specify the time range before and after the tagged time point, then double click a recording in the list to play it.

You can also click
 in the list and click
Edit
or
Delete
to edit the tag or delete it. For more playback operations, refer to
5. 5 Playback Operations
.
in the list and click
Edit
or
Delete
to edit the tag or delete it. For more playback operations, refer to
5. 5 Playback Operations
.
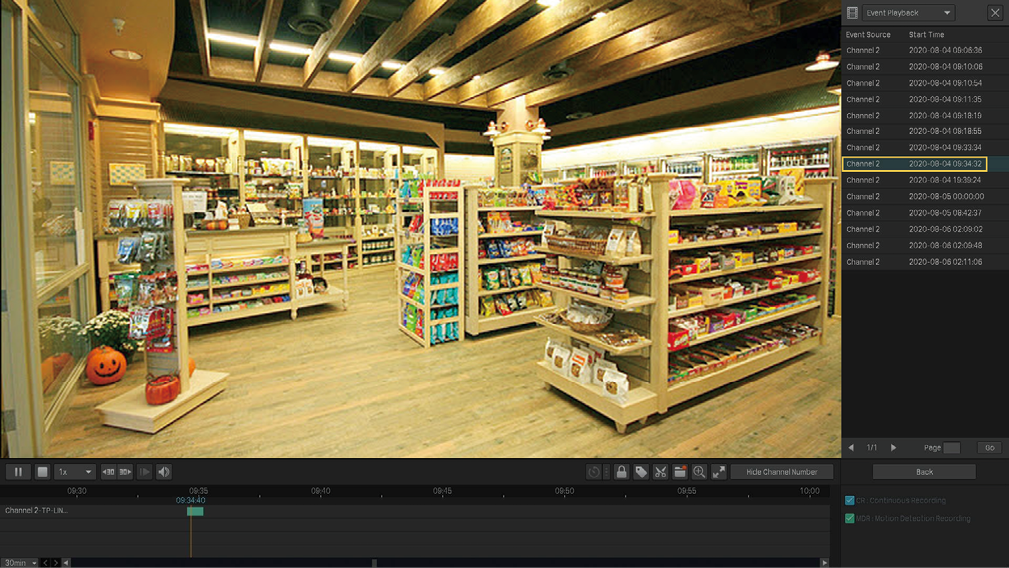
5. 4 Playback Recordings of Events
With Events configured, the NVR and cameras can detect and react to events. In Event Playback, you can search, play, and edit the videos recorded when certain events are detected, including motion, line crossing and area intrusion.
Note : If you have never configured Events on the NVR, there are no recordings of events. To configure Events, refer to Events and Alerts .
Follow the steps below to search and play the recordings of certain events.
1. Right click on the Live View screen and click Playback in the pop-up Main Menu to open the Playback module.
2. On the right panel, select Event Playback and select an event type from the drop-down list. Click the checkboxes to select channels, and select a time range in the calendar. You can also enable Person Appeared to search the recordings that people appeared in. Click Search .
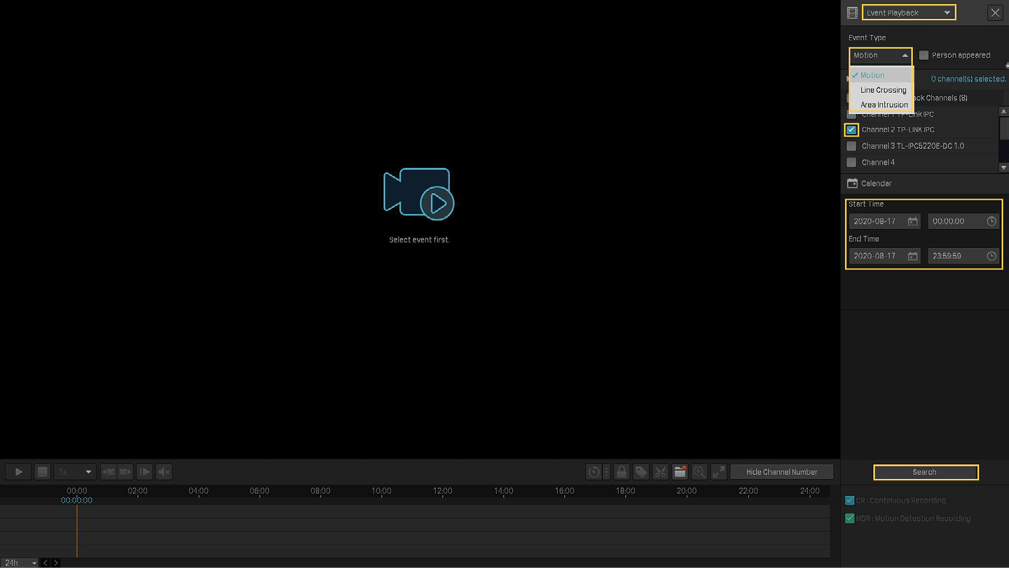
3. The recording files of events are listed on the right panel. Double click a recording in the list to play it.
For more playback operations, refer to 5. 5 Playback Operations .
In the Playback module, you can use the icons and buttons in the toolbar and on the right panel to adjust the display, edit and back up the recordings.
Note: The operations are not available in Instant Playback.
5. 5. 1 Basic Playback Operations
The following icons are supported when playing recordings:
|
|
|
|
|
|
|
|
(Available in Normal Playback and Event Playback) Lock/unlock the recordings. Once locked, the recording cannot not be overridden when Loop Recording is enabled. |
||
|
|
|
|
|
|
|
|
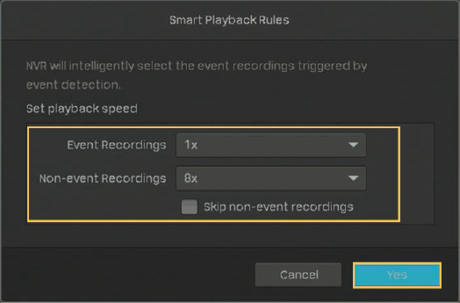
5. 5. 2 Set Smart Playback Rules In Normal Playback , you can configure Smart Playback rules to adjust the playing speed automatically. When Smart Playback configured, the NVR can intelligently classify the recordings into two types, Event Recordings and Non-event Recordings, and adjusts the speed based on the recording types.
Click the
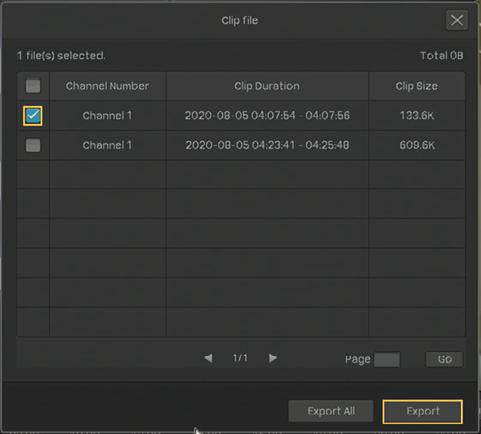
5. 5. 3 Edit Recordings Follow the steps below to clip video files. 1. In Playback, specify the playback mode, channels, and time range, then click Search to search recordings.
2.
Click the recordings in the time bar to select a start time. Click
3.
Click the recordings again and drag the mouse to adjust the length of the clip. Click
After editing, you can click
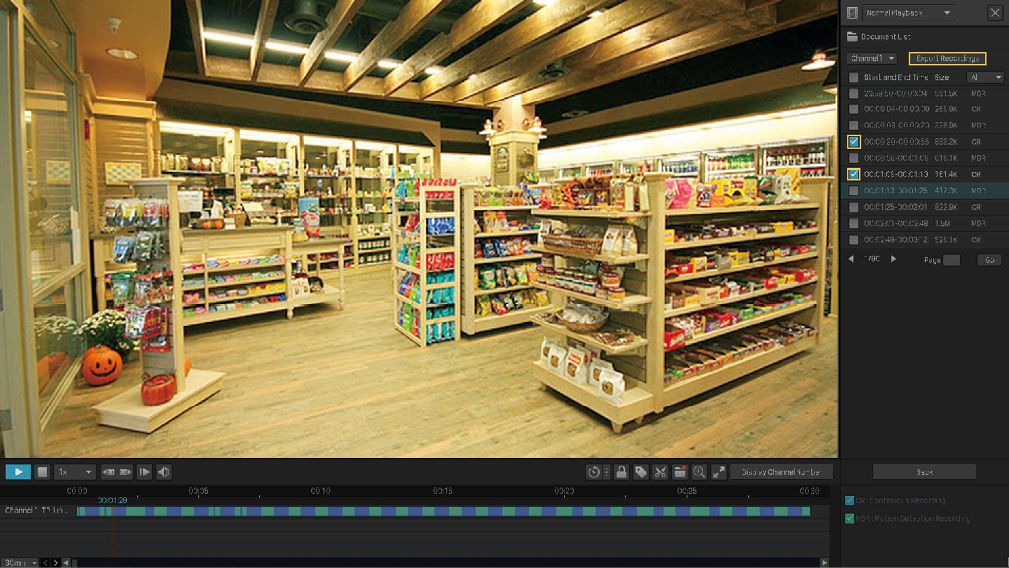
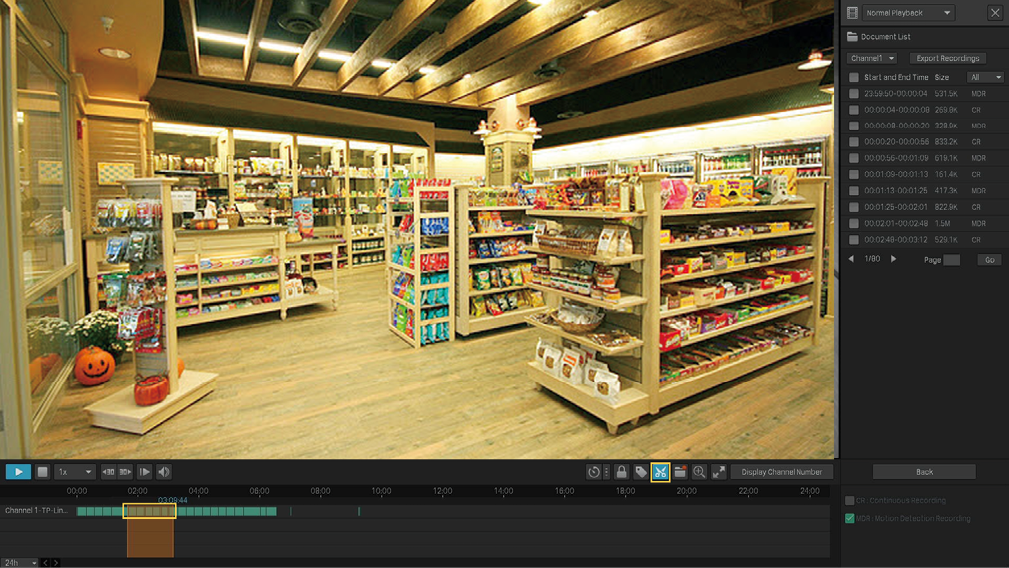
Note : �? To export the clips, an external storage is required. �? For the clips that are not exported, they will not be saved as new recordings when you leave the Playback module. 5. 5. 4 Export Recordings In Playback, you can easily search the desired recordings based on channel, time, recording types, tags, and events, and back up them in batches. Follow the steps below to search and back up recordings. Note : To back up the recordings, an external storage is required. 1. In Playback, specify the playback mode, channels, and time range, then click Search to search recordings.
2. The recording files are listed on the right panel. Click the checkbox to select the recordings to be exported and click Export Recordings .
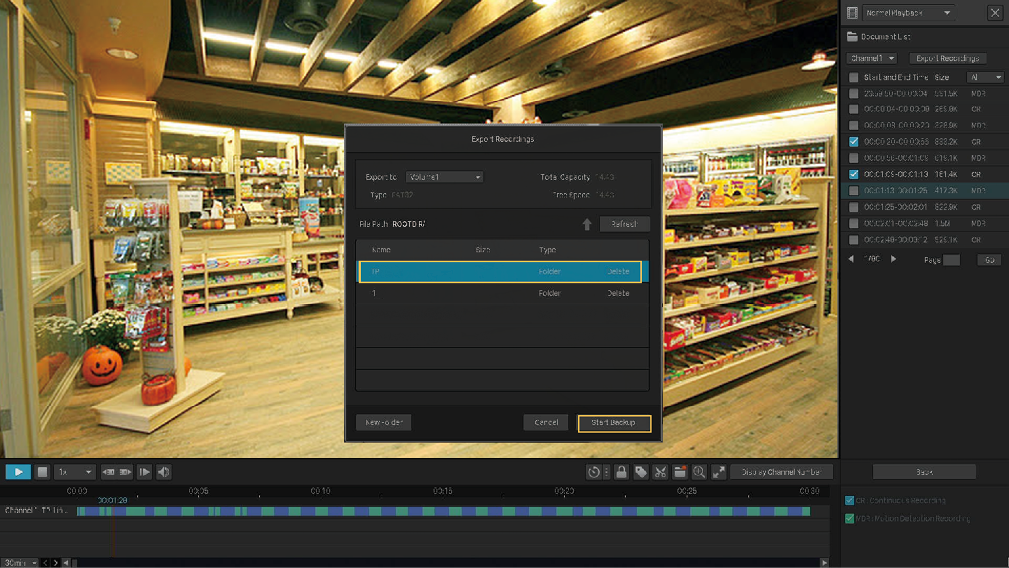
3. The following window pops up. Specify the path to export the recordings. Click Start Backup and wait until backup is completed.
Feedback
Thank you for your feedback. Sorry, something went wrong! |


 at the toolbar to set the beginning of the clip.

 to set the end of the clip.
 to view all clips. To export the clip to an external storage, select the clips and click