Network Video Recorder User Guide

8. 1 Upgrade the NVR Firmware

The NVR supports Online Upgrade and Local Upgrade. Follow the steps below to upgrade the firmware.

1. Get ready to upgrade the firmware.

? (For Online Upgrade) Connect the NVR to the internet first.

? (For Local Upgrade) Download the NVR firmware from TP-Link Download Center , place the firmware in an external storage device and plug the external storage device into the NVR.

2. Right click on the Live View screen and click Settings in the Main Menu. Go to System > Firmware Upgrade .

3. Click the buttons to upgrade the NVR online or locally.
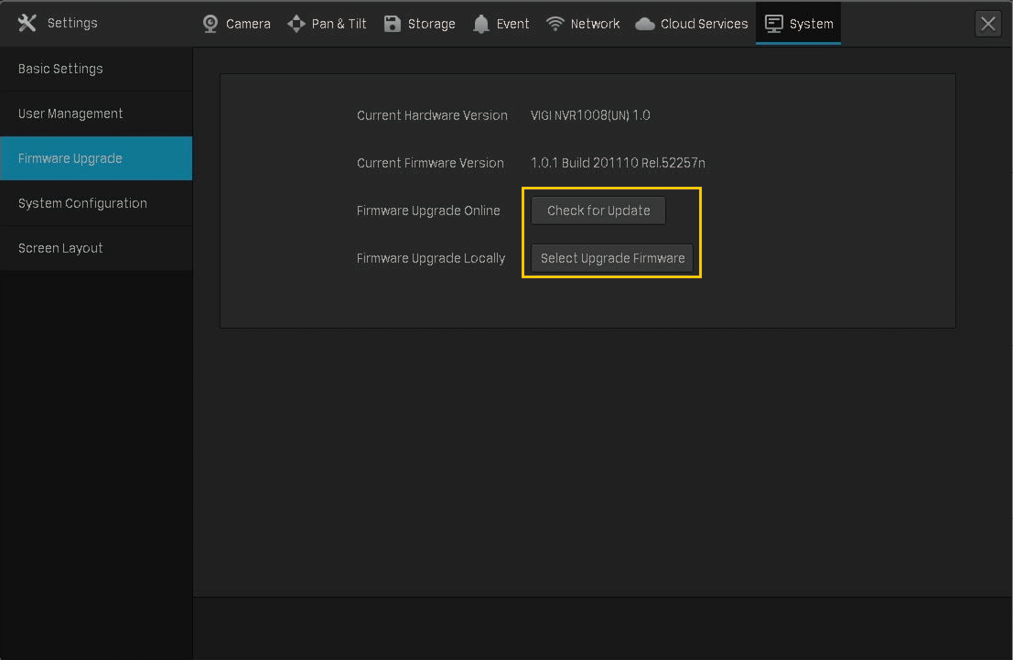
? (For Online Upgrade) Click Check for Upgrade and the NVR will detect new firmware online and upgrade automatically.

? (For Local Upgrade) Click Select Upgrade Firmware to select the firmware from the external storage device and click Upgrade .

Note : When upgrading, please do not turn off the power of NVR.

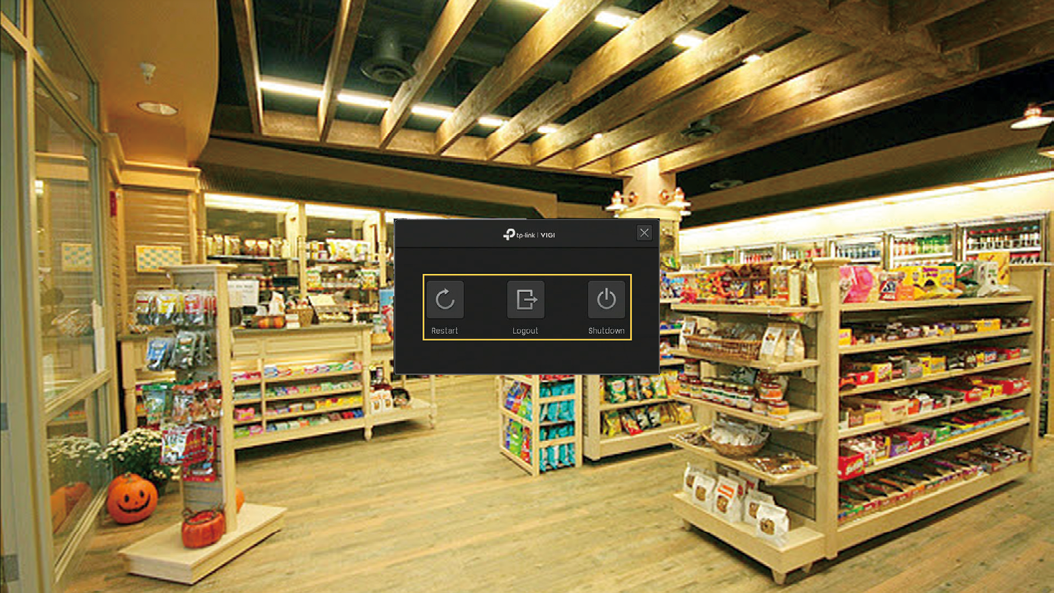
8. 2 Restart/Log Out/Shut Down the NVR

To restart/log out/shut down the NVR, right click on the Live View screen and click . Then, click the corresponding buttons.

8. 3 Reset the NVR

To reset the NVR to the factory settings, right click on the Live View screen and click Settings in the Main Menu. Go to System > System Configuration > Settings Management . Then, click Reset .

Note: Please wait without any operations until the NVR is reset successfully. It may take a few minutes.

8. 4 Configure Reboot Schedule for NVR

When Reboot Schedule is enabled, the NVR reboots automatically and regularly at the specified time.

Follow the steps below to configure Reboot Schedule for NVR.

1. Right click on the Live View screen and click Settings in the pop-up Main Menu. Go to System > System Configuration > Reboot Schedule .

2. Enable Reboot Schedule , and specify the reboot time. Click Save .

8. 5 Diagnose the NVR

The NVR supports two diagnostic tools, Rapid Diagnosis and Custom Diagnosis. You can diagnose the NVR to test the network connection and delay.

Follow the steps below to diagnose the NVR.

1. Right click on the Live View screen and click Settings in the Main Menu. Go to System > System Configuration > Diagnostic Tools .

2. Use a diagnostic tools and view the results.

? To quickly diagnose the network connection, click Rapid Diagnosis .

Gateway/Extranet/Cloud Service Connection

Displays the connection status between the NVR and gateway/extranet/TP-Link Cloud.

Delay

Displays the delay in milliseconds of each channel. Not Connected means that the NVR cannot communicate with the camera.

Packet Loss Rate

Display the ratio of lost packets.

? For Custom Diagnosis, select an operation and specify the parameters. Click Start Diagnosis .

Operation

Select an operation.

Ping: The NVR sends several packets to the specified IP address or domain to test the connection between them.

Tracert: The NVR tries to trace the route to the specified IP address or domain within limited hops and record the route.

IP/Domain Name

Specify an IP address or a domain name to diagnose the connection.

Packet Number

(For Ping diagnose) Specify how many packets the NVR sends to the specified IP/domain name.

Packet Size

(For Ping diagnose) Specify the size of packets.

Timeout

(For Ping diagnose) Specify the maximum time that the NVR waits for response of a ping packet. If no response is received after the time, the ping packet will be regarded as lost.

Hop Count

(For Tracert diagnose) Specify the maximum hops when tracing the route.

Diagnostic Results

If you select Ping as the operation, the results show the statistics of ping packets.

If you select Tracert as the operation, the results show the route that the NVR traces to the specified IP address or domain name.