How to configure TP-Link Powerline utility to secure my power line network
Both TL-PA2010 and TL-PA4010 support encryption, and you can add all your powerline adapters to a private network to protect your powerline network against unauthorized access. To secure your data and get better network performance, please follow the procedures described below to configure powerline adapters by using utility.
We take TL-PA2010 for example in this article.
Step 1 Install the powerline adapter hardware, then connect your PC to one of the powerline adapters and run the CD came with Powerline adapter, select your model and click the Management Utility. If you don’t have the CD, or CD rom, please download the utility from the download center.
Step 2 The Utility will detect and list the other powerline adapters in the same power line network in a few seconds. Click and select the Powerline Ethernet Adapter you wish to change from the list, then click on the Modify tab.
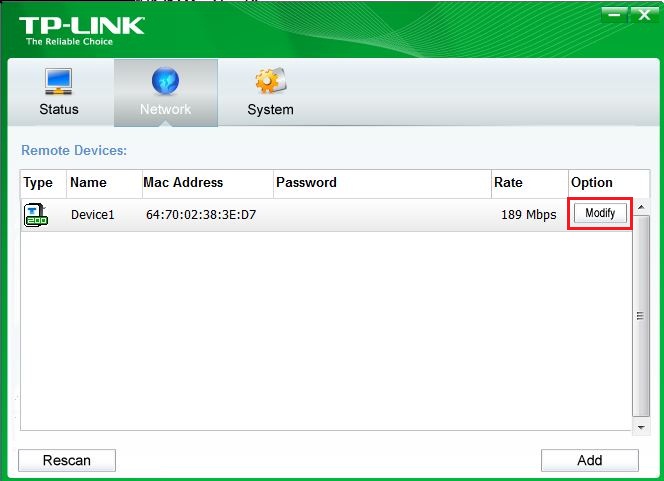
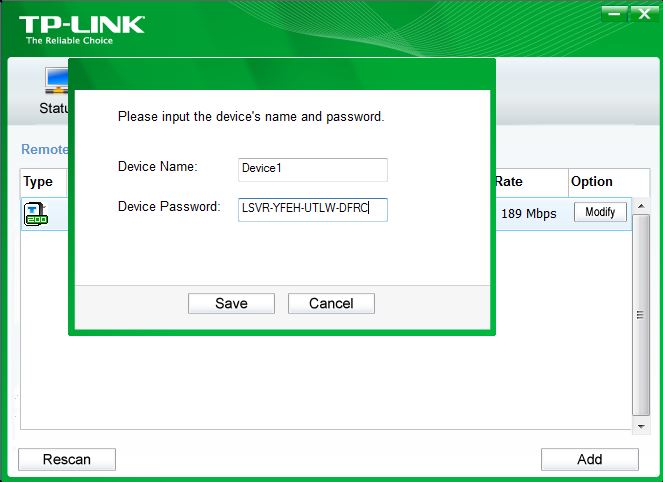
Step 3 Enter the device’s password and click Save. (The password can be found on the bottom of the device or packaging).
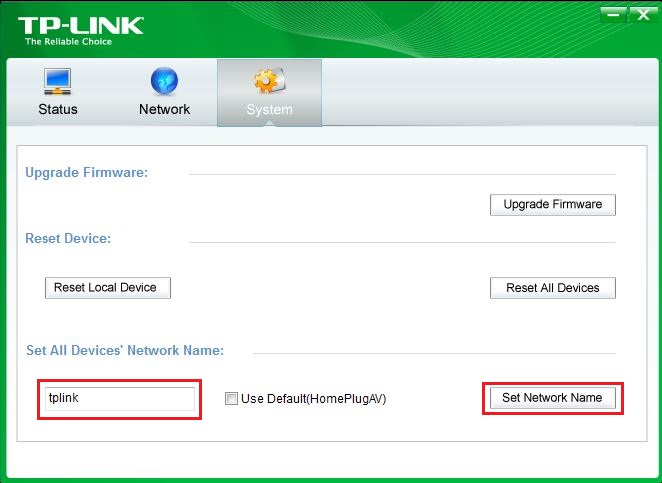
Step 4 Click System tab, set a new Network Name to create your own private network, and then click Set Network Name to add the device with password entered to this network.
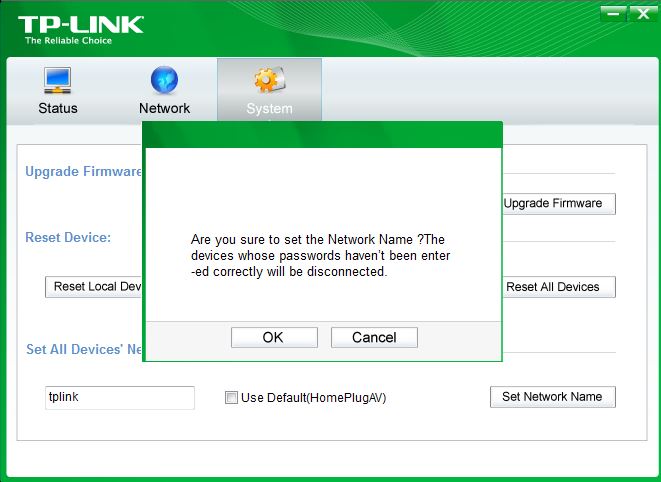
Step 5 Click OK on the tip window to continue the configuration.
Step 6 Once the device is added to the private network successfully, the utility will pop up a Information window as below. At this time, your power line network is secured and the other powerline adapters with different Private Network Name won’t detect your devices any more.
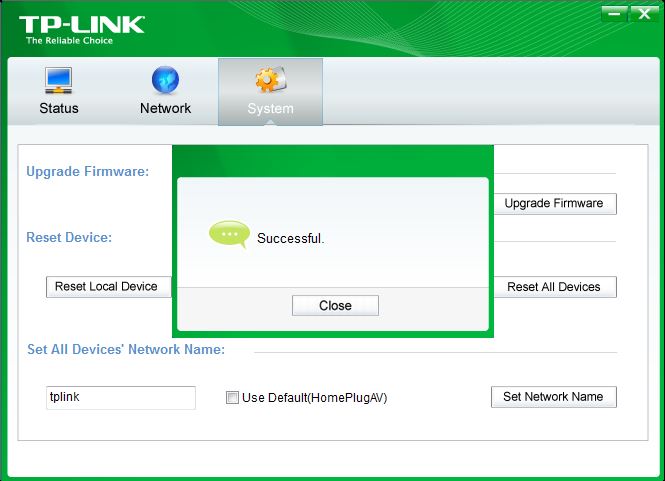
If you would like to add another powerline adapter to this private network, please repeat Step 2 to Step 5.
Is this faq useful?
Your feedback helps improve this site.
TP-Link Community
Still need help? Search for answers, ask questions, and get help from TP-Link experts and other users around the world.
