
How to connect to wireless network by using built-in Utility/Client on Vista
 46935
46935Step 1
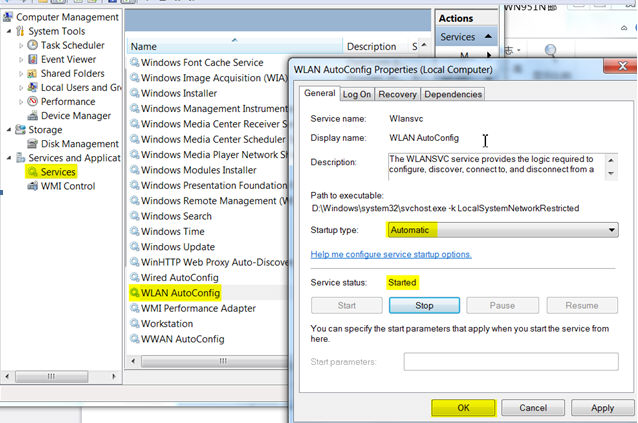
Right click "My computer" and select "Manage".
Step 2
Select "Services" in the left menu and find\enable "WLAN Auto Config".
Step 3
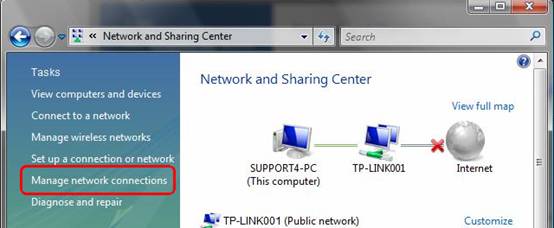
Click Start->Control Panel, Select and double click Network and Sharing Center, then click Manage network connections.
Step 4
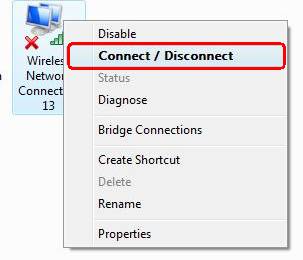
Select the wireless connection, right click it and select Connect/Disconnect
Step 5
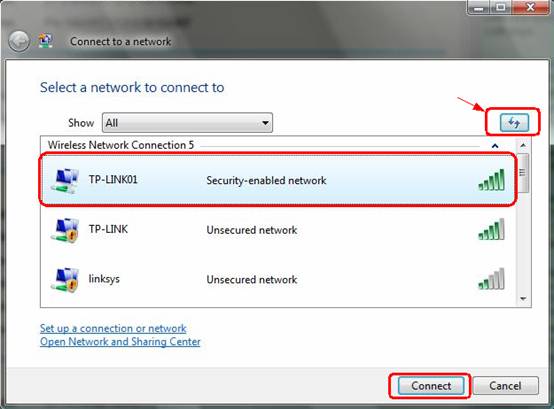
Click Refresh button to view the wireless network. Select the correct one, then double click it or click Connect.
Step 6
If the wireless network is secured, you will be requested to enter the password to connect to it, then click Connect.
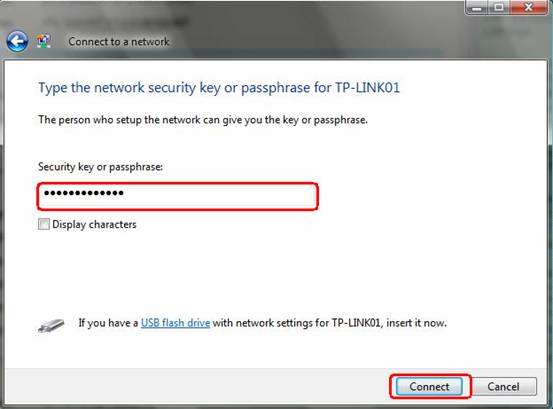
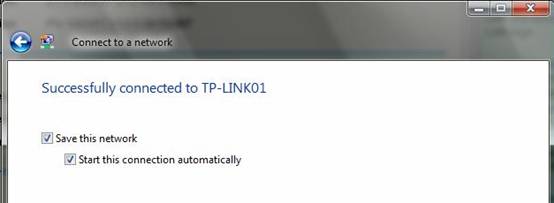
After a few minutes, it will connect to the wireless network.
Get to know more details of each function and configuration please go to Download Center to download the manual of your product.
Is this faq useful?
Your feedback helps improve this site.

TP-Link Community
Still need help? Search for answers, ask questions, and get help from TP-Link experts and other users around the world.