How to Set Up Your Deco
Note: Features available in Deco may vary by model and software version. All steps and images described here are only examples and may not reflect your actual Deco experience.
Deco setup is done entirely through the Deco app, available on Android and iOS. Before starting, you will need a TP-Link ID or an existing TP-Link Cloud account. To learn more about navigating the app after setup, see Getting to know your Deco app.
Key Takeaways
- Deco can only be set up through the Deco app, available on Android and iOS. Download it from Google Play or the App Store before starting.
- Before beginning setup, disable Power-Saving mode on your phone. If you are using iOS 14 or later, you must enable Local Network permission for the Deco app to complete configuration.
- During setup, you will connect one Deco unit to your modem using an Ethernet cable and power both devices on. The Deco app will guide you through selecting your connection type (such as Dynamic IP, PPPoE, or Static IP).
- Wait for the Deco's LED to pulse blue before proceeding. If the LED does not pulse blue, press the Reset button for one second and wait about two minutes for the LED to turn to pulsing blue.
- Your Wi-Fi network name and password are created during setup. After setup is complete, connect all your devices to the new Deco network.
- If your package includes more than one Deco unit, plug in the additional units after setup is complete. They will join the network automatically within two minutes.
Before You Start
Note:
- To make sure the setup process runs smoothly, disable Power-Saving mode on your phone before you begin.
- For iOS 14 and above, enabling the Local Network permission is required to complete the configuration process. If you are using an Android device, see why the Deco Android app requires location permission.
The Deco can only be set up through the Deco app, which is available on Android and iOS. The steps below use the Deco X60 as an example.
Step 1: Download the Deco App
Go to Google Play or the App Store to download the Deco app, then install it on your Android or iOS smartphone or tablet. You can also scan the QR code shown below, which links directly to the Deco app download page.

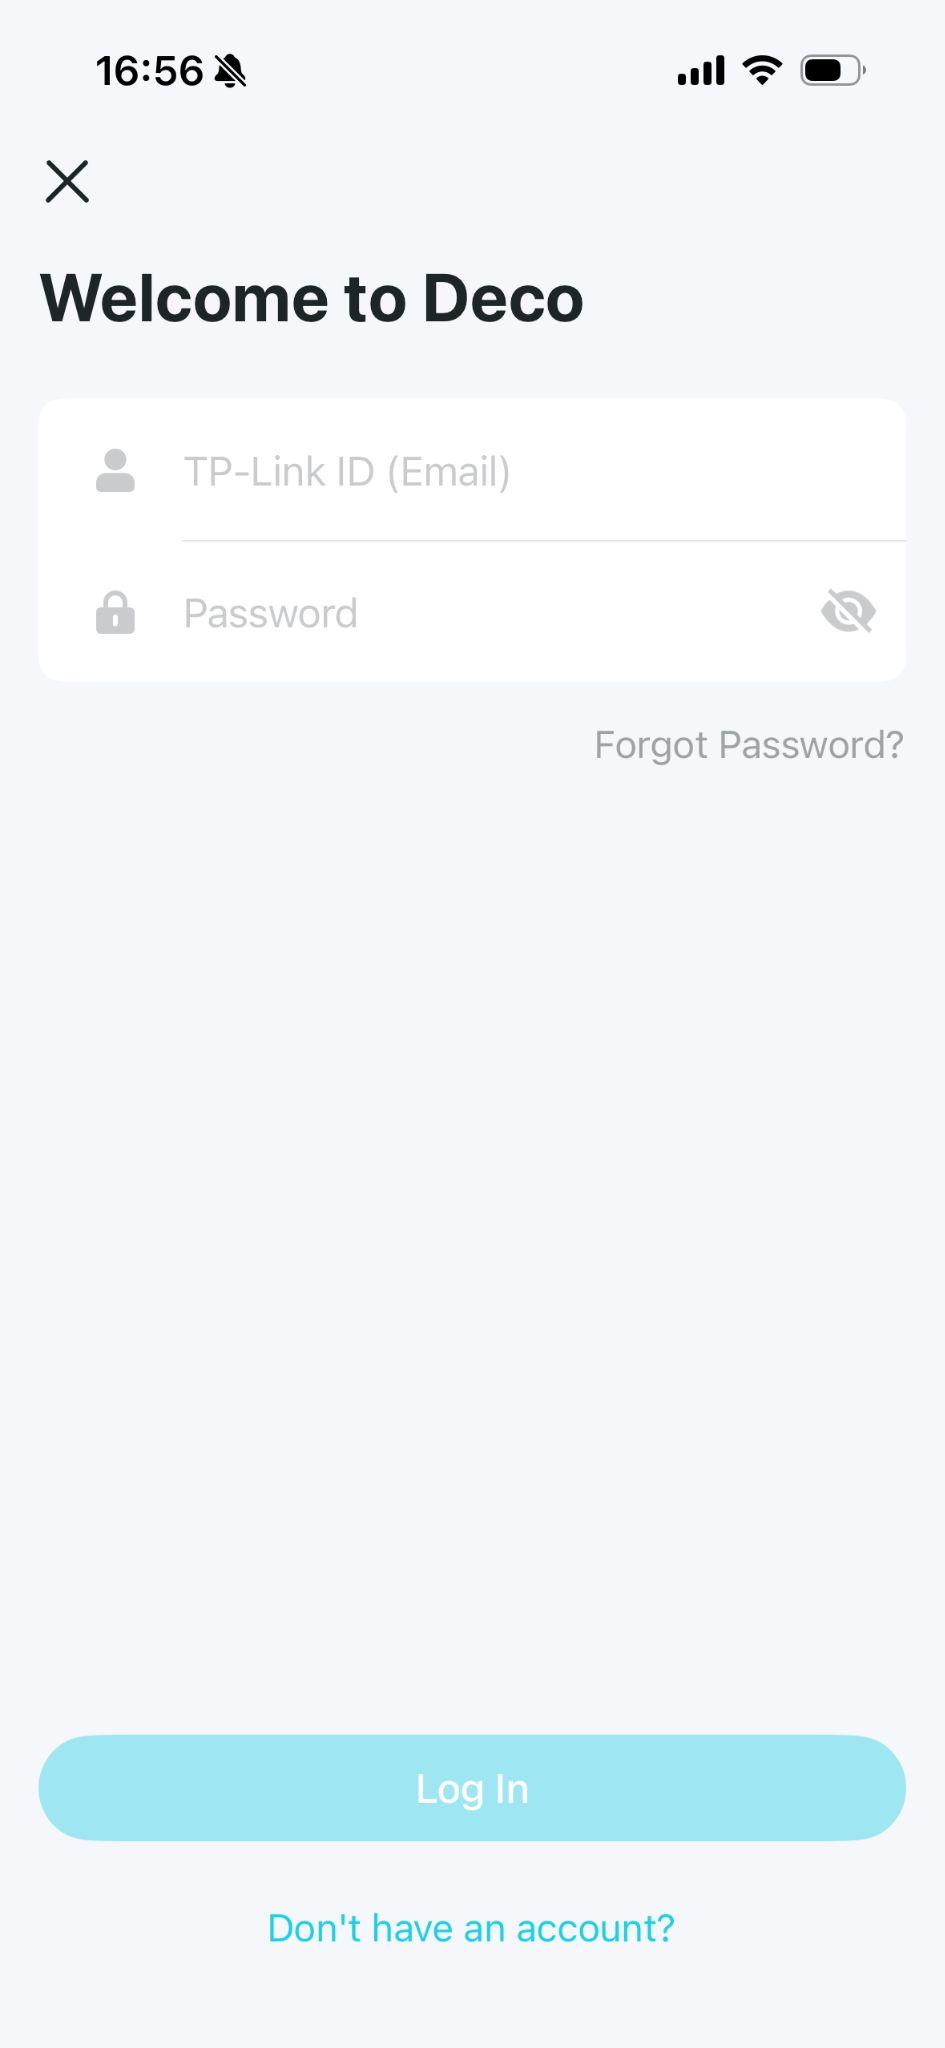
Step 2: Log In to Your TP-Link Account
Open the app and log in with your TP-Link ID. If you do not have an account yet, tap Don't have an account? to sign up first.
Note: If you forgot your login password, tap “Forgot Password?”. The app will help you reset your password.

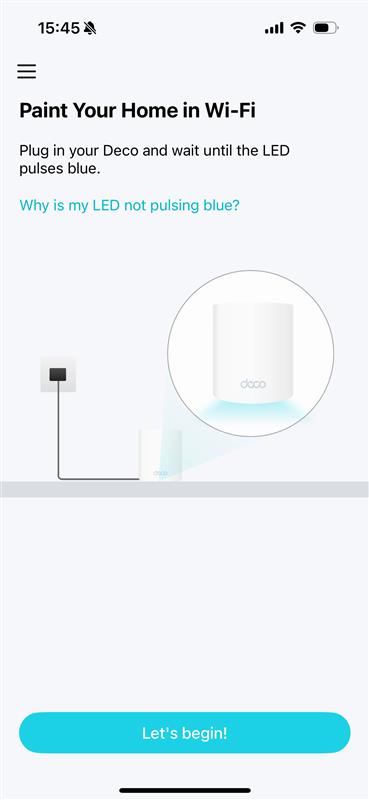
Step 3: Tap "Let's Begin" in the App
Plug in your Deco and wait until the LED pulses blue, then tap Let's begin in the app. This confirms the unit is ready to be configured.
Note: If the LED is not pulsing blue, press the Reset button on the Deco for one second. The LED will turn yellow — wait about two minutes for it to turn to pulsing blue before proceeding.
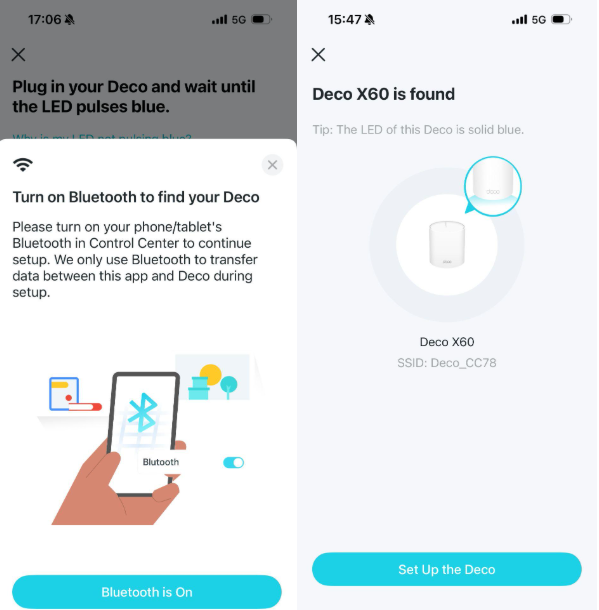
Step 4: Connect Phone/Tablet to the Deco’s Wi-Fi
Turn on Wi-Fi on your phone/tablet to connect it to the Deco’s Wi-Fi. For some models, you can also turn on Bluetooth for a quicker setup.
A. Connect via Wi-Fi: Turn on Wi-Fi on your phone or tablet, and it will automatically connect to the Deco's Wi-Fi.
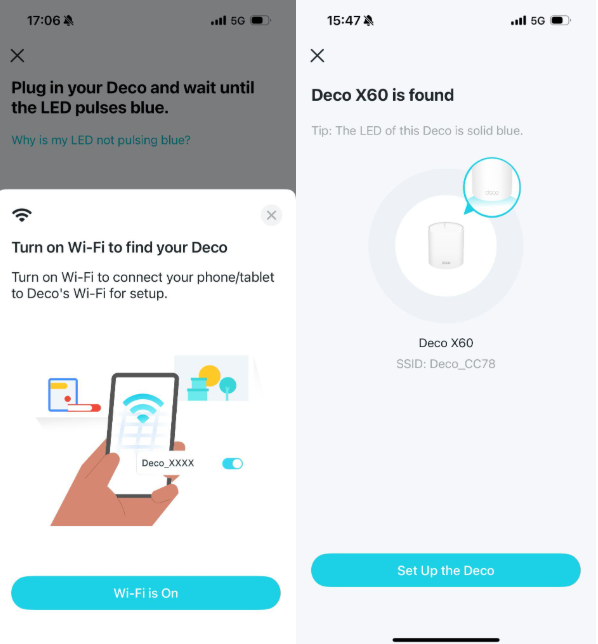
Note: If your phone or tablet did not connect to the Deco's Wi-Fi automatically, you can find the default network name (Deco_XXXX) printed on the product label and connect to it manually.
B. Connect via Bluetooth: Turn on Bluetooth on your phone or tablet, and it will automatically connect to the Deco.
In case it fails to find the Deco in this step:
1) Make sure the smartphone supports Bluetooth 4.0 or later.
2) Switch to another smartphone and restart the onboarding process.
Step 5: Connect Your Deco to the Modem
If you have a modem, power off your modem. Connect one of the Ethernet ports of your Deco to the modem and power it on.
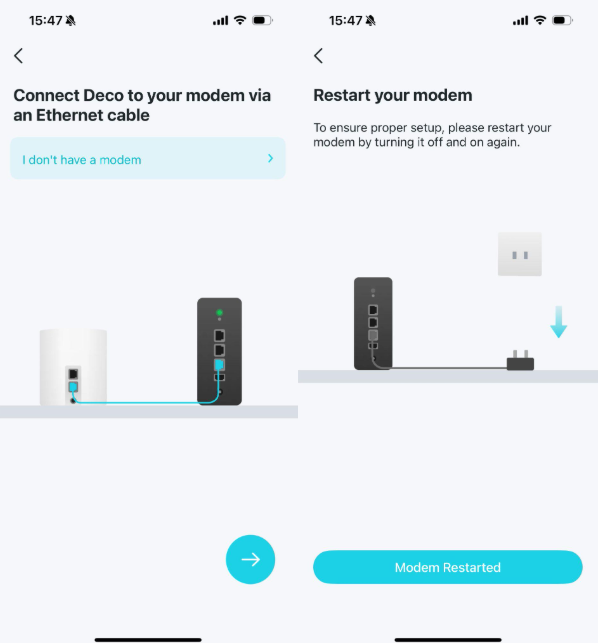
If you don't have a modem, connect your Deco directly to the Ethernet outlet via an Ethernet cable.
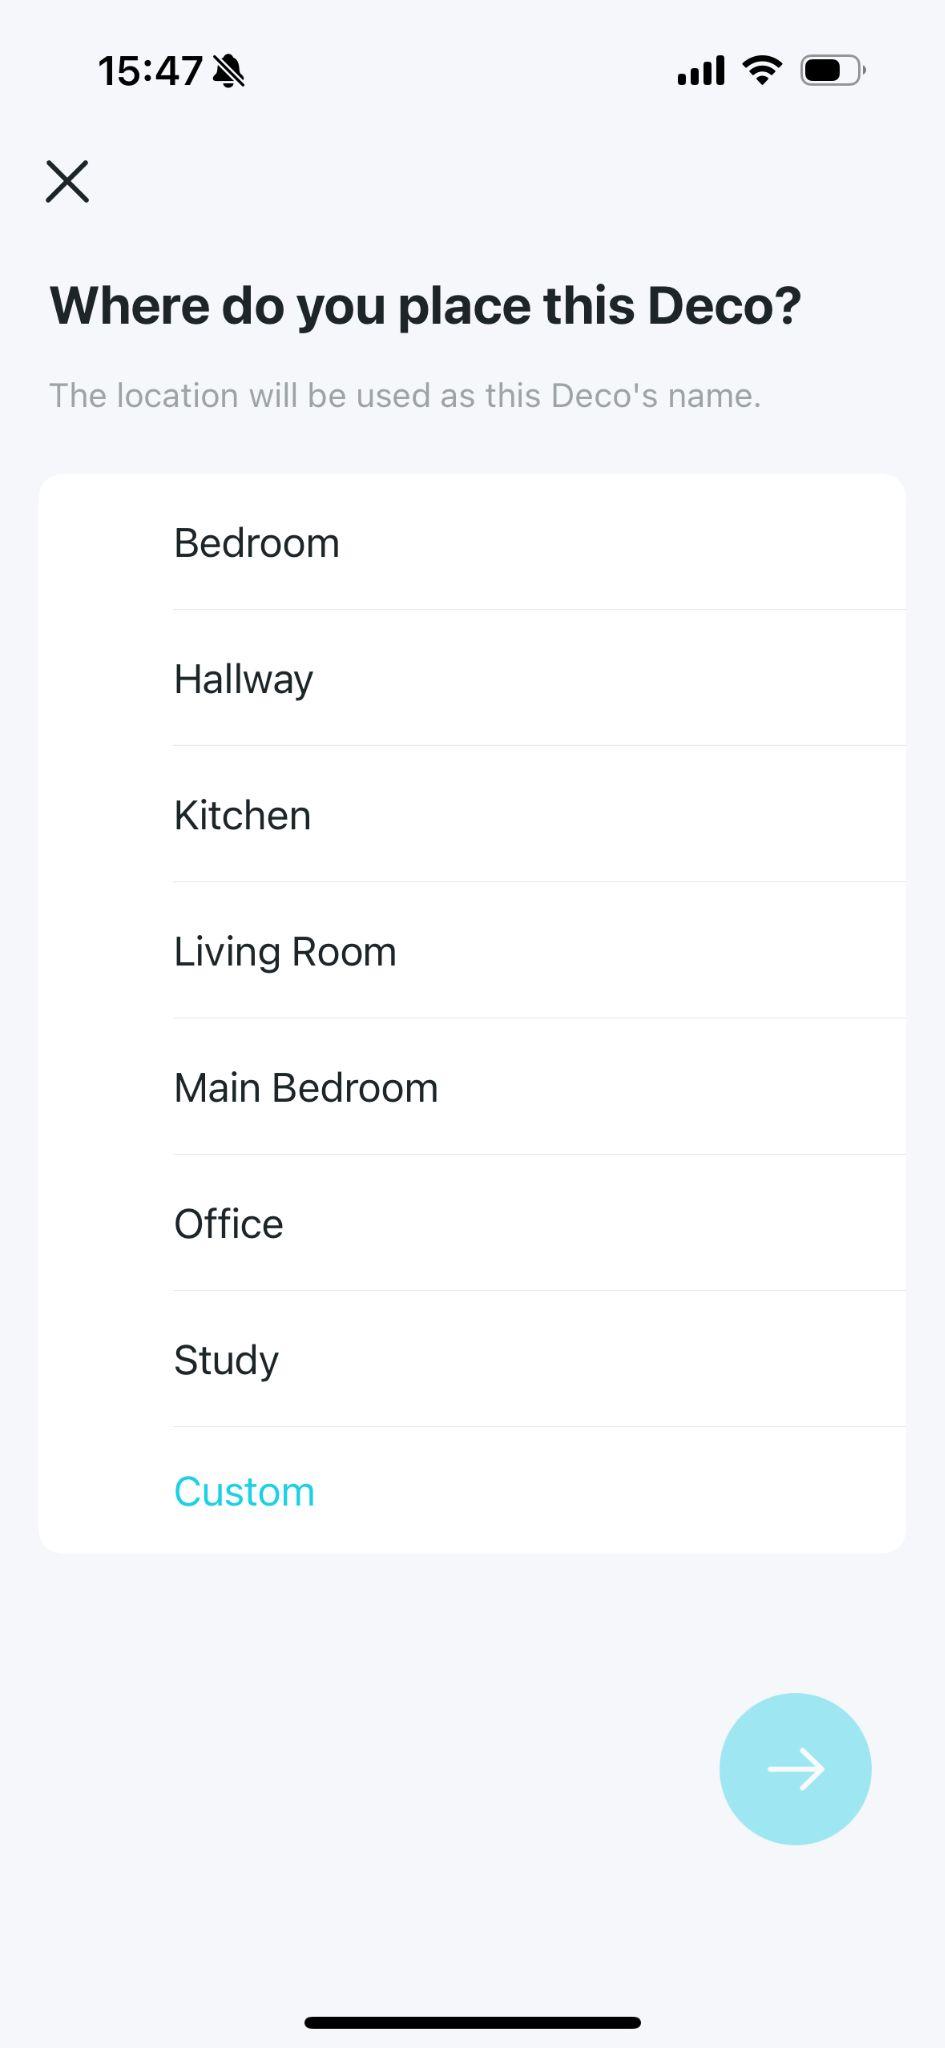
Step 6: Select a Location for Your Deco
Select or customize a location for your Deco from the list in the app. The room name you choose here will become this Deco unit's name in the app.
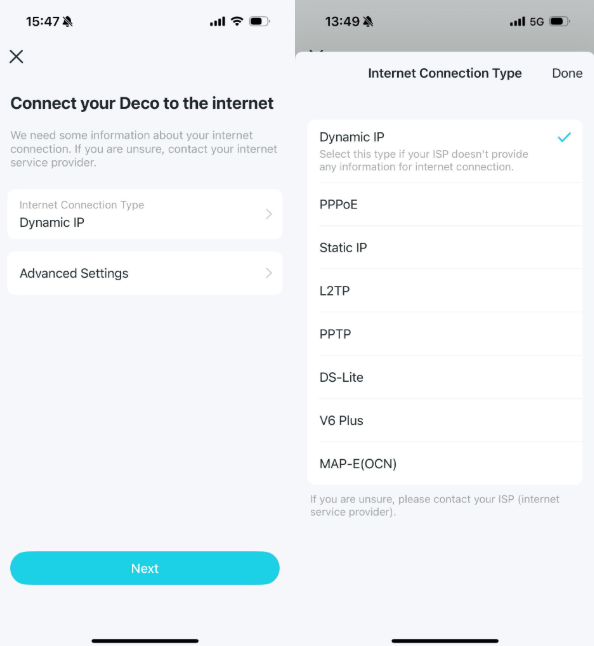
Step 7: Select Your Internet Connection Type
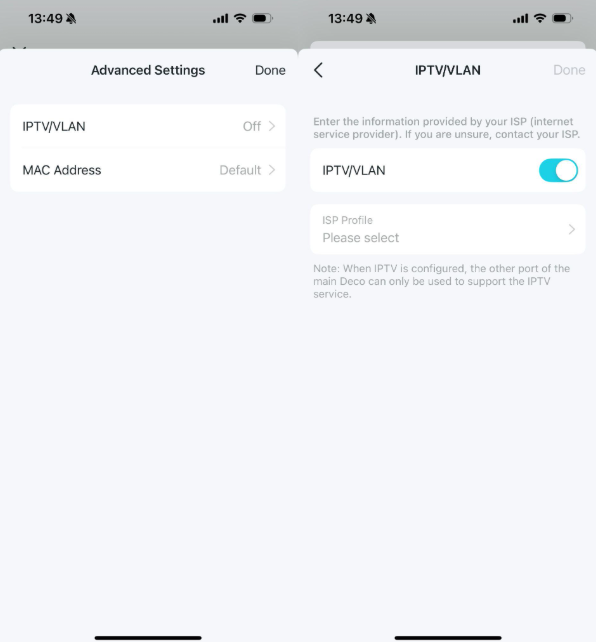
Select your Internet connection type on the Internet Connection Type screen and enter the required information. If your ISP requires a VLAN ID, you can also enter it here under Advanced Settings > IPTV/VLAN.
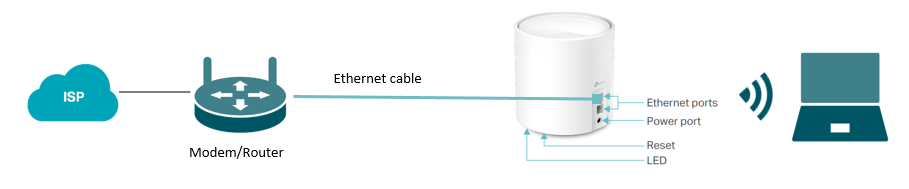
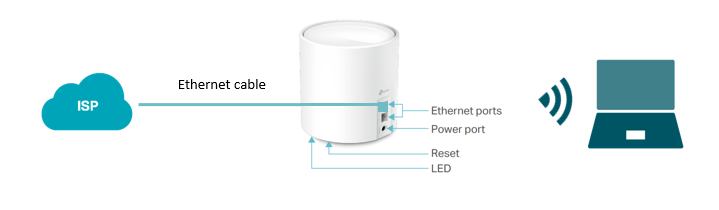
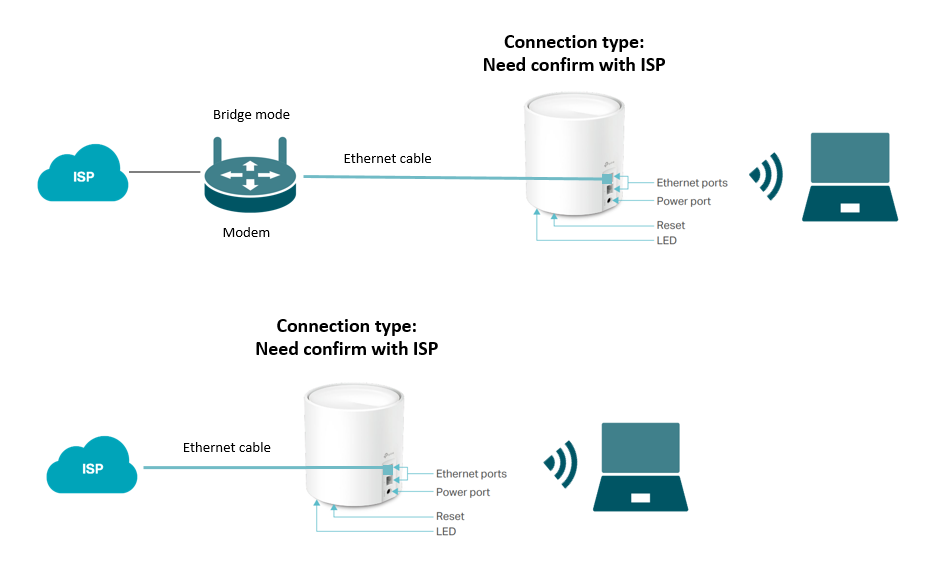
Note: Choose Dynamic IP if your Deco is wired to a main router or modem router (as shown in Image 1). If your Deco is wired directly to a bridge modem or ISP connection (as shown in Image 2), confirm the correct connection type with your ISP. See common connection types of regular ISPs for reference.
For connection type: you may choose Dynamic IP when the Deco is wired to a main router/Modem Router like Image 1, or you are suggested to confirm with ISP if your TP-Link Modem is wired to ISP/ a bridge Modem directly like image 2.
Image 1
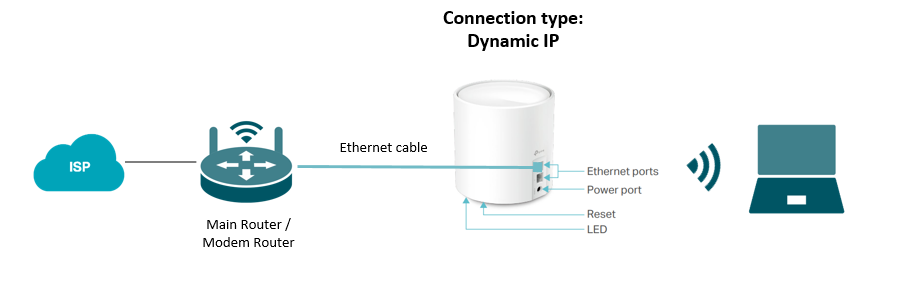
Image 2
If the ISP requires a VLAN ID, get the VLAN ID from your ISP and enter it in Advanced Settings > IPTV/VLAN:
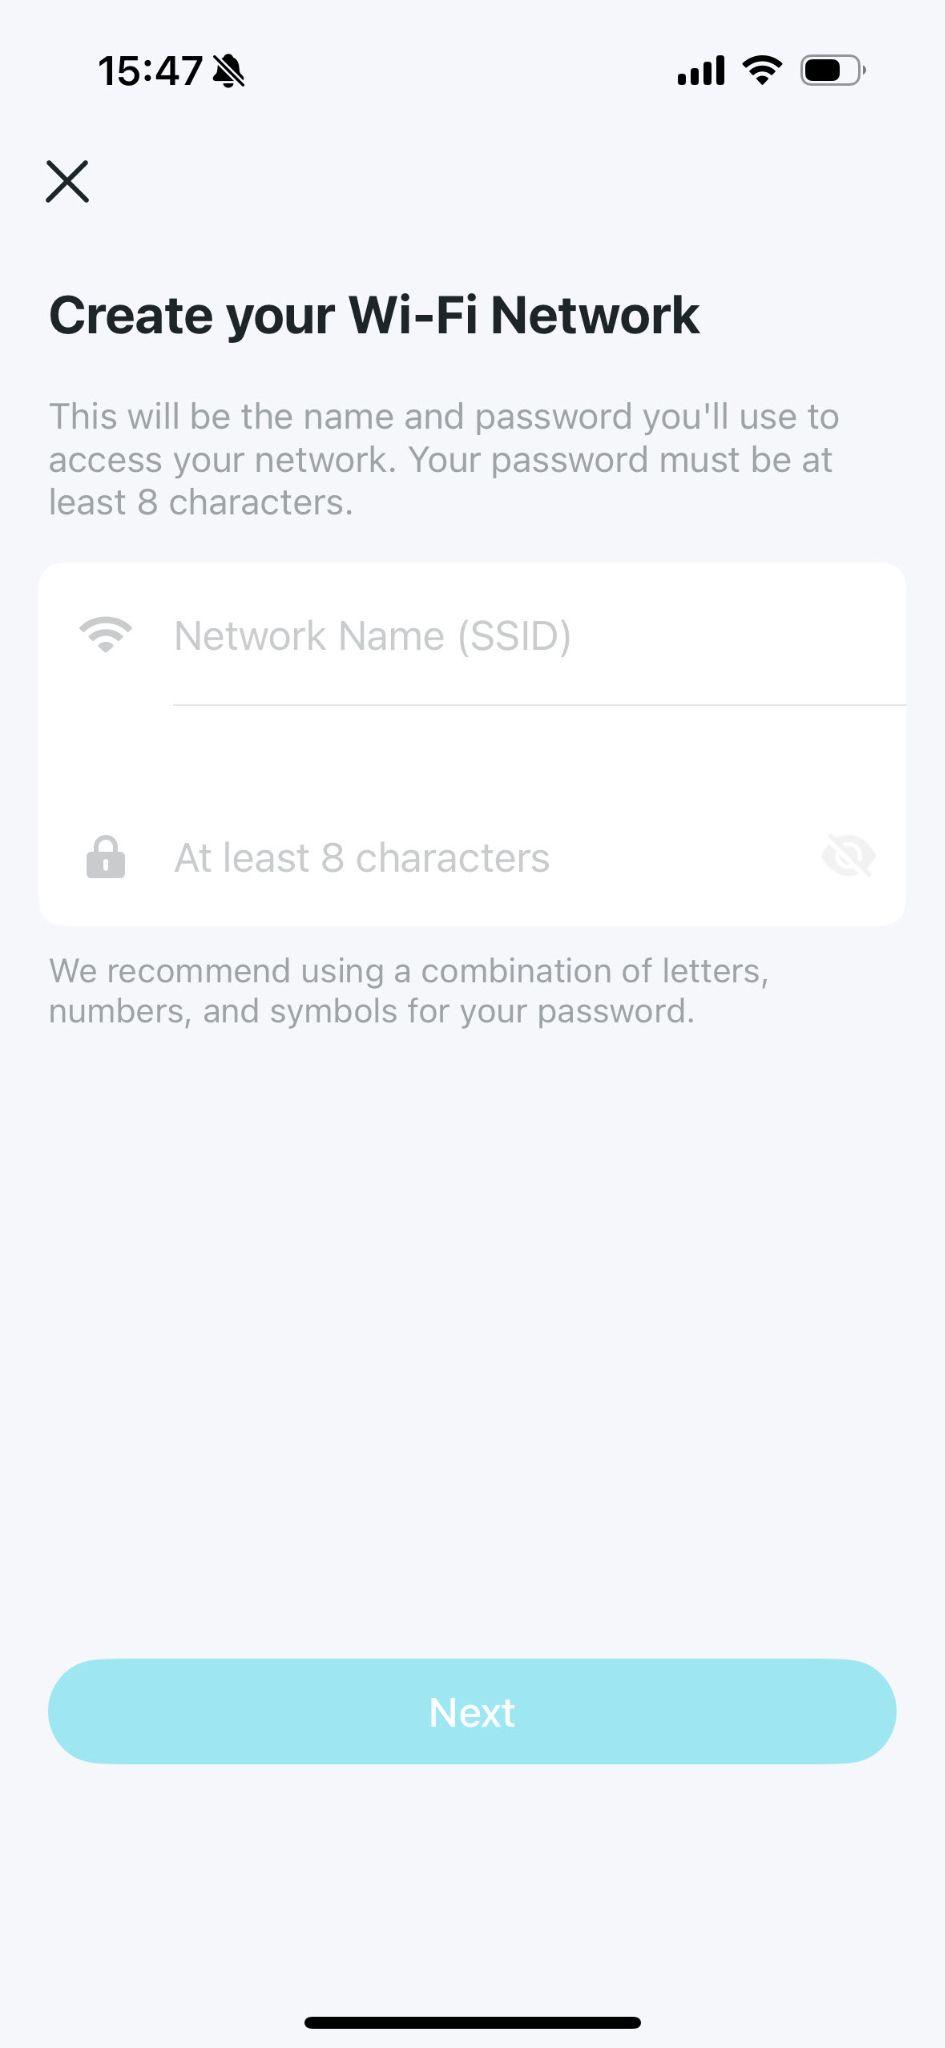
Step 8: Create Your Wi-Fi Network Name and Password
Create your Wi-Fi network name and password. These will be the name and password you use to connect your devices to Wi-Fi. Your password must be at least eight characters long.
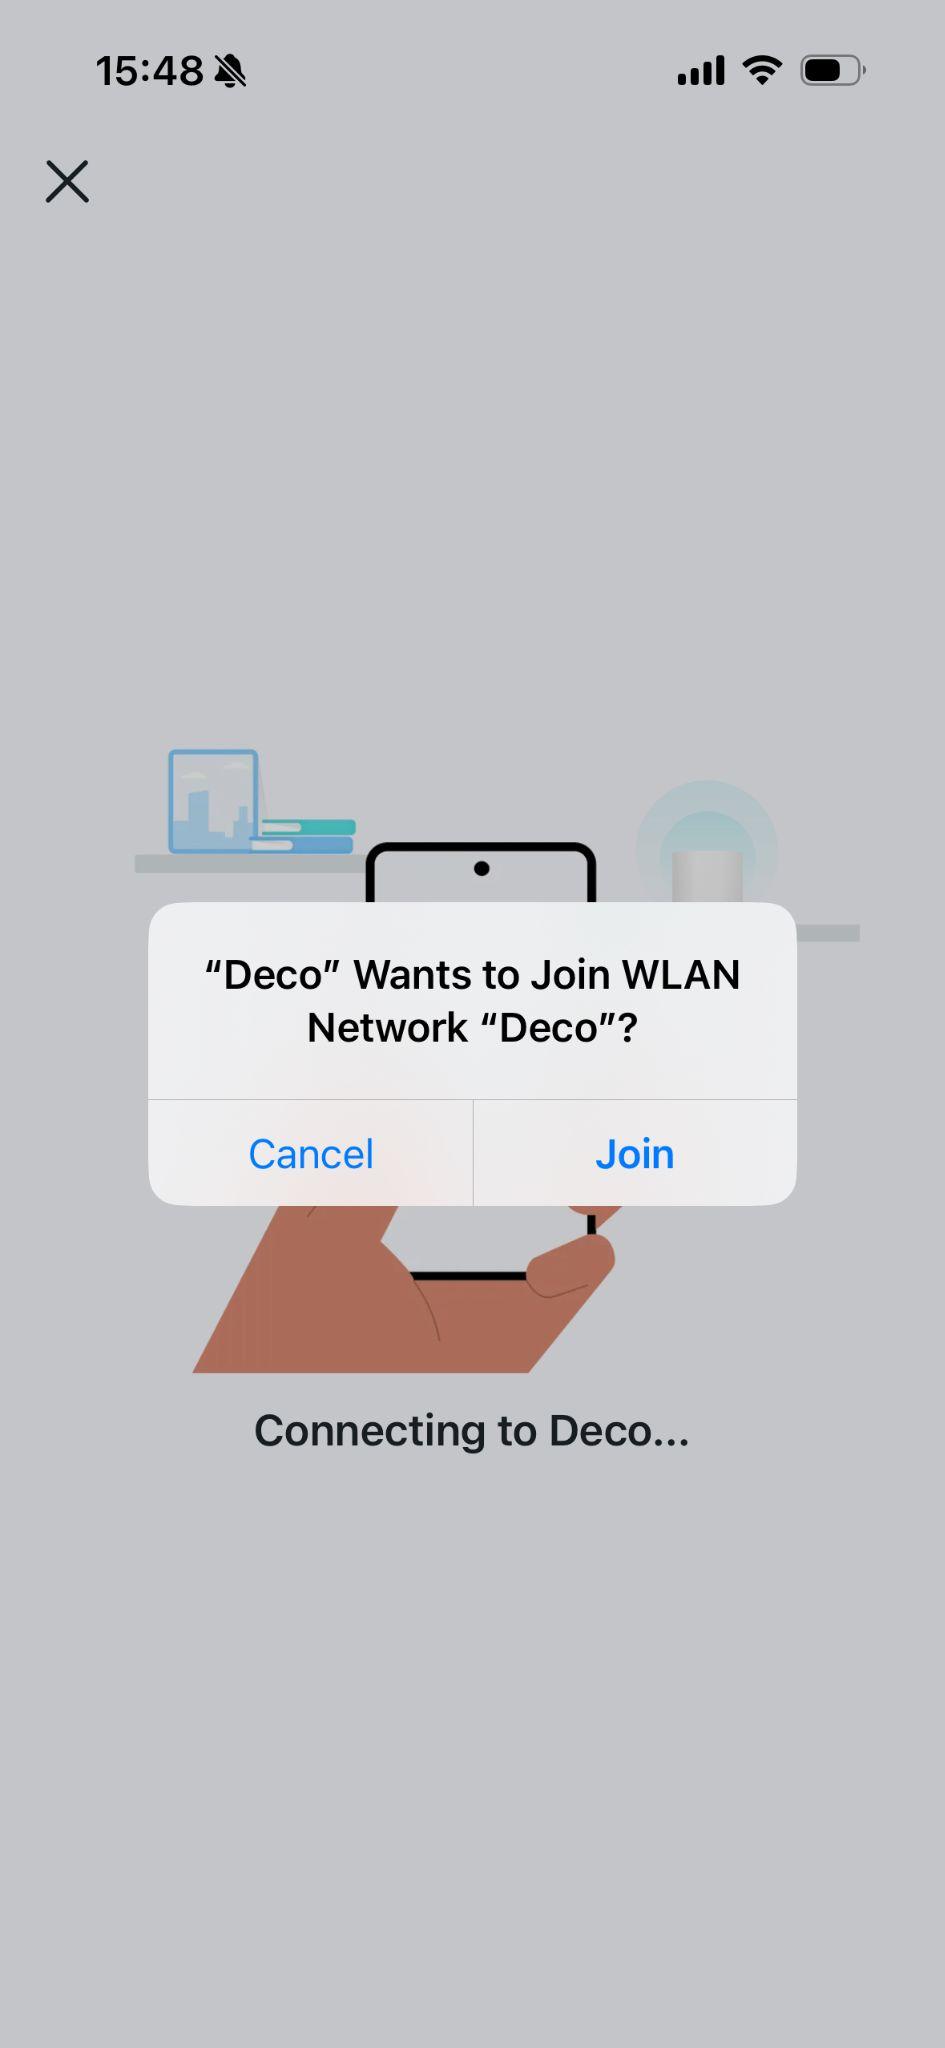
Step 9: Connect Your Phone to the Deco's Wi-Fi
Connect your phone or tablet to the Deco's Wi-Fi network using the name and password you just created. The app will guide you through this step automatically.
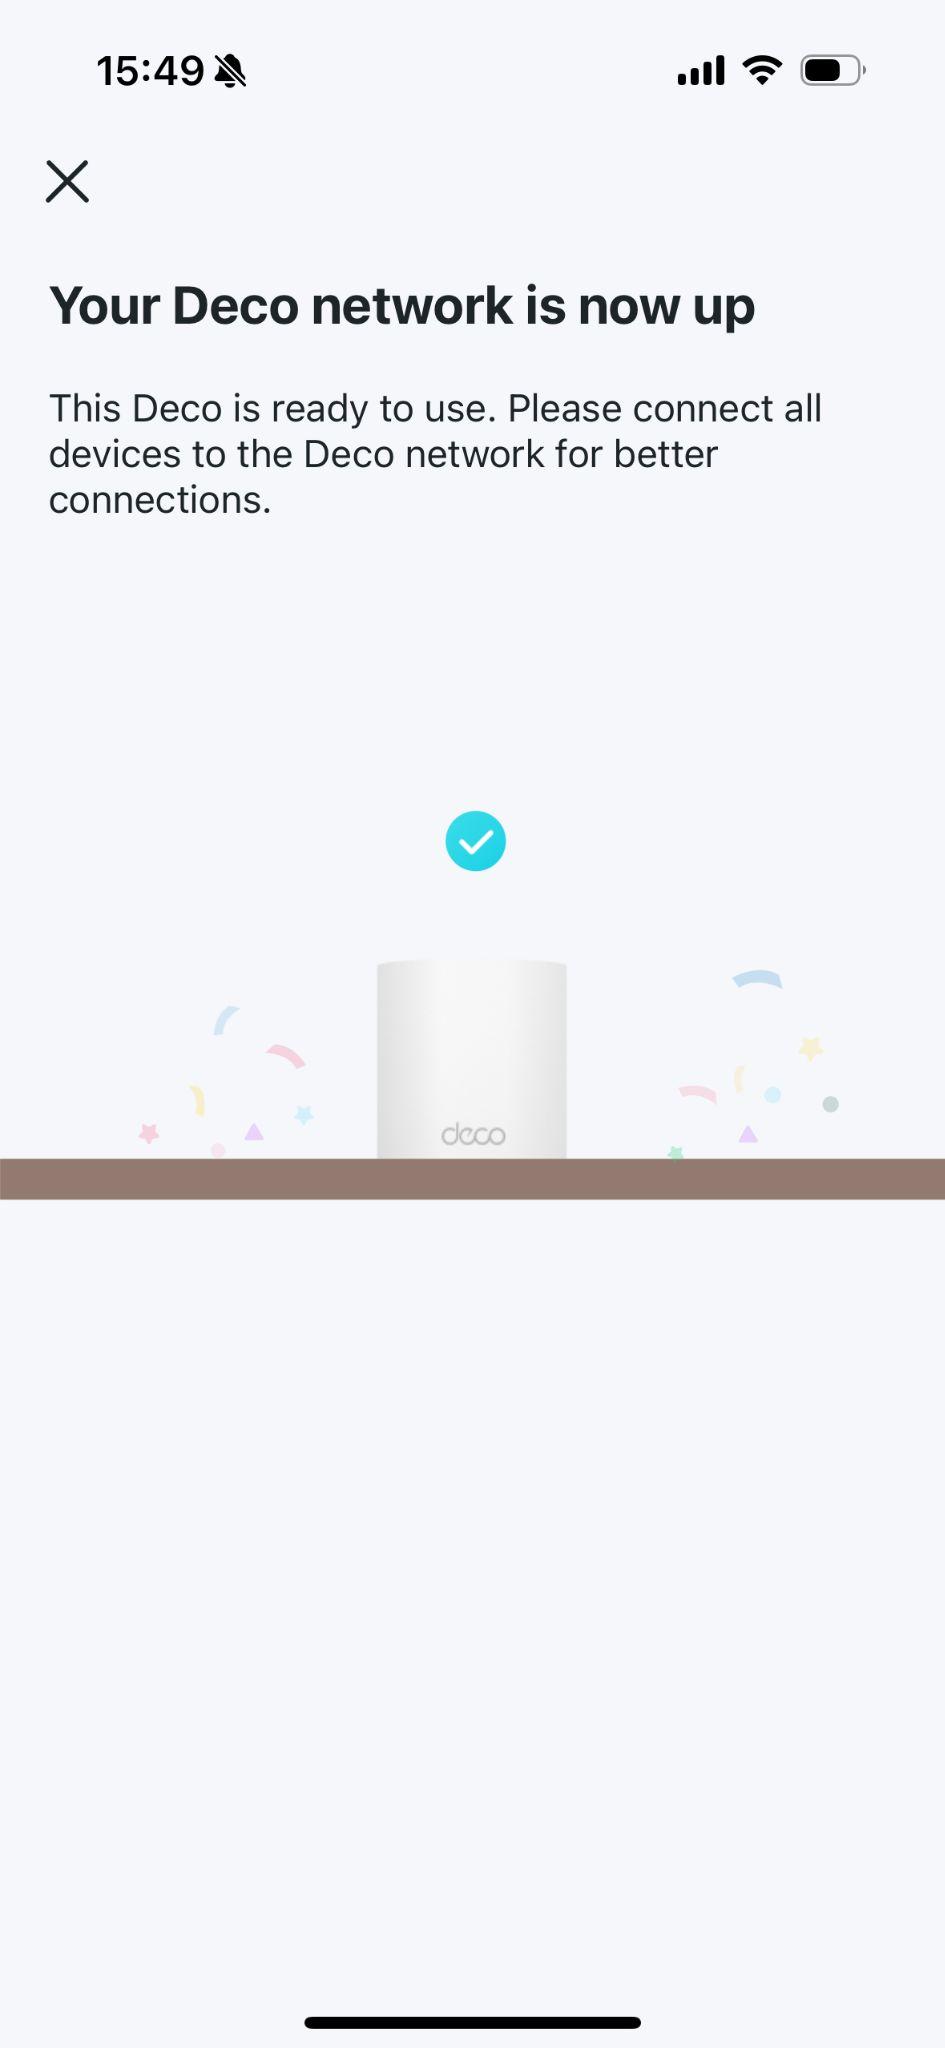
Step 10: Setup Complete
Your Deco network is now ready to use. Connect all your devices to the new Deco Wi-Fi network using the name and password you created during setup. If you run into any problems at this stage, see what to do if your main Deco failed to complete setup.
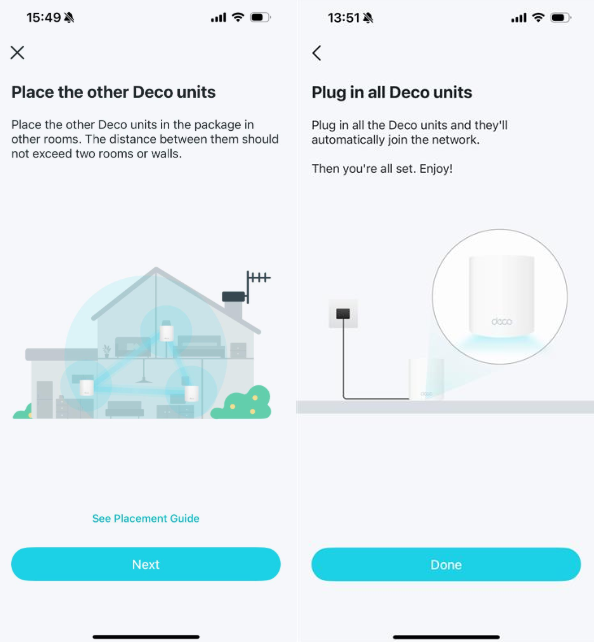
Step 11: Add More Deco Units (If Applicable)
If you have other Deco units in the same package, for Wi-Fi 6 or above Decos, just power on these Decos in the same room and they will join the network within two minutes. For users adding a Deco unit purchased separately, see how to add an additional unit to your Deco network.
Is this faq useful?
Your feedback helps improve this site.
TP-Link Community
Still need help? Search for answers, ask questions, and get help from TP-Link experts and other users around the world.