How to configure IP & MAC Binding on TP-Link ISP-customized Router
Introduction
This article provides step-by-step instructions for configuring IP & MAC Binding on the ISP-customized router.
IP & MAC Binding, namely, ARP (Address Resolution Protocol) Binding, is used to bind a network client’s IP address to its MAC address. This will prevent ARP spoofing and other ARP attacks by denying network access to a client with a matching IP address in the Binding list, but an unrecognized MAC address.
Configuration
Step 1. Log in to the web management interface.
Step 2. Go to Advanced > Security > IP & MAC Binding and enable IP & MAC Binding.
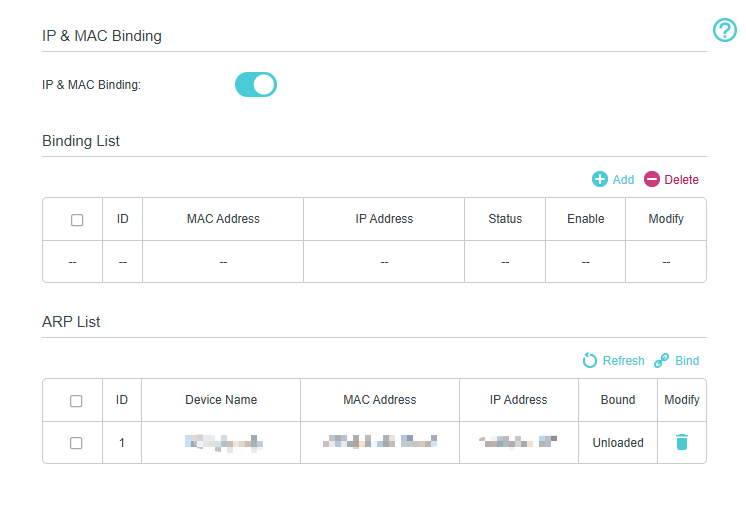
Step 3. Bind your client (s) according to your needs.
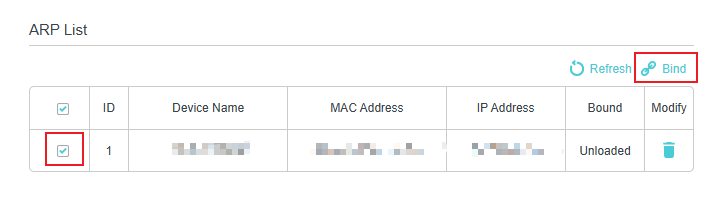
Scenario 1: To bind the connected client (s)
- Select the client (s) to be bound in the ARP List.
- Click Bind to add to the Binding List.
Scenario 2: To bind the unconnected client
- Click Add in the Binding List.
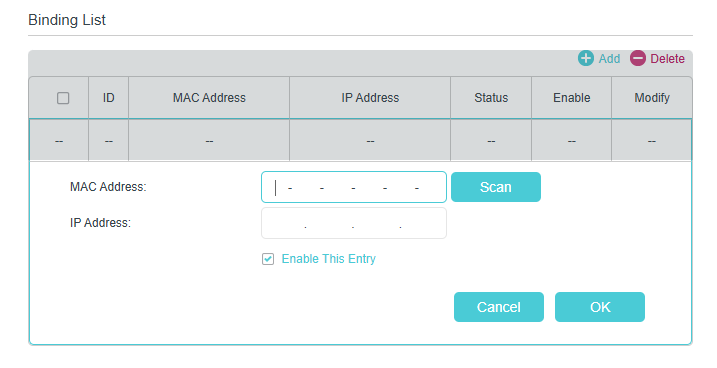
- Enter the MAC address and IP address that you want to bind.
- Select the check box to enable this entry and click OK.
QA
Q1: Why can’t I find my client in the ARP List when trying to bind it?
A1: Your client may not be connected to the router, or it may have obtained an IP address from a different network segment. Ensure the client is online and renew its IP address by reconnecting to the router.
Q2: What happens if two clients use the same IP address after binding?
A2: Only the client with the correct MAC address will be allowed to access the network. Other clients using the same IP address will be blocked automatically.
Q3: Can I bind multiple IP addresses to the same MAC address?
A3: No. Each entry must be a one‑to‑one relationship (one IP address bound to one MAC address). If multiple clients need static control, create separate entries for each client.
Q4: Why does my client lose Internet access after enabling IP & MAC Binding?
A4: This usually occurs when the client's MAC address or IP address does not match the entry in the Binding List. Delete the incorrect entry and create a new one.
Get to know more details of each function and configuration please go to Download Center to download the manual of your product.
Is this faq useful?
Your feedback helps improve this site.


TP-Link Community
Still need help? Search for answers, ask questions, and get help from TP-Link experts and other users around the world.