How to Set Up a Deco WireGuard VPN Server Using the Deco App
WireGuard is an open-source VPN protocol known for its speed, security, and simplicity compared to older protocols like OpenVPN and PPTP. A WireGuard VPN server lets remote devices securely connect to your home network over the Internet, giving you access to home files, devices, or Internet traffic from anywhere.
Setting up WireGuard on your Deco mesh router means the Deco acts as the VPN server directly — no third-party VPN subscription is needed, and you control your own private, encrypted connection.
This guide covers how to configure a WireGuard VPN server on a Deco mesh router using the Deco app. For a broader overview of VPN options on Deco, see how to set up VPN Server and VPN Client on a Deco router. If you prefer configuring via the web management page, see the WireGuard VPN setup guide for TP-Link routers.
Key Takeaways
- WireGuard VPN server setup on Deco is managed entirely through the Deco app via More > Advanced > VPN Server.
- Dynamic Domain Name System (DDNS) is recommended to prevent VPN connection issues caused by a changing WAN IP address.
- The Client Access setting determines whether connected VPN clients can access the home network only, or both the home network and the Internet through the VPN server.
- Each WireGuard peer (VPN client account) can only be used by one device at a time.
- Mobile devices can connect to the WireGuard server by scanning a QR code via the WireGuard app, available on Google Play and the Apple App Store.
- Other devices (such as TP-Link WireGuard VPN clients) connect by importing an exported configuration file.
How to Set Up WireGuard VPN Server on Deco
Please follow the steps below to set up the Wireguard VPN Server on Deco APP.
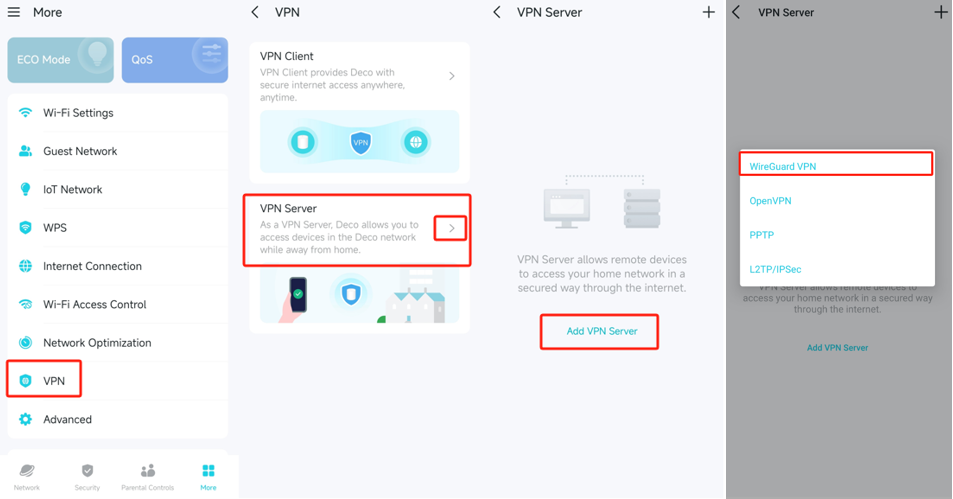
Step 1. Launch the Deco app. Go to MORE > VPN> VPN Server > Add VPN Server, and select WireGuard VPN.
Step 2. We recommend enabling DDNS to bind your WAN IP to a domain name. This prevents VPN connection issues caused by a changing WAN IP address.
Please refer to this link: https://www.tp-link.com/support/faq/3481/
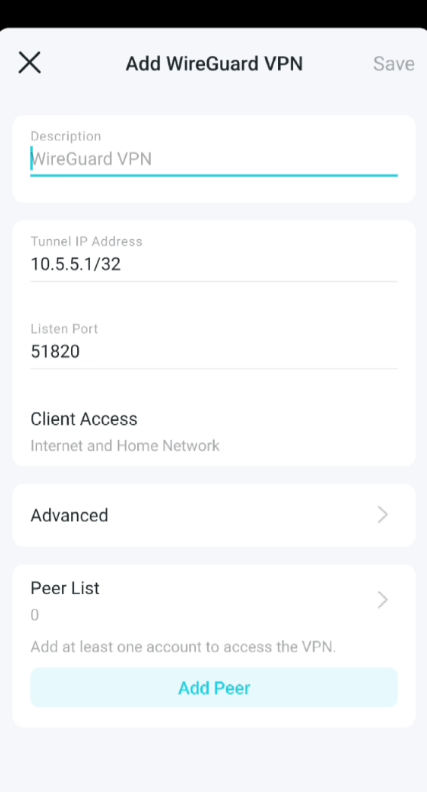
Step 3. View the default WireGuard VPN settings, as shown above. The parameters are automatically filled in, and do NOT change them unless necessary.
Select your Client Access type. Select Home Network Only if you only want the remote device to access your home network; select Internet and Home Network if you also want the remote device to access the internet through the VPN Server.
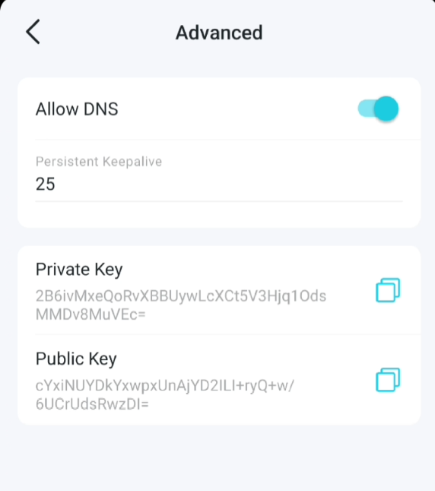
Step 4. (Optional) Click Advanced Settings to display more settings.
If Allow DNS is turned on, the Deco will become the DNS server of the VPN client that establishes a connection with it. It is vital for ensuring your online privacy.
Change the Persistent Keepalive time (25 seconds by default) to send out heartbeat regularly, you can also click RENEW KEY to update the private key and public key.
Step 5. Locate the Peer List section. Click Add Peer to create an account.
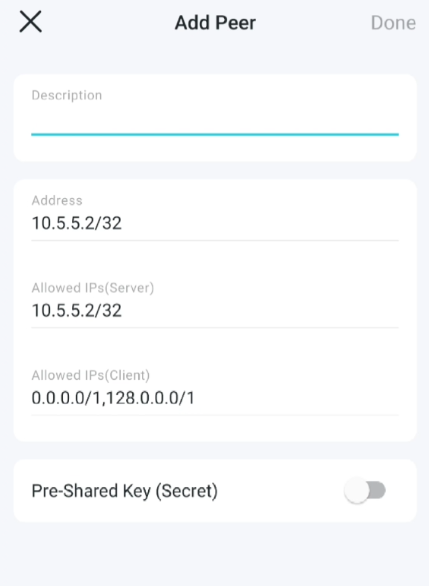
Address: The IP assigned by the server to the client's VPN tunnel after connection. This address must be included in the Allowed IPs (Server)
Allowed IPs (Server): The IP addresses of clients permitted to communicate with the server.
Allowed IPs (Client): The destination IP addresses the client can access through the VPN tunnel. The default configuration is suitable for most users.

Note: Each account can only be used by one WireGuard VPN client at a time.
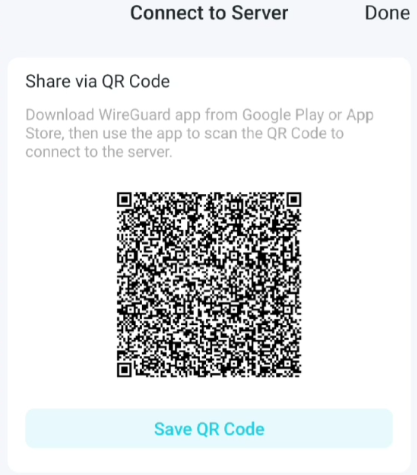
Step 7. Connect to the WireGuard server:
On the Peer List, click  in the Modify column of the corresponding account.
- On mobile, download the WireGuard app from Google Play or the Apple App Store, then scan the QR code to connect.
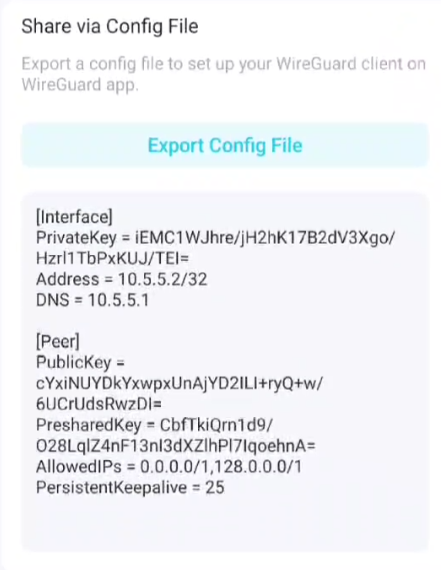
- For other devices (e.g. TP-Link WireGuard VPN client), click EXPORT Config File to save the WireGuard VPN configuration file which will be used by the remote device to access your router.
Step 8. On the Peer list, you can click the button to modify the VPN server settings, connect to the server, or delete the account.

Looking For More
Is this faq useful?
Your feedback helps improve this site.


TP-Link Community
Still need help? Search for answers, ask questions, and get help from TP-Link experts and other users around the world.