Comment utiliser l'outil de contrôle de la caméra
Remarque 1: Cette FAQ convient à toutes les caméras cloud TP-Link, y compris NC200, NC220, NC250, etc. Ici, nous prenons NC200 comme exemple.
Remarque 2 : cet outil est compatible Windows uniquement.
Remarque 3 : Cet outil doit être utilisé en mode local, ce qui signifie que la caméra et le PC doivent être sur le même réseau local.
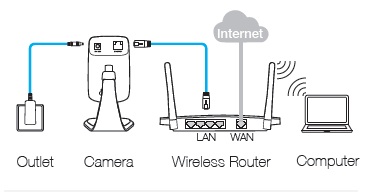
1. Par exemple, connectez le NC200 et un ordinateur Windows à votre routeur via un câble réseau.
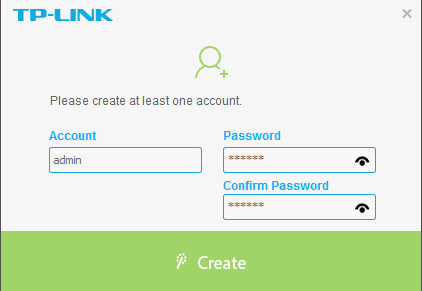
2. Exécutez l'outil de contrôle de caméra TP-Link sur l'ordinateur (Allez à Support, tapez le numéro de modèle de votre caméra, puis il affichera Management Utility). Si c'est la première fois que vous l'utilisez, vous devez d'abord créer un compte. Cliquez ensuite sur le bouton "Créer", vous pouvez entrer dans son interface de gestion.
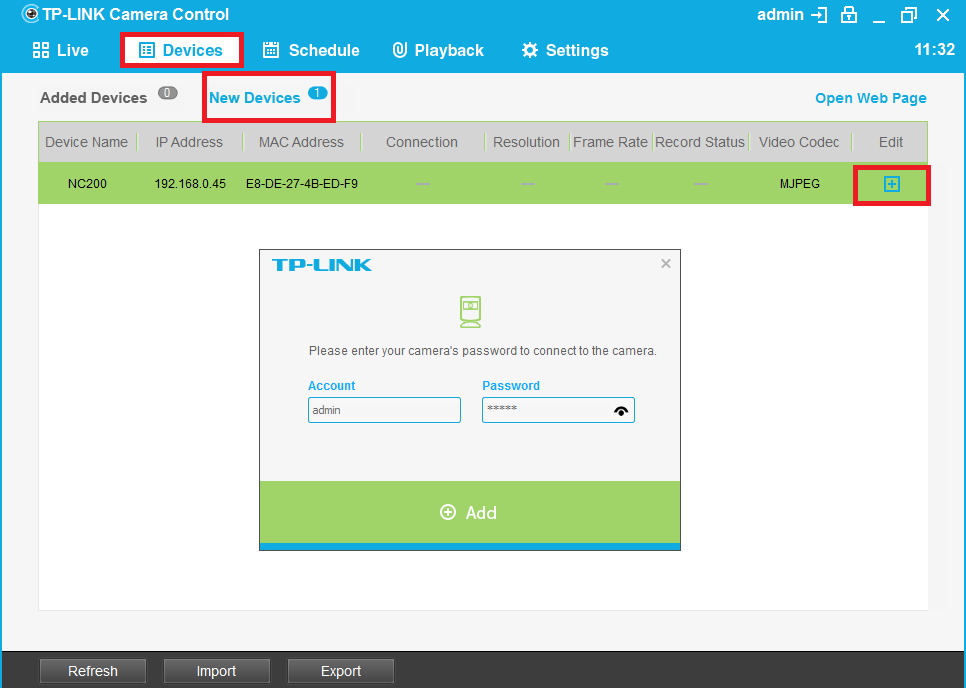
3. Sélectionnez Périphérique —> Nouveau périphérique . Dans cette interface, l'outil Camera Control peut détecter directement toutes les caméras du LAN. Cliquez sur  le bouton " " pour choisir la caméra que vous souhaitez ajouter à l'outil de contrôle de la caméra. Vous devez entrer le mot de passe de votre caméra pour vous connecter à la caméra avant de cliquer sur le bouton "Ajouter".
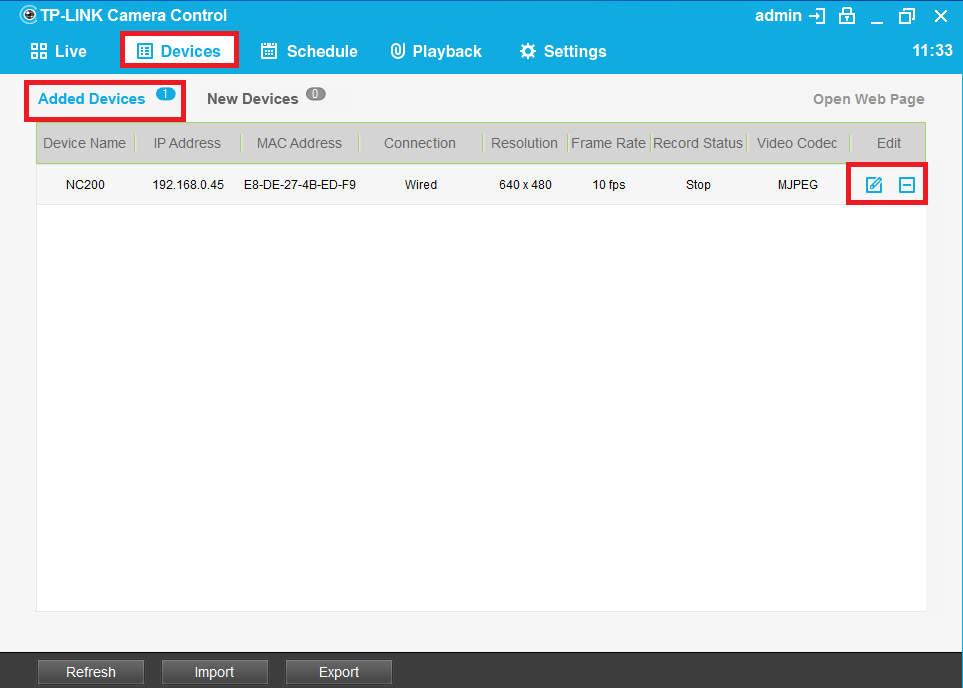
4. Vous pouvez sélectionner Périphériques —> Périphériques ajoutés pour vérifier toutes les caméras ajoutées. En outre, vous pouvez cliquer sur le bouton "  " pour modifier certains paramètres de la caméra ou
  sur le bouton " " pour supprimer la caméra.
5. Dans l'interface de modification, vous pouvez modifier le nom de périphérique et la résolution de la caméra. Cliquez sur  le bouton " " pour confirmer la modification ou
  sur le bouton " " pour restaurer les paramètres d'origine.

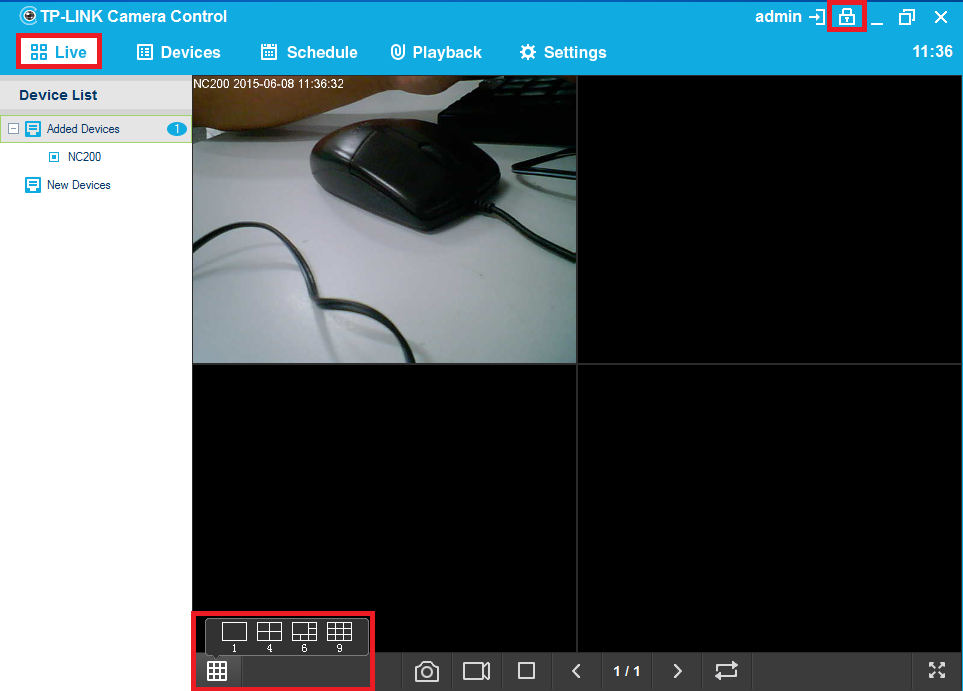
6. Sélectionnez Live, vous pouvez afficher toutes les caméras ajoutées dans cette interface en même temps. Selon le nombre de caméras, vous pouvez régler le numéro de grille sur 1/4/6/9. En outre, vous pouvez cliquer sur le bouton "  " pour verrouiller l'écran afin d'empêcher les autres de fonctionner.
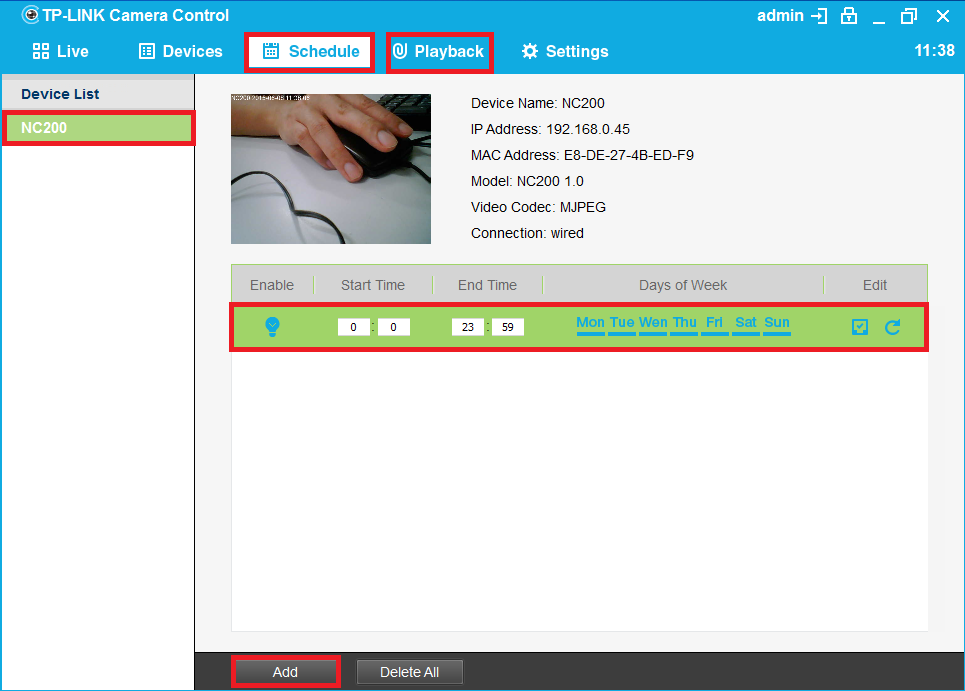
7. Sélectionnez Programmer , cliquez sur le bouton "Ajouter", vous pouvez définir les paramètres d'enregistrement vidéo. Et sélectionnez Lecture , vous pouvez lire des fichiers vidéo enregistrés.
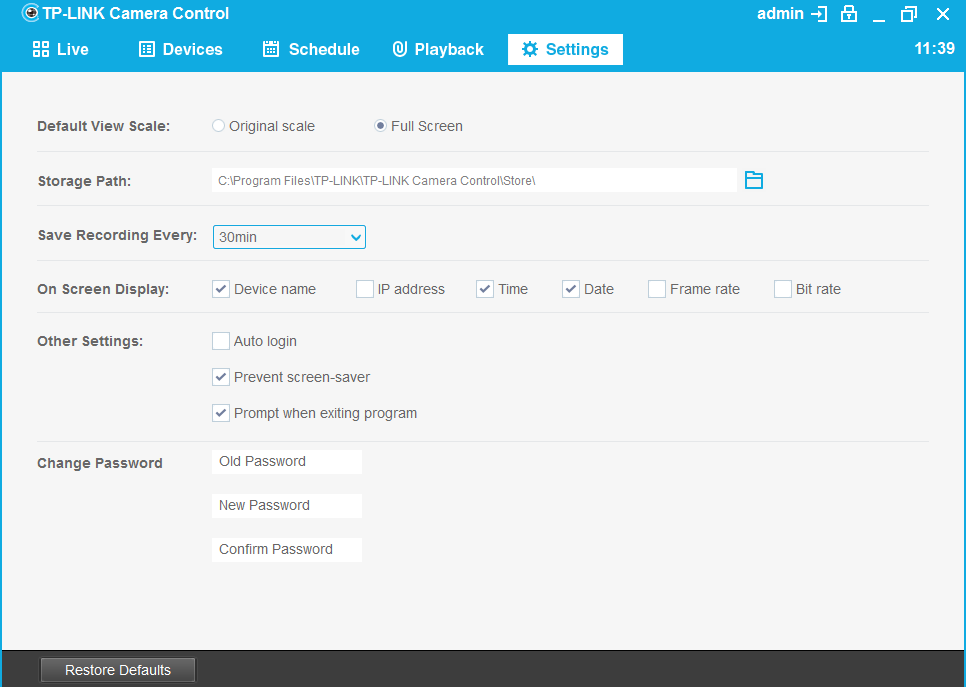
8. Sélectionnez Paramètres , vous pouvez faire les paramètres dans le diagramme ci-dessous.
Est-ce que ce FAQ a été utile ?
Vos commentaires nous aideront à améliorer ce site.