How to customize USB access settings with AC VDSL/ADSL Modem Router (new logo)
By default, all the network clients can access all folders on your USB disk. You can customize your sharing settings by setting a sharing account, sharing specific contents and setting a new sharing address on the modem router’s web management page.
Here takes Archer VR2800 as demonstration.
1. Log in the web interface of the modem router. You can refer to How to log into the web-based interface of the AC VDSL/ADSL Modem Router (new logo)?
2. Go to Advanced > USB Sharing > USB Storage Device page.
To Customize the Address of the USB Disk
You can customize the server name and use the name to access your USB disk.
1. On the Sharing Settings part, make sure Network Neighborhood is ticked, and enter a Network/Media Server Name as you like, such as MyShare, then click Save.
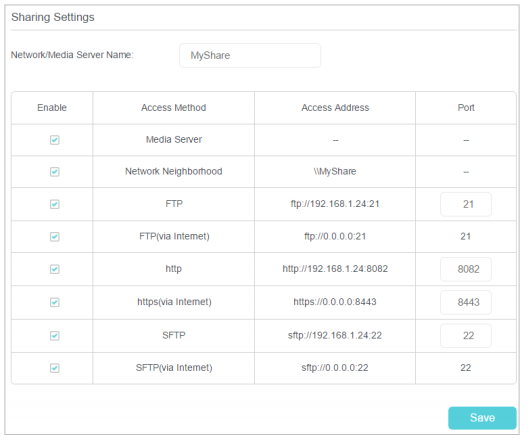
2. Now you can access the USB disk by visiting \\MyShare (for Windows) or smb:// MyShare (for Mac).
To Only Share Specific Content
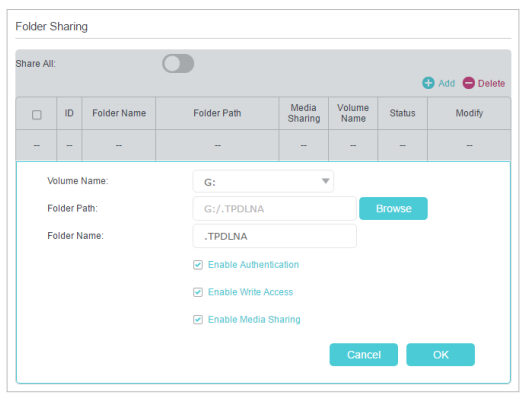
1. Focus on the Folder Sharing section. Click the button to disable Share All, then click Add to add a new sharing folder.
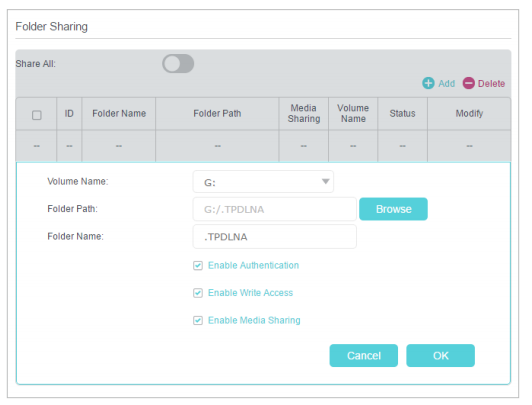
2. Select the Volume Name and Folder Path, then enter a Folder Name as you like.
3. Decide the way you share the folder:
• Enable Authentication: Select to enable authentication for this folder sharing, and you will be required to log in to the Sharing Account to access the USB disk.
• Enable Write Access: If you tick this check box, network clients can modify this folder.
• Enable Media Sharing: Tick to enable media sharing for this folder, and you can view photos, play music and watch movies stored on the USB disk directly from DLNA-supported devices. To learn more, please refer to How to configure Media Sharing on AC VDSL/ADSL Modem Router (new logo)?
4. Click OK.
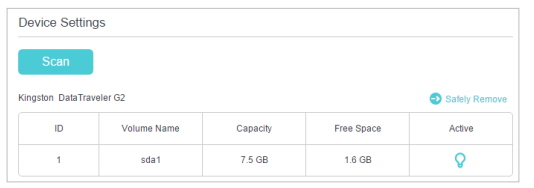
Tips: The modem router can share eight volumes at most. You can click  on the page to detach the corresponding volume you do not need to share.
To Set up Authentication for Data Security
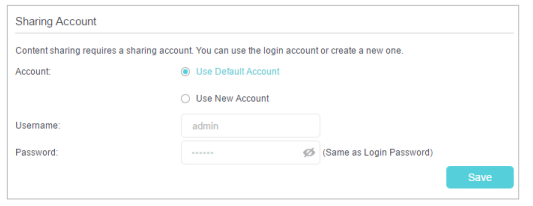
1. Under Sharing Account, choose Use Default Account or Use New Account. The user name and password are both admin for the default account. If your choose Use New Account, you have to customize the username and a password.
Note: For Windows users, do not set the sharing username the same as the Windows username. Otherwise, Windows credential mechanism may cause the following problems:
• If the sharing password is also the same as the Windows password, authentication will not work since the Windows system will automatically use its account information for USB access.
• If the sharing password is different from the Windows password, the Windows system will be unable to remember your credentials and you will always be required to enter the sharing password for USB access.
2. Specify the folder(s) to enable authentication.
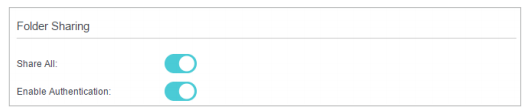
• If you want to enable authentication for all folders, leave Share All enabled, and toggle on Enable Authentication.
• If you want to enable authentication for specific folders, disable Share All and click Add to specify the folders, and select Enable Authentication.
Note: Due to Windows credential mechanism, you might be unable to access the USB disk after changing Authentication settings. Please log out from the Windows and try to access again. Or you can change the address of the USB disk.
Get to know more details of each function and configuration please go to Download Center to download the manual of your product.
Est-ce que ce FAQ a été utile ?
Vos commentaires nous aideront à améliorer ce site.


