
How to Set Up TP-Link Range Extender via the Tether App
This guide walks you through configuring your TP-Link range extender using the TP-Link Tether app. The app guides you through the setup process step by step, making it easy to extend your Wi-Fi coverage in minutes.
If your extender has an Ethernet port and you want to connect it to your router via an Ethernet cable, please refer to How to Configure Your TP-Link Range Extender to Access Point Mode.
Key Takeaways
- Use the Tether app to set up your extender quickly from your phone.
- Plug in the extender near your router during setup, then move it to the ideal location.
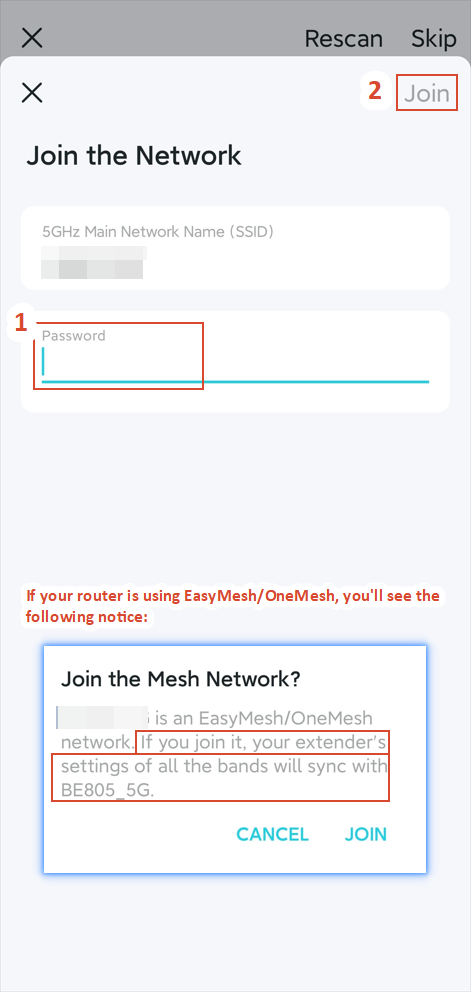
- If your router is broadcasting an EasyMesh or OneMesh wireless network, the extender will inherit the router’s wireless settings and cannot have its own SSID changed.
- Once connected successfully, the extender’s Signal LED will turn solid blue to confirm a good connection.
- After setup, you can manage your extender and enable auto-updates from the app.
Requirements
Before you begin, please ensure:
- Your TP-Link extender supports the Tether app (Tether compatibility list).
- You have downloaded the TP-Link Tether app from the App Store or Google Play.

- You are logged in with your TP-Link ID on the Tether app.
Step-by-Step Configuration Guide
Step 1: Prepare the Extender
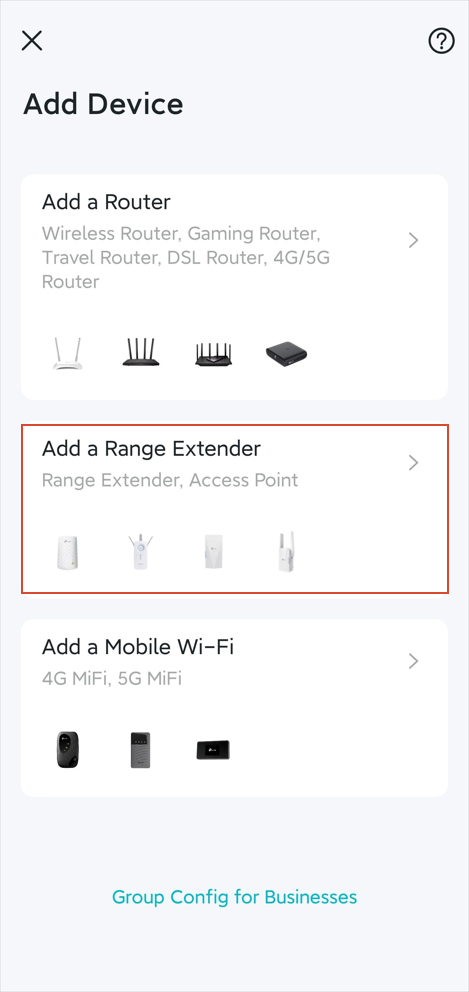
Open the Tether app on your phone.
Tap the + icon in the top-right corner.
Select Add a Range Extender.
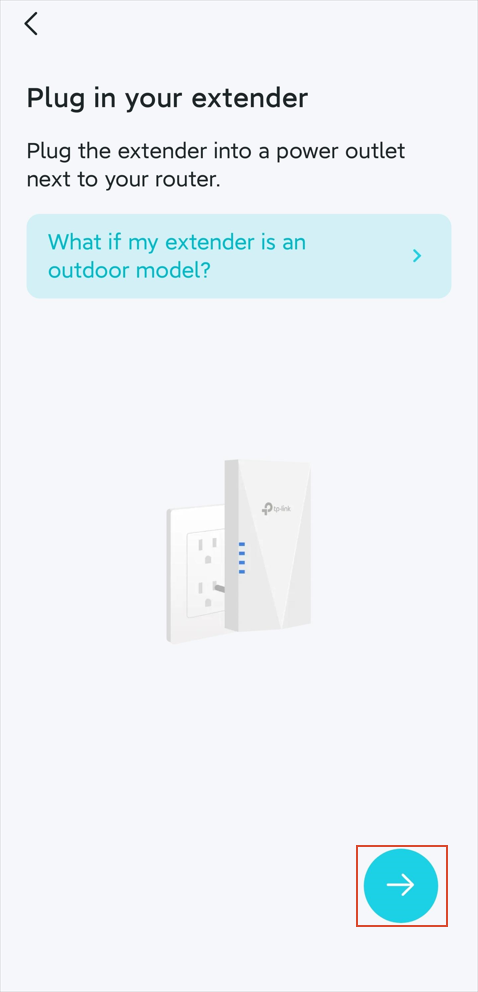
Power on the extender near the router (within 10ft, with a clear line of sight).
Tap the arrow icon at the bottom right to continue.
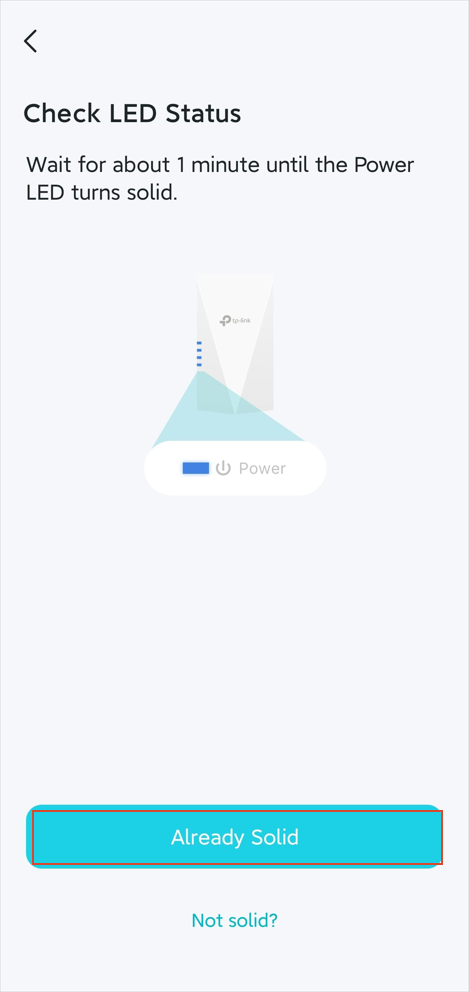
Wait until the power LED turns solid, then tap Already Solid.
Step 2: Connect the Extender to the Tether App
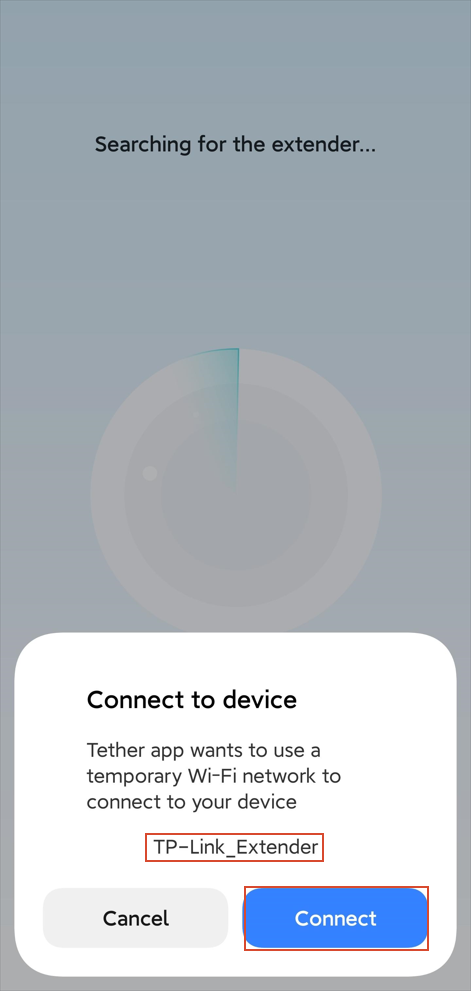
When prompted Connect to Device, click Connect. The app will automatically connect to the extender.
Once connected, the app will ask you to create a login password for managing the extender. Enter and confirm a password.
Note: If the app cannot find the extender, go to your phone’s Wi-Fi settings, connect to the TP-Link_Extender network, return to the Tether app, and tap Try Again.
Step 3: Connect the Extender to the Router
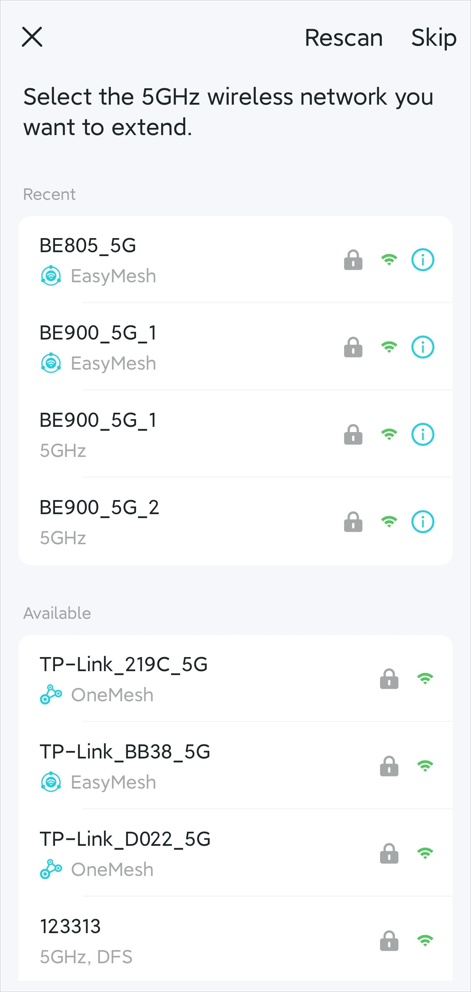
The app will scan for available wireless networks nearby (first 5GHz, then 2.4GHz).
Select your router’s 5GHz Wi-Fi network from the list, enter its password, and click Join. The app will test its connection.
Repeat the same process for 2.4 GHz.
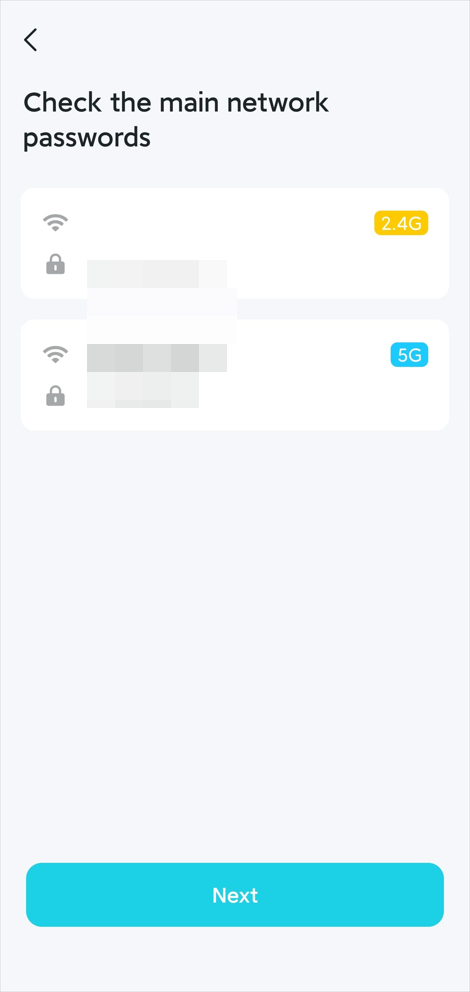
Ensure you’ve entered the correct password for your router’s Wi-Fi, and click Next.
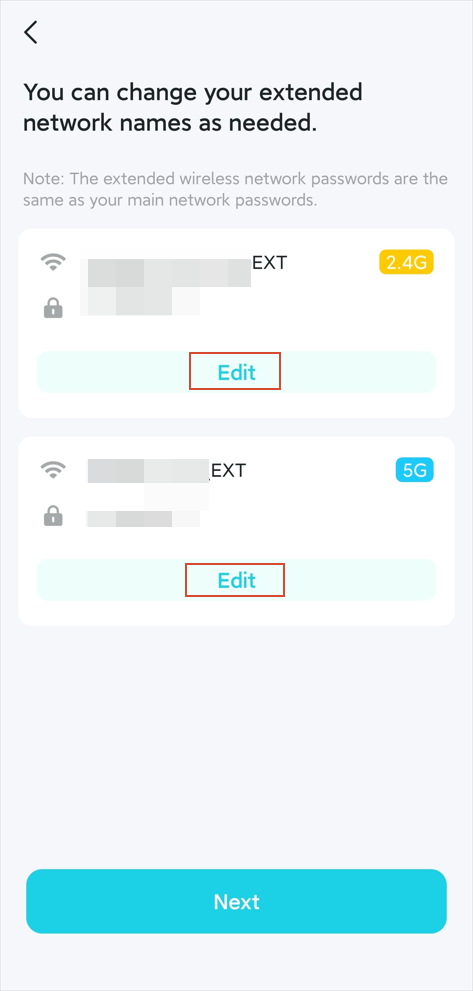
If you’d like to change the extender’s Wi-Fi name, click Edit. Once finished, click Next.
The extender will apply the settings, which takes 1-2 minutes.
When the extender successfully connects to the router, its Signal LED will turn solid blue. If it doesn’t light up, refer to Fail to Configure the TP-Link Range Extender for troubleshooting guidance.
Note: If your router uses EasyMesh/OneMesh, the extender will only connect to its 5GHz (skipping 2.4GHz) and will use the same Wi-Fi settings as the router.
Step 4: Relocate the Extender
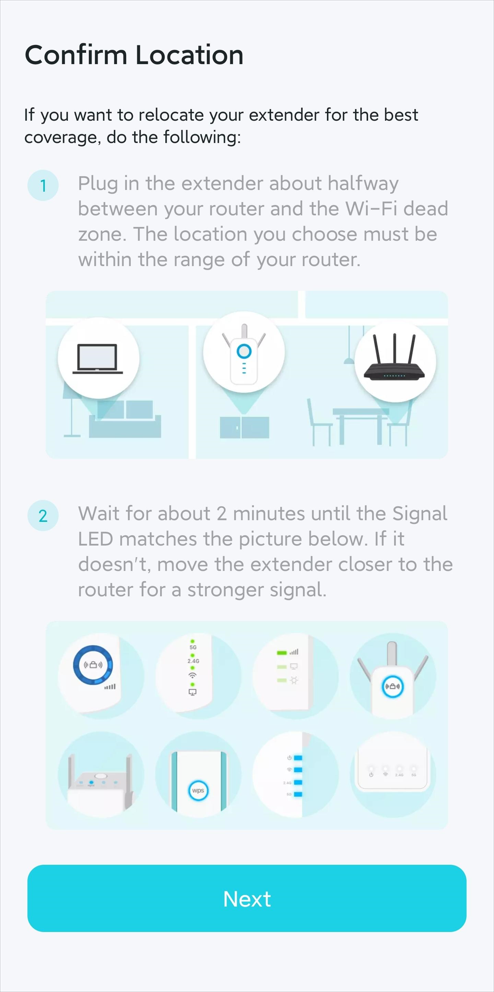
Unplug the extender, and place it halfway between your router and the area where you need better Wi-Fi coverage. For detailed guidance, refer to How to Place Your TP-Link Wi-Fi Extender for the Best Signal and Performance.
Wait until the Signal LED turns solid blue again, then click Next.
Note: If the signal light is red, the extender is experiencing a poor signal. Move it closer to the router.
Step 5: Connect Your Devices to the Extender
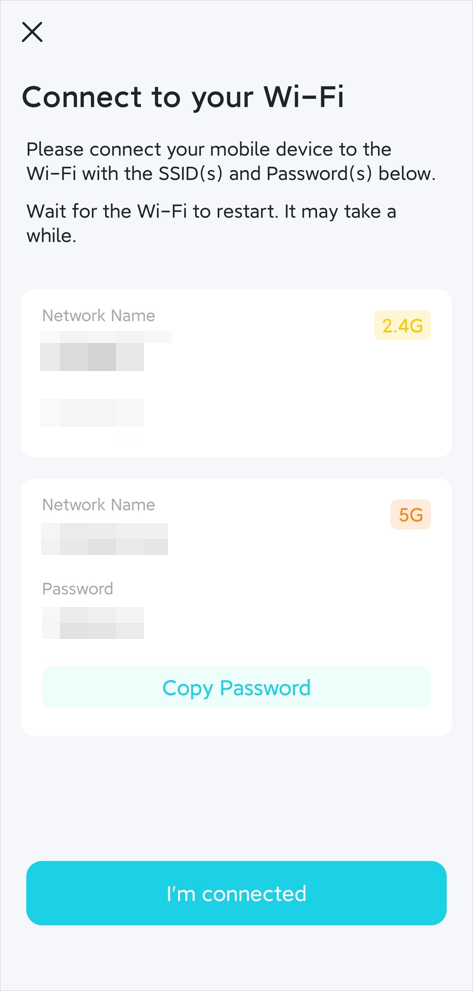
Connect your devices (phone, laptop, smart TV, etc.) to the extender's new Wi-Fi network using the name and password displayed in the app. Enjoy your extended Wi-Fi coverage!
Step 6: Enable Auto Update (Optional)
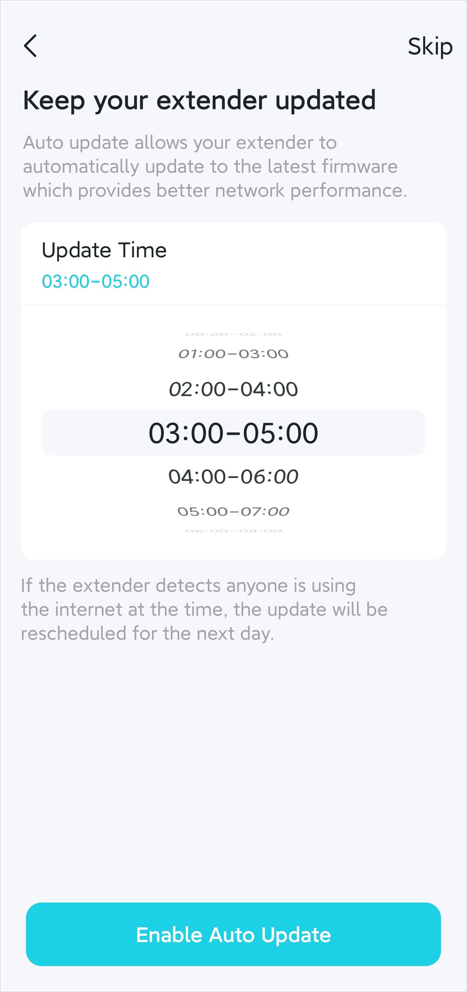
Select an Update Time range (e.g., 2:00 AM – 4:00 AM).
Tap Enable Auto Update to keep the extender’s firmware up to date automatically.
If you prefer not to enable this, tap Skip.
To get to know more details of each function and configuration, please go to the Download Center to download the manual for your product.
Looking For More
¿Es útil esta pregunta frecuente?
Sus comentarios nos ayudan a mejorar este sitio.



TP-Link Community
Still need help? Search for answers, ask questions, and get help from TP-Link experts and other users around the world.