How to access USB storage device on TP-Link ISP-customized Router from Windows or macOS
Introduction
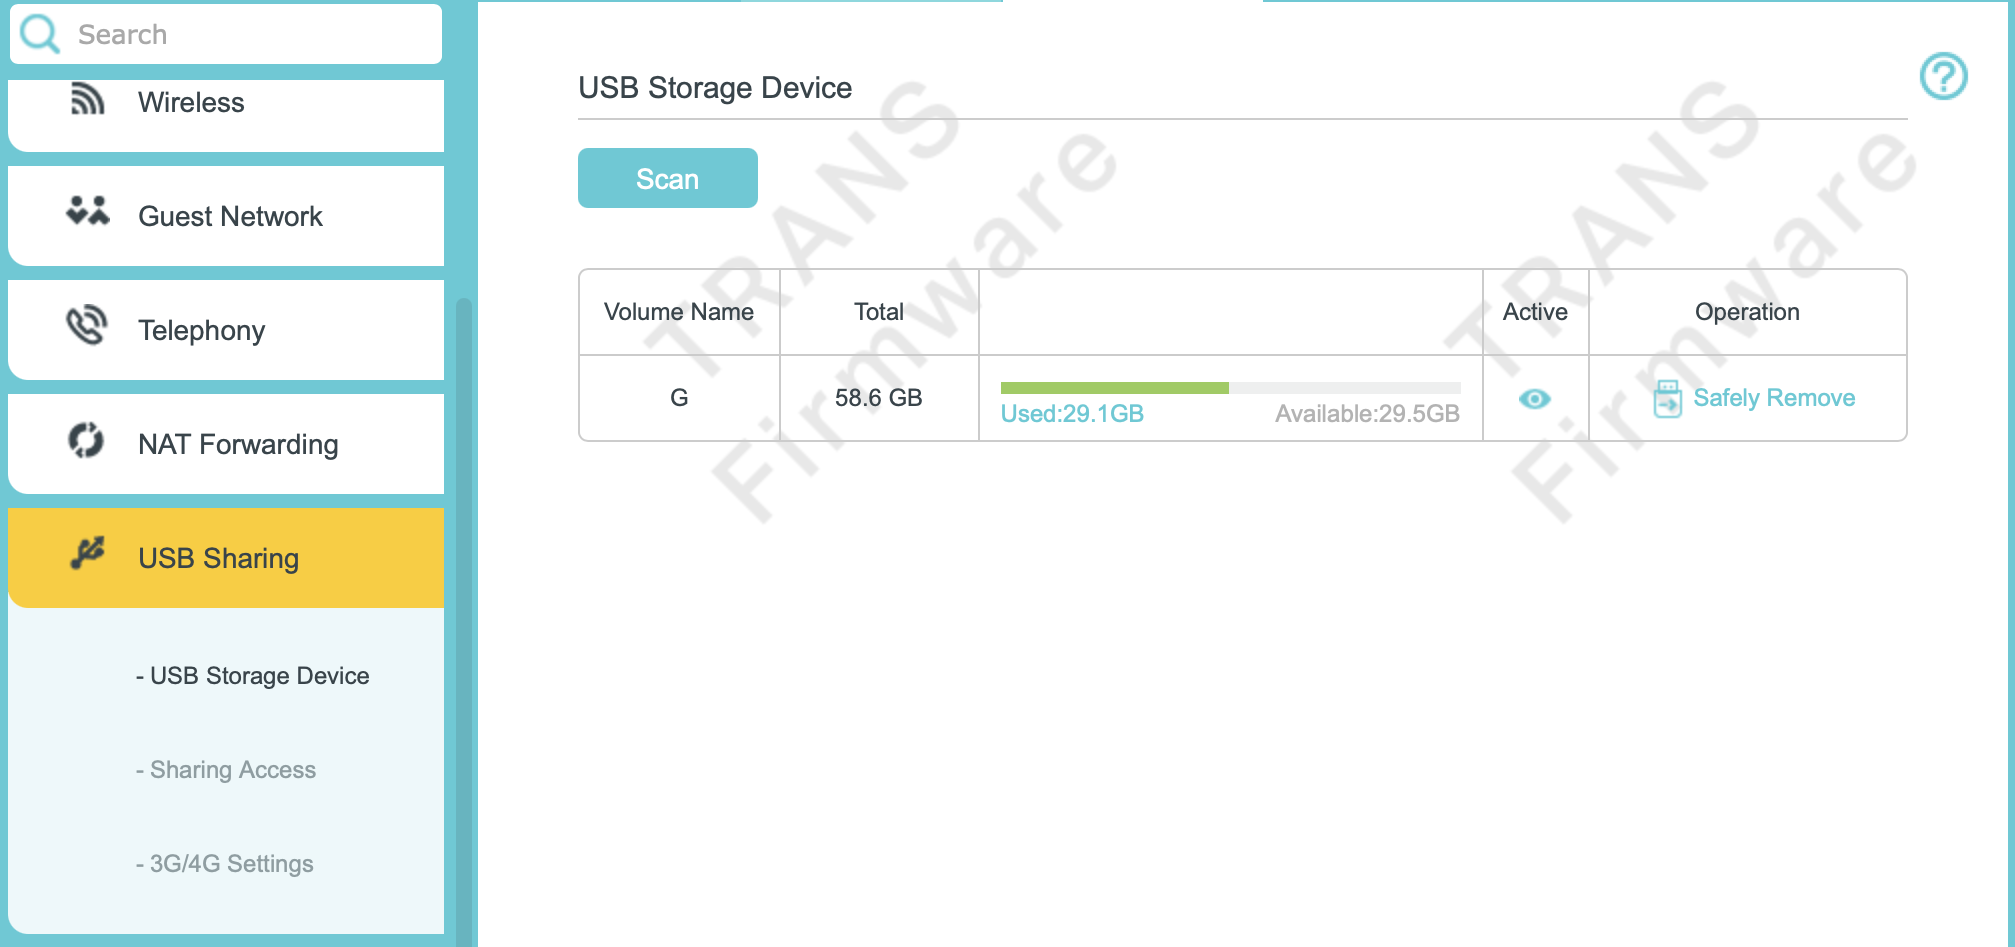
With the USB storage device plugged into the TP-Link router's USB port, log in to the router and go to USB settings under Advanced > USB Sharing > USB Storage Device. If the router recognizes the USB storage device, it will show up on this page.
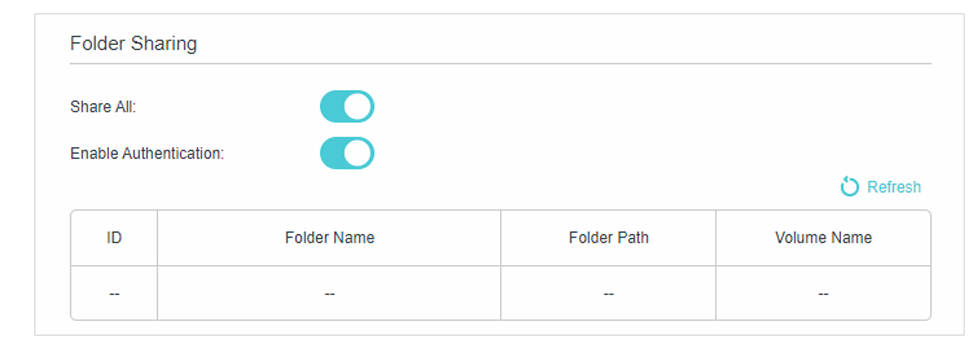
By default, all the network clients can access all folders on your USB disk. You can customize your sharing settings by setting a sharing account, sharing specific contents, and setting a new sharing address on the router’s web management page.
This article provides step-by-step instructions for configuring the USB storage function effectively via Windows and macOS.
Requirements
- If you use USB hubs, make sure no more than 4 devices are connected to the modem router.
- If the USB storage device requires using bundled external power, make sure the external power has been connected.
- If you use a USB hard drive, make sure its file system is FAT32, exFAT, NTFS, or HFS+.
- Before you physically disconnect a USB device from the router, safely remove it to avoid data damage: Go to Advanced > USB Sharing > USB Storage Device, click Safely Remove.
Configuration
Scenario 1: Access the USB drive locally
- Windows(SMB)
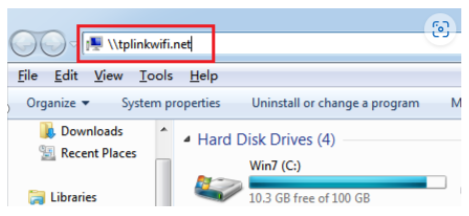
Step 1. Open File Explorer. Type \\tplinkwifi.net or \\192.168.0.1 (The LAN IP of the device)
Note: 192.168.0.1 is the router's LAN IP address. If you have changed it, please use the current LAN IP of TP-Link Router.
Step 2. Type in the username and password above to log in.
- Windows(FTP)
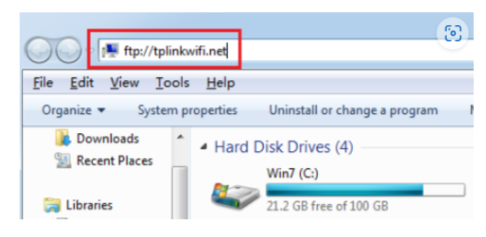
Step 1. Open File Explorer, type ftp://tplinkwifi.net or ftp://192.168.0.1. Type in the username and password above to log in.
Step 2. Go to Computer > Network, then click the Network Server Name (TPSHARE by default) in the Computer section.
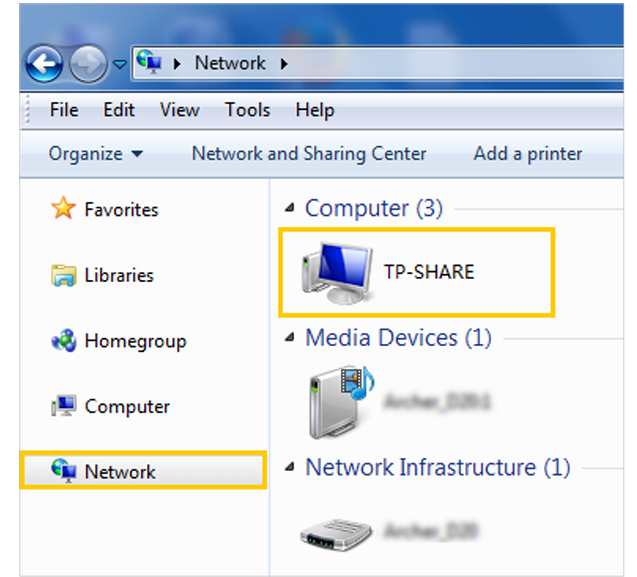
Note: Operations in different systems are similar. Here we take Windows 7 as an example.
- macOS(SMB)
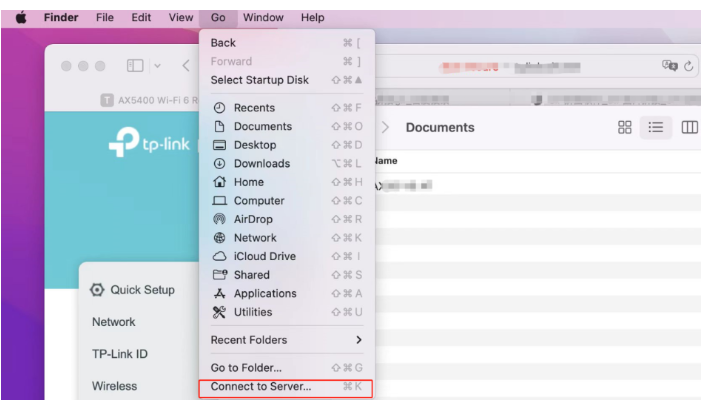
Step 1. Open Finder, select Go, then click “Connect to Server...”.
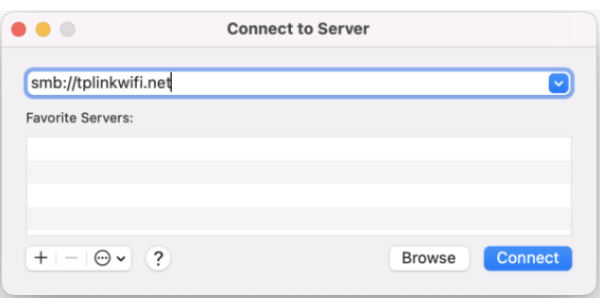
Step 2. Type smb://tplinkwifi.net or smb://192.168.0.1 .(192.168.0.1 is the LAN IP of router)
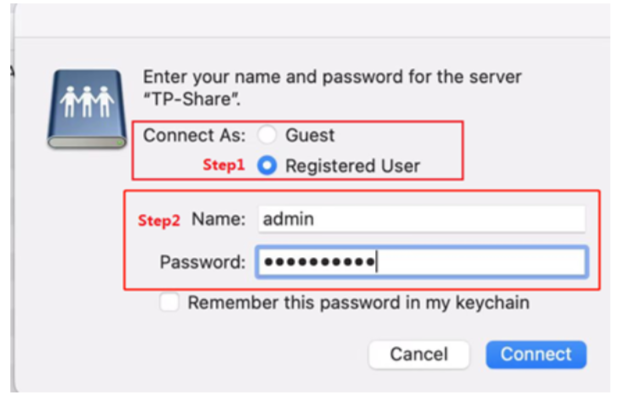
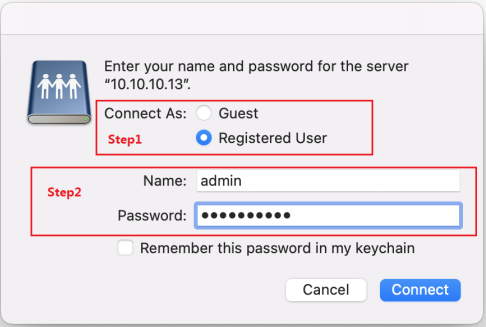
Step 3. When prompted, select the Guest radio box. If you have set up a username and password to deny anonymous access to the USB disks, select the Registered User radio box.
- macOS(FTP)
Step 1. Open Finder, select Go, then click “Connect to Server...”.

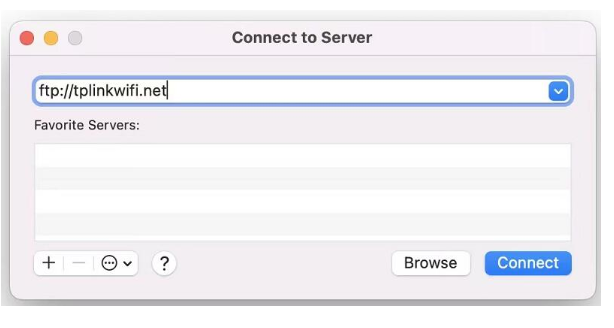
Step 2. Type ftp://tplinkwifi.net or ftp://192.168.0.1
Step 3. Type the username and password above to log in.
Scenario 2: Access the USB drive remotely
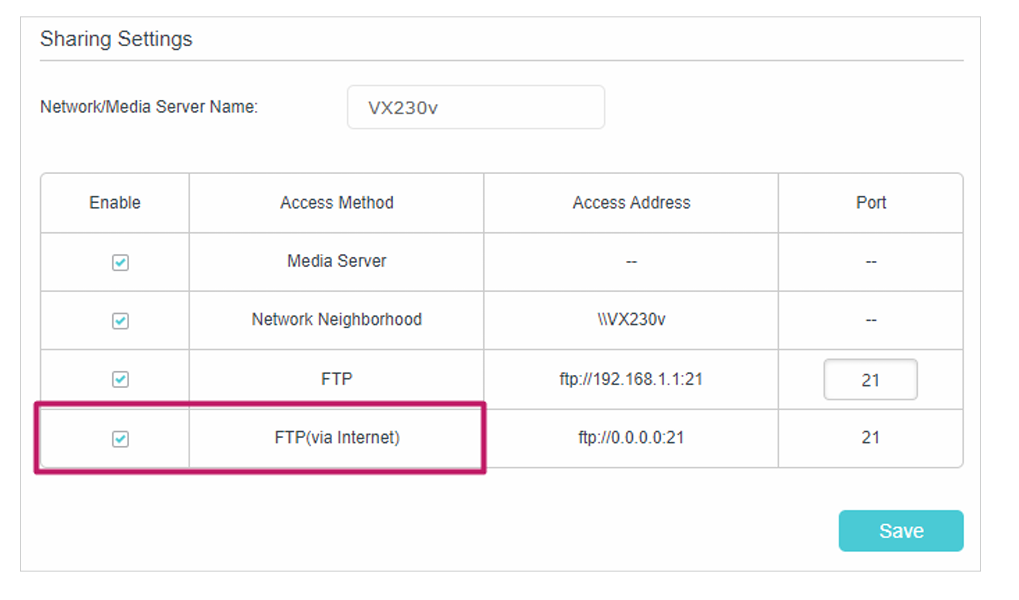
Please note that only FTP is supported for remote access to the USB drive. Check FTP(via Internet), then click Save to enable the Internet FTP service. Use the address shown in the screenshot to access the USB device remotely.
- Windows
Step 1. Open File Explorer.
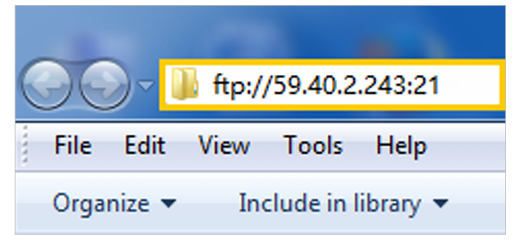
Step 2. Type the server address in the address bar. Type in ftp://<WAN IP address of the router>:<port number> (such as ftp://59.40.2.243:21). If you have specified the domain name of the router, you can also type in ftp://<domain name>:<port number> (such as ftp://MyDomainName:21)
Step 3. Press Enter on the keyboard.
Step 4. Access with the username and password you set in To Set Up Authentication for Data Security.
- macOS
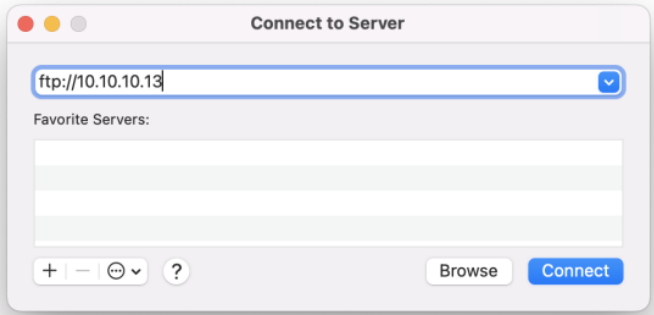
Step 1. Open Finder, select Go, then click “Connect to Server...”. Type in ftp://WAN IP to access the USB drive remotely. Type in your username and password to log in.
Scenario 3: Map a USB drive in the Windows system
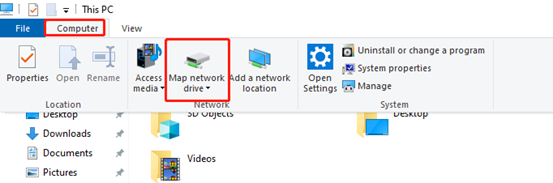
Step 1. Open Windows Explorer.
Step 2. Click Computer > Map network drive.
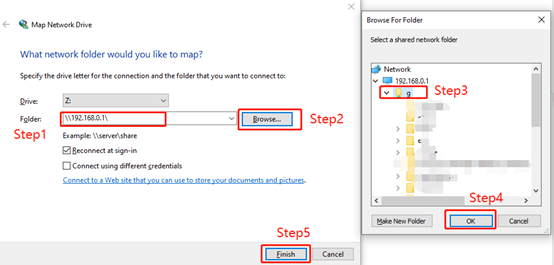
Step 3. Type \\192.168.0.1\ in the address bar. Then click Browse.
Step 4. Select the folder you want to share. Click OK, then click Finish.
Note: 192.168.0.1 is the router's LAN IP address. If you have changed it, please use the current LAN IP of our router.
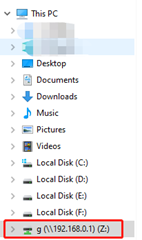
Step 5. After finishing, you can see the mapping drive in Windows Explorer.
QA
Q1: How to customize the address of the USB storage device
A1: You can customize the server name and use the name to access your USB storage device.
Step 1. Go to Advanced > USB Sharing> Sharing Access. In the Sharing Settings session, make sure Media Server is ticked, enter a Network/Media Server Name of your choice (e.g., MyShare), then click Save.
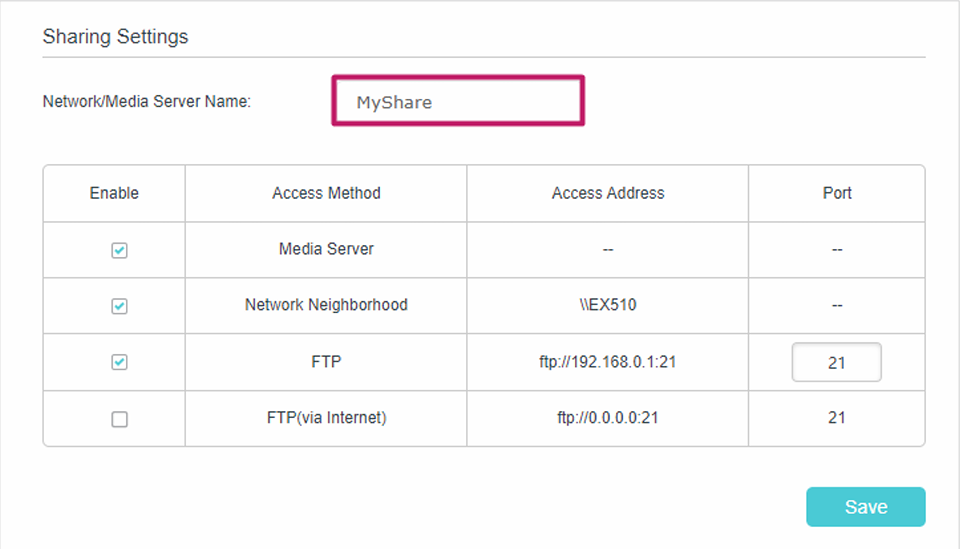
Step 2. Now you can access the USB storage device at \\MyShare (Windows) or smb://MyShare (Mac).
Q2: How to set up authentication for data security
A2: You can set up authentication for your USB storage device so that network clients will be required to enter the username and password when accessing the USB storage device.
Step 1. Go to Advanced > USB Sharing> Sharing Access. In the Sharing Account section, enable Use New Account.
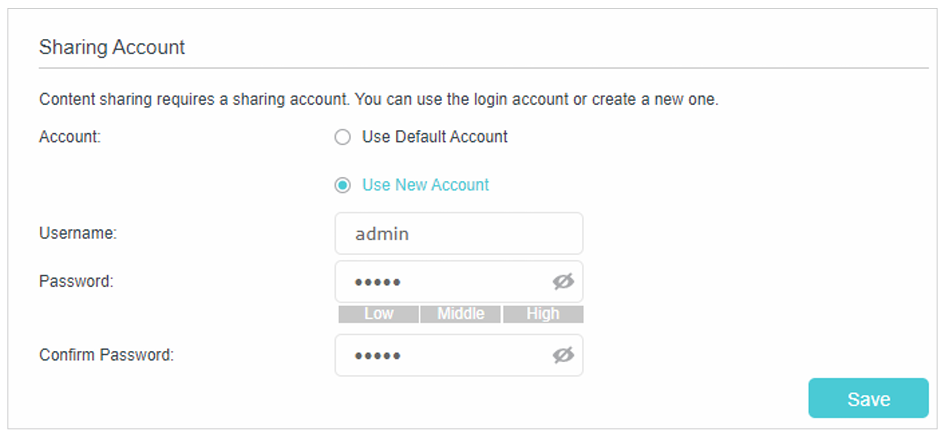
Step 2. Modify the access account. The username and password are both set to "admin" by default.
The administrator account allows you to access shared folders and modify them.
Note: For Windows users, do not set the sharing username to the same as the Windows username. Otherwise, the Windows credential mechanism may cause the following problems:
- If the sharing password is also the same as the Windows password, authentication will not work since Windows will automatically use its account information for USB access.
- If the sharing password is different from the Windows password, Windows will be unable to remember your credentials, and you will always be required to enter the sharing password for USB access.
Due to the Windows credential mechanism, you might be unable to access the USB disk after changing the authentication settings. Please log out of Windows and try to reaccess it. Or you can change the USB disk's address by referring to "To Customize the Address of the USB Storage Device."
Get to know more details of each function and configuration please go to Download Center to download the manual of your product.
這篇faq是否有用?
您的反饋將幫助我們改善網站


