How to set up Port Forwarding feature on my TP-Link ADSL Modem Router (Trendchip Solution)
Step 1 Open the web browser and type the IP address of the device in the address bar (default is 192.168.1.1). Press Enter .
Step 2 Type the username and password in the login page, the default username and password are both admin, then click OK to log into the device.
Step 3 Click Advanced Setup->NAT, and select the current Virtual Circuit you use.
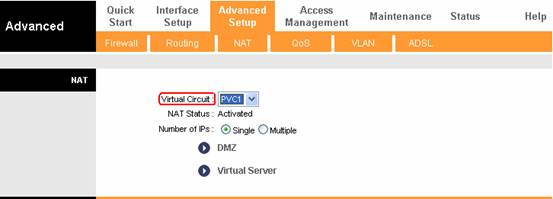
Step 4 Click Virtual Server to open Virtual Server configuration page.
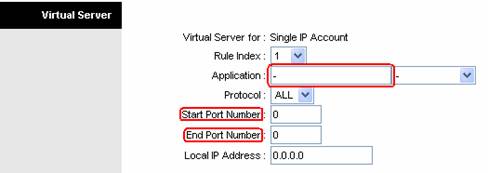
1. You can choose the option Application and select a service in the list, and then the ports for the server will be put into the entry automatically.

2. You also can type a server name on Application bar and type the ports for the server manually to configure custom server.
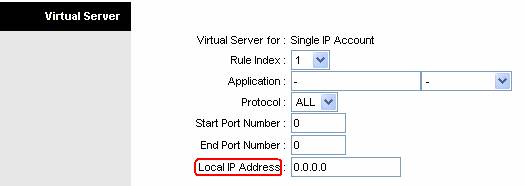
Step 5 Type the IP address of the computer the service is using on.
Step 6 Click Save button to save the settings.
Note:
You´d better assign a static IP address for your computer, so the Virtual Server entry will take effect all the time.
Get to know more details of each function and configuration please go to Download Center to download the manual of your product.
Is this faq useful?
Your feedback helps improve this site.

3.0-F1_1529482239075s.jpg)
TP-Link Community
Still need help? Search for answers, ask questions, and get help from TP-Link experts and other users around the world.