How to Enable and Configure IPv6 on Your Deco
Deco supports IPv6 internet connections, and you can enable Deco IPv6 directly in the Deco App. The connection type you select must match what your ISP provides. If you are unsure which type to use, contact your ISP before starting.
Throughout this guide, we use Deco M5 as an example.
Key Takeaways
- To enable IPv6 on your Deco, open the Deco App and go to More > Internet Connection > IPv6, then toggle it on and select your connection type.
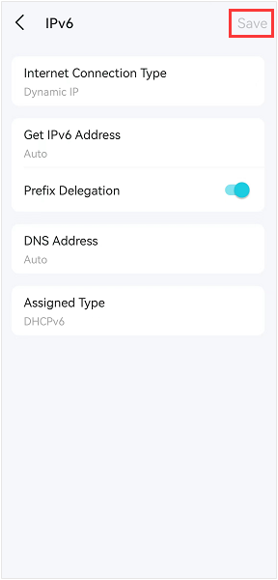
- There are four IPv6 internet connection types: Dynamic IP (default), PPPoE, 6to4 Tunnel, and Bridge. Your ISP will provide the correct type and any required credentials.
- For PPPoE, Deco uses the IPv4 account by default. If your ISP provides separate IPv4 and IPv6 accounts, disable Sync IPv4 Account and enter IPv6 credentials manually.
- The 6to4 Tunnel connection type requires an active IPv4 Internet connection as a prerequisite.
- If the Deco connects to another router that provides IPv6 access to all connected devices, use the Bridge connection type.
- Once saved, check whether your devices show an IPv6 connection.
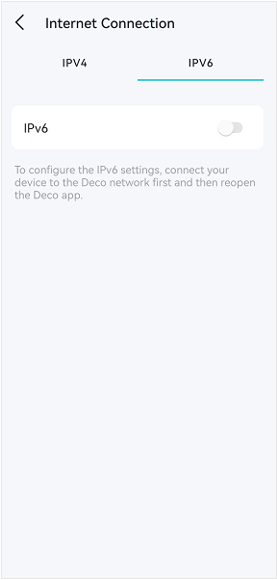
Note: Before setting up an IPv6 internet connection on your Deco app, please make sure your phone is connected to the Deco network.
Here we take the Deco M5 as an example.
Steps to Enable IPv6 on Deco
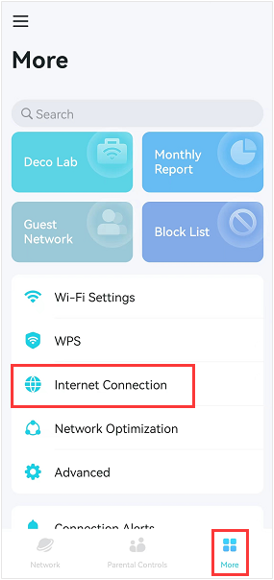
1. Launch the Deco app, and go to More > Internet Connection> IPv6 to enable it.
2. Select the IPv6 connection type provided by your ISP.
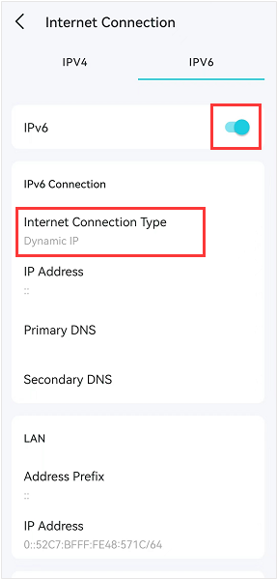
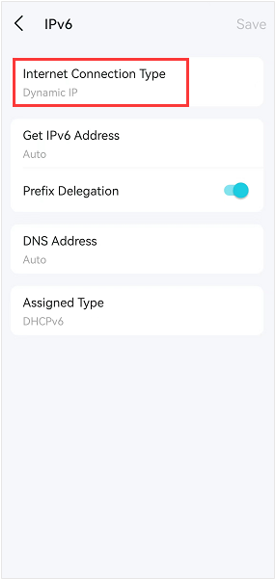
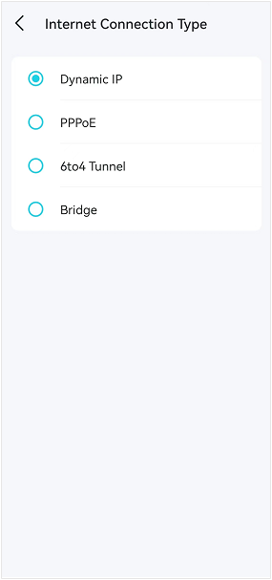
There are four IPv6 internet connection types: Dynamic IP (by default), PPPoE, 6to4 tunnel, and Bridge. Your ISP will provide the configuration details for your connection type.
Note: Contact your ISP if you do not know your IPv6 connection type or configuration details.
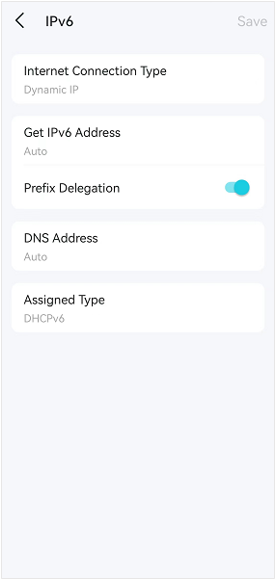
Dynamic IP
Select the proper information as required.
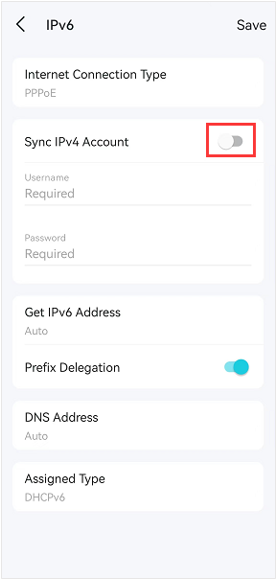
PPPoE
By default, the router uses the IPv4 account to connect to the IPv6 server. If your ISP provides two separate accounts for IPv4 and IPv6, disable the Sync IPv4 Account switch and manually enter the IPv6 username and password.
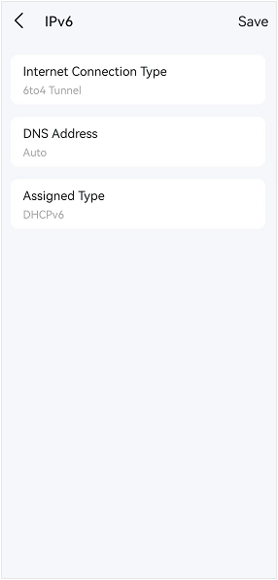
6to4 Tunnel
Select the proper information as required. An IPv4 internet connection is required for this connection type.
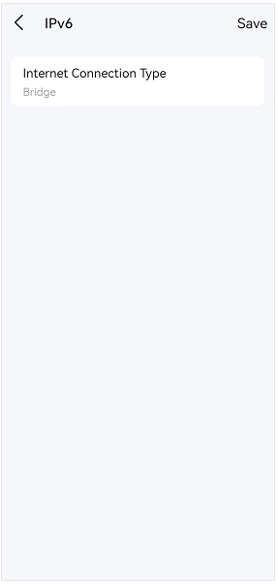
Bridge
If your Deco is connected to another router that provides IPv6 Internet access to all connected devices, you’ll need to select Bridge as the Internet Connection Type.
3. Tap Save to apply your settings.
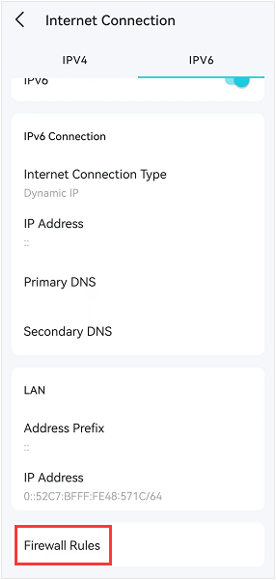
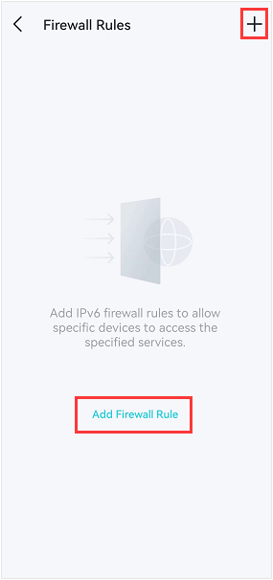
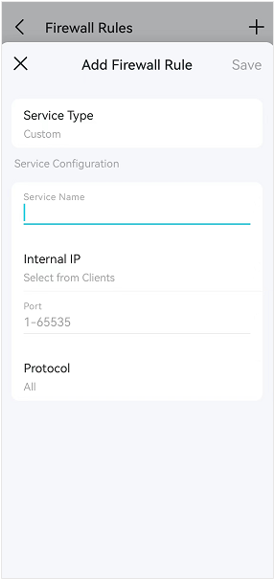
4. (Optional) Tap Firewall Rules on the Internet Connection>IPv6 page, click on the + icon, or tap Add Firewall Rule to allow specific devices to access the specified services.
Looking For More
Is this faq useful?
Your feedback helps improve this site.
TP-Link Community
Still need help? Search for answers, ask questions, and get help from TP-Link experts and other users around the world.