How to Find Your IP Address on Windows, Mac, iPhone, Android, and More
This page covers how to find the IP address on your device, with step-by-step instructions for Windows (XP, 7, Vista, 8, and 10), Mac OS, Chrome OS, iPhone, and Android. An IP address (Internet Protocol address) is a unique number assigned to your device on a network. You may need to find it for network troubleshooting, port forwarding, or device configuration. Jump directly to your operating system or device type below.
Key Takeaways
- An IP address is a unique number assigned to your device on a network. It is needed for tasks like network troubleshooting, port forwarding, and device configuration.
- On Windows 10, find your IP address by going to Control Panel > Network and Internet > Network and Sharing Center > Change adapter settings, then right-clicking Ethernet or Wi-Fi and selecting Status > Details.
- On Mac OS, go to System Preferences > Network, then select your connection type (Ethernet or Wi-Fi). Your IP address appears beneath the connection status.
- On iPhone, go to Settings > WLAN, tap the (i) icon next to your connected network, and your IP address will appear under the address section.
- On Android, go to Settings > WLAN, select your connected Wi-Fi network, and your IP address will be displayed.
When your computer is connected to a network, it will be assigned an address on the network called an IP address.
The steps below will help you to find the IP address of your computer. There are two ways to find your computer's IP address.
Find Your IP Address by Device or Operating System
Step 1. Click Start > Control Panel > select and click Network and Internet Connections (If you can´t find it, please go next) > select and double-click Network Connections.
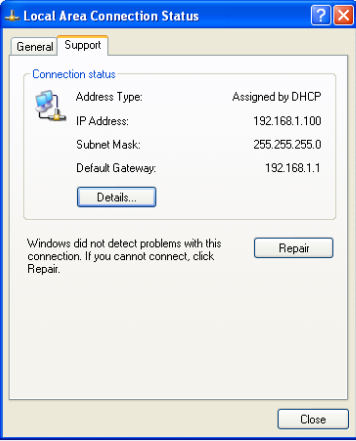
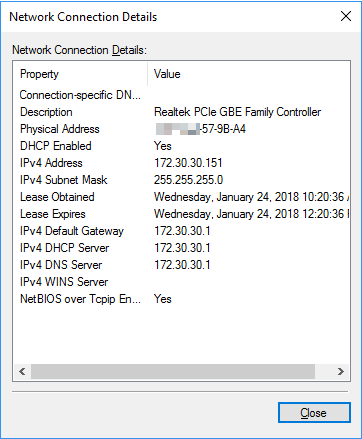
Step 2. Highlight and right-click the Local Area Connection icon, then click Status and go to Support. The IP address will display.
Note: If your computer is connected to a wireless network, please click the Wireless network connection icon.
Step 1. Click Start > Control Panel > Network and Internet Connections (if you can't find it, skip to the next step) > Network Connections.
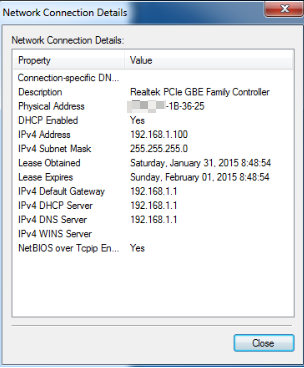
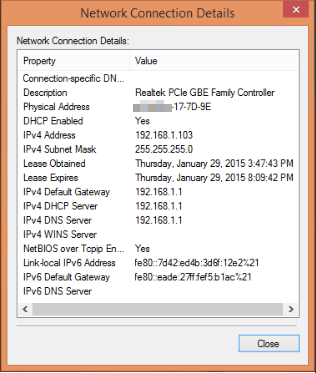
Step 2. In the task list, please click Change adapter settings. Highlight and right-click the Local Area Connection icon; click on Status and go to Details. The IP address will display.

Note: If your computer is connected to a wireless network, please click the Wireless network connection icon.
Step 1. Click Start > Control Panel > Network and Internet > Network and Sharing Center.
Step 2. In the task list, please click Manage network connections. Highlight and right-click the Local Area Connection icon; click on Status and go to Details. The IP address will display.
Note: If your computer is connected to a wireless network, please click the Wireless network connection icon.
Step 1. Go to the Control Panel.
Here we will illustrate different ways to find a control panel on Windows 8.
1) Press “Windows key 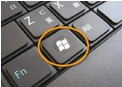 +F”, a search box will come out, please input the control panel and press enter.
2)Press “Windows key+ R”, then there will be a “run” box, input control panel, and press enter;
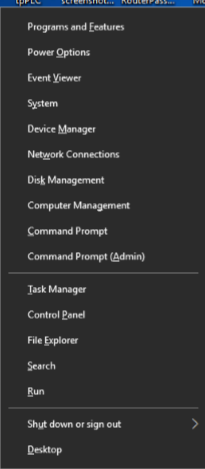
3) Press “Windows key +X”, and click on “Control Panel”;
4) You can also input “control panel” in the search bar on the right-hand side of the screen.
Step 2. Click Network and Internet > Network and Sharing Center, then click Change adapter settings on the left side.
Step 3. Highlight Ethernet, then right-click and select Status > Details. The IP address will display.
Note: If your computer is connected to a wireless network, please click the Wi-Fi icon.
Step 1. Go to the Control Panel. Press Windows key+X at the same time and select Control Panel.
Step 2. Click Network and Internet > Network and Sharing Center, then click Change adapter settings on the left side.
Step 3. Highlight Ethernet, then right-click and select Status > Details. The IP address will display.
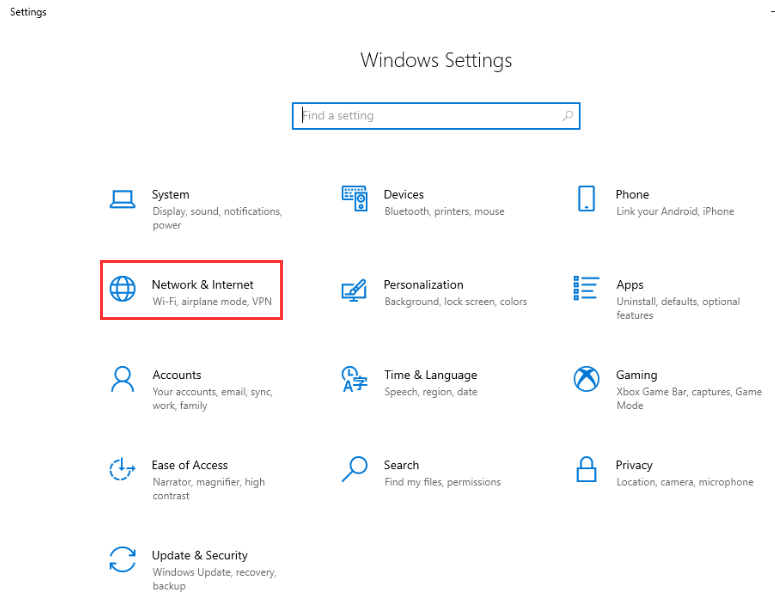
Step 1. Go to Network settings page.
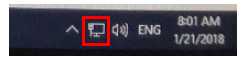
Situation 1. Click the network icon (which may look like a computer or Wi-Fi signal) in the taskbar. Go to Network settings.

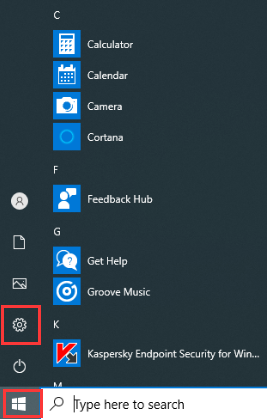
Situation 2. Click the Windows symbol and then choose the Settings button in the bottom-left corner. It will pop up on the Settings page, go to Network & Internet.
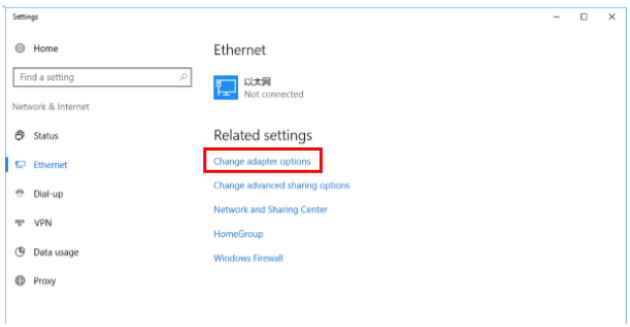
Step 2. Click Ethernet > Change adapter options. Or click Status > Change adapter options. The IP address will display.

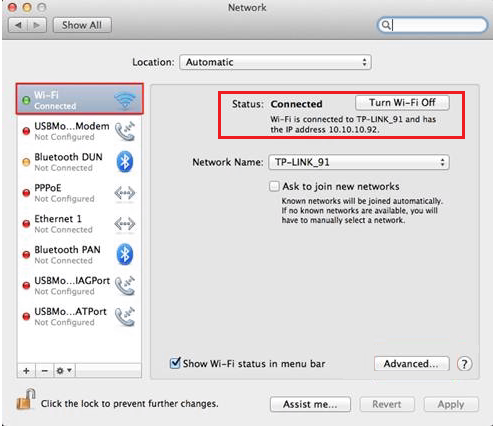
Step 1. Click the Apple icon, then select System Preferences from the Apple drop-down list.
Step 2. Click the Network icon.
Step 3. In the left column, select Ethernet (for wired connection) or Wi-Fi (for wireless connection). Your IP address will be listed directly beneath your connection status, in smaller print.
Step 1. Select the Time in the bottom-right corner of the screen. If you don't see the Chrome OS shelf, tap or click in the bottom-right corner of the screen to bring it up.
Step 2. Select your Wi-Fi network in the pop-up window.
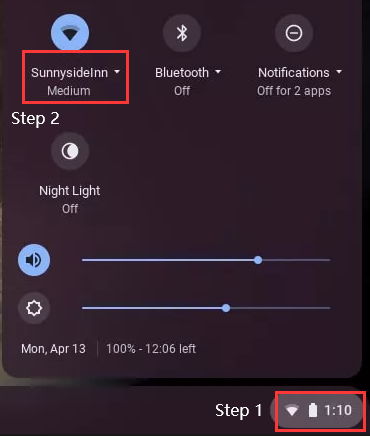
Step 3. Click the Network icon.
Step 4. Your Chromebook's IP address and MAC will appear in a small pop-up window. The MAC address is listed as Wi-Fi.
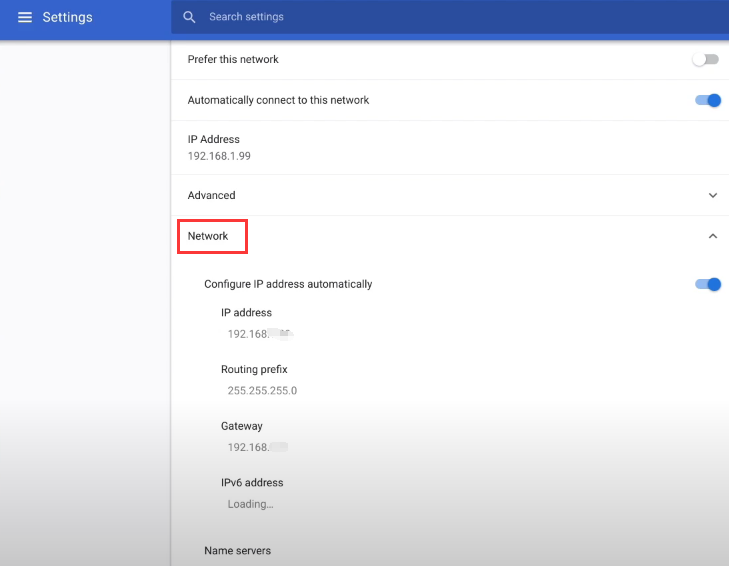
Step 5. Double-check your Wi-Fi name, and it will pop up on the Settings page. Click on Network, and you will also see the IP Address, Subnet Mask, and Default Gateway.
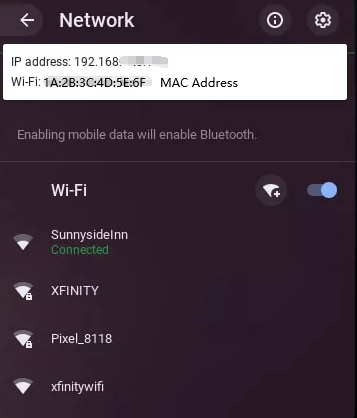
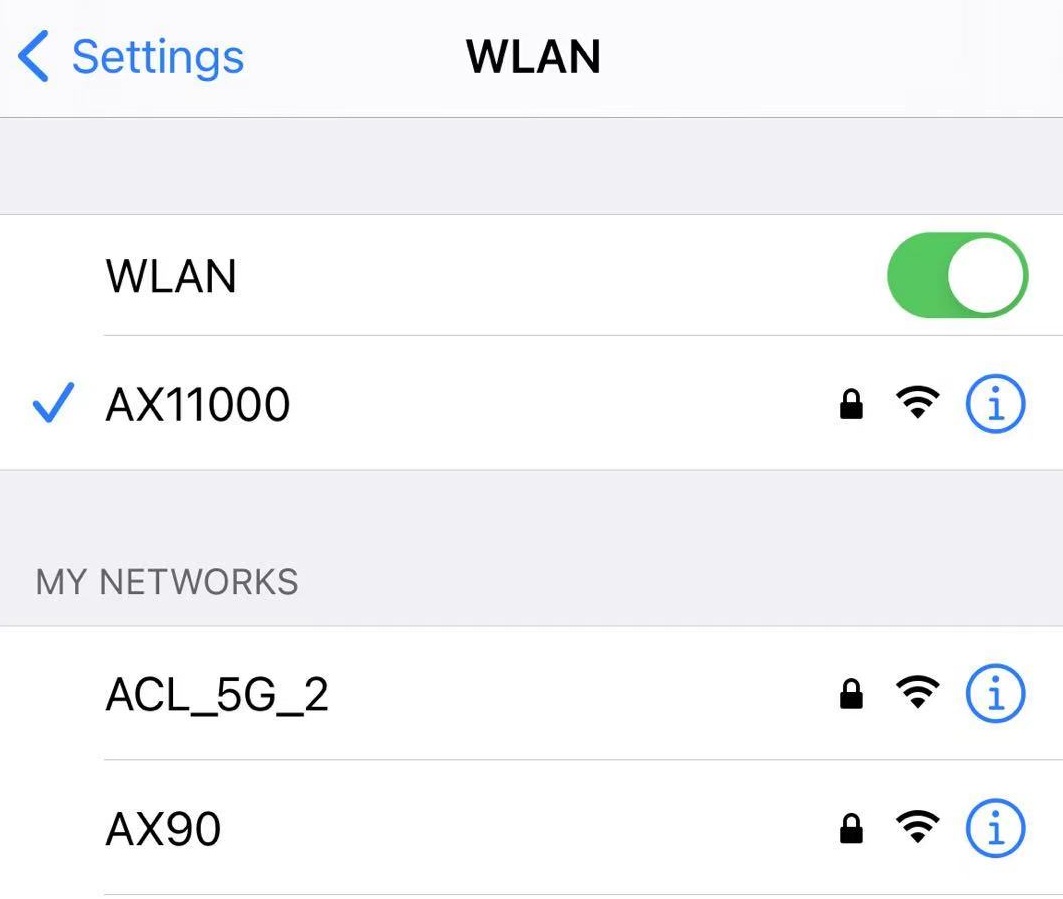
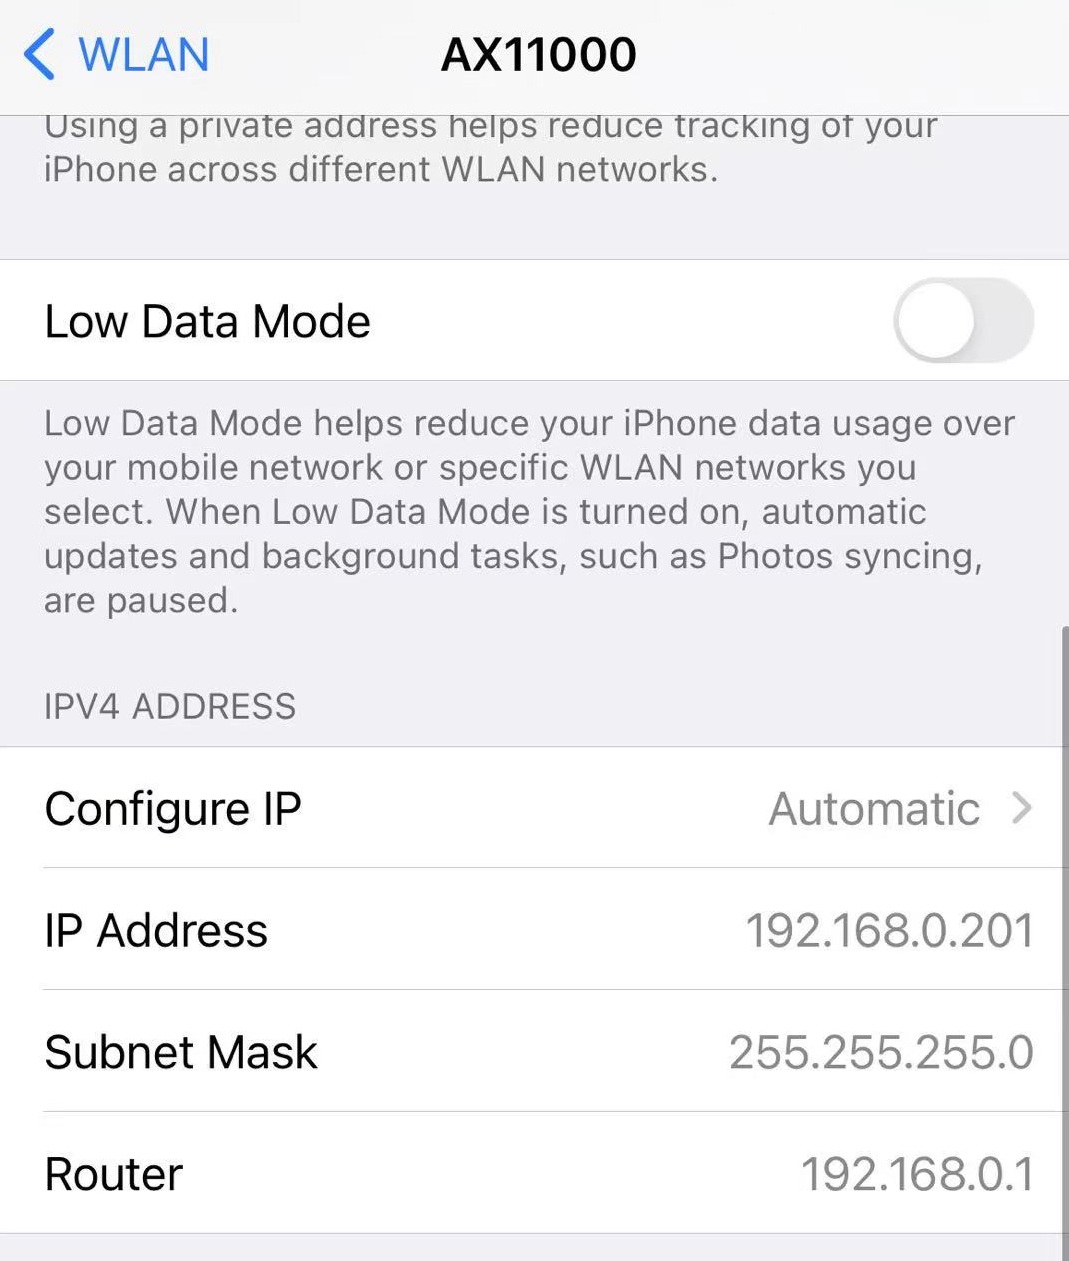
Step 1. On your device's home screen, tap Settings, then select WLAN.
Step 2. Select the information icon to the right of the connected network. Tap on the blue lowercase ( i ) in the circle for the address section of your iPhone.
The title labeled "IP Address" is your iPhone's local IP address.
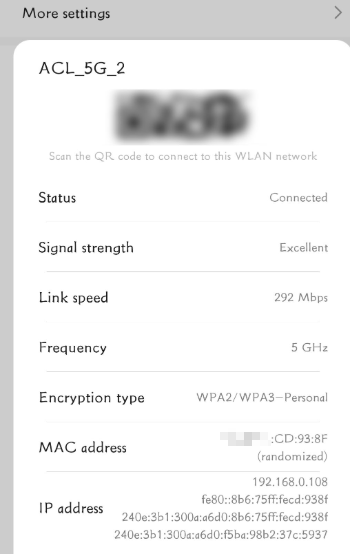
Step 1. On your device, access Settings and choose WLAN.
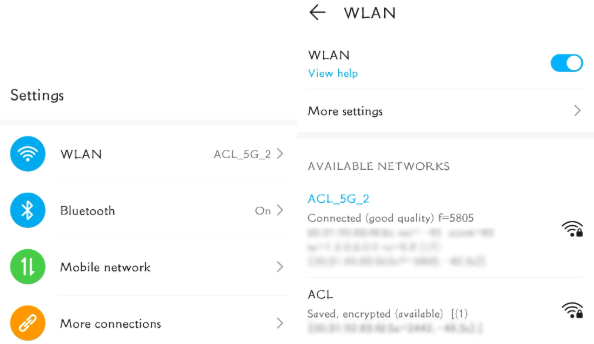
Step 2. Select the Wi-Fi network you are connected to — your IP address will be displayed.
Looking For More
Questa faq è utile?
Your feedback helps improve this site.
TP-Link Community
Still need help? Search for answers, ask questions, and get help from TP-Link experts and other users around the world.