How to configure IP & MAC Binding on TP-Link ISP-customized Router
Introduction
This article provides step-by-step instructions for configuring IP & MAC Binding on the ISP-customized router.
IP & MAC Binding, namely, ARP (Address Resolution Protocol) Binding, is used to bind a network client’s IP address to its MAC address. This will prevent ARP spoofing and other ARP attacks by denying network access to a client with a matching IP address in the Binding list, but an unrecognized MAC address.
Configuration
Step 1. Log in to the web management interface.
Step 2. Go to Advanced > Security > IP & MAC Binding and enable IP & MAC Binding.
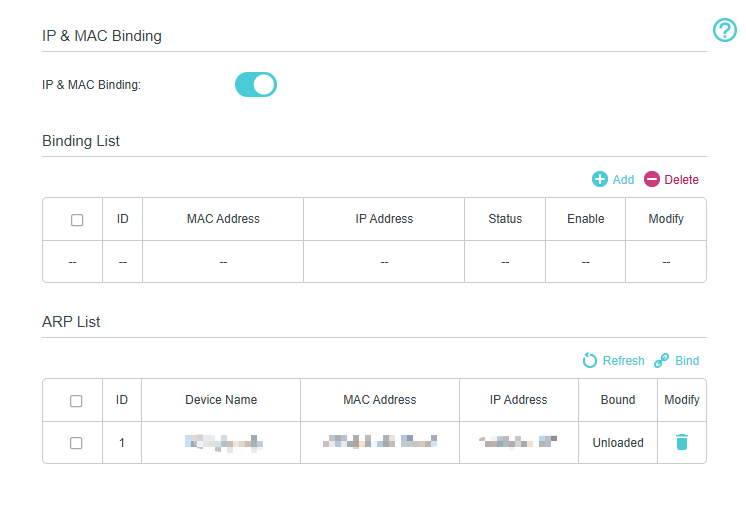
Step 3. Bind your client (s) according to your needs.
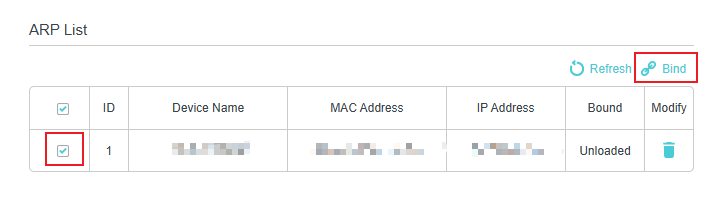
Scenario 1: To bind the connected client (s)
- Select the client (s) to be bound in the ARP List.
- Click Bind to add to the Binding List.
Scenario 2: To bind the unconnected client
- Click Add in the Binding List.
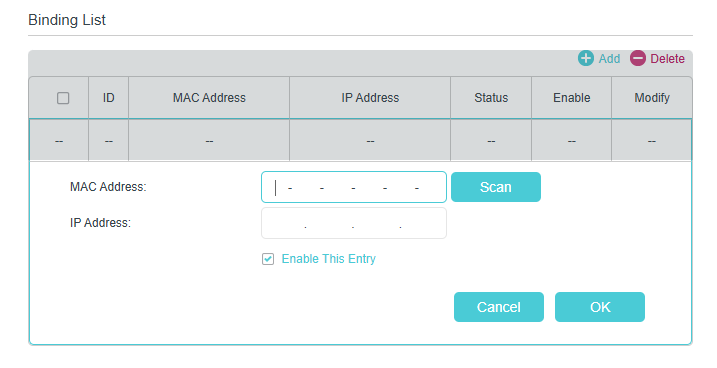
- Enter the MAC address and IP address that you want to bind.
- Select the check box to enable this entry and click OK.
QA
Q1: Why can’t I find my client in the ARP List when trying to bind it?
A1: Your client may not be connected to the router, or it may have obtained an IP address from a different network segment. Ensure the client is online and renew its IP address by reconnecting to the router.
Q2: What happens if two clients use the same IP address after binding?
A2: Only the client with the correct MAC address will be allowed to access the network. Other clients using the same IP address will be blocked automatically.
Q3: Can I bind multiple IP addresses to the same MAC address?
A3: No. Each entry must be a one‑to‑one relationship (one IP address bound to one MAC address). If multiple clients need static control, create separate entries for each client.
Q4: Why does my client lose Internet access after enabling IP & MAC Binding?
A4: This usually occurs when the client's MAC address or IP address does not match the entry in the Binding List. Delete the incorrect entry and create a new one.
Get to know more details of each function and configuration please go to Download Center to download the manual of your product.
Questa faq è utile?
Your feedback helps improve this site.

-1.0_overview_listpage_normal_20251120072446k.png)