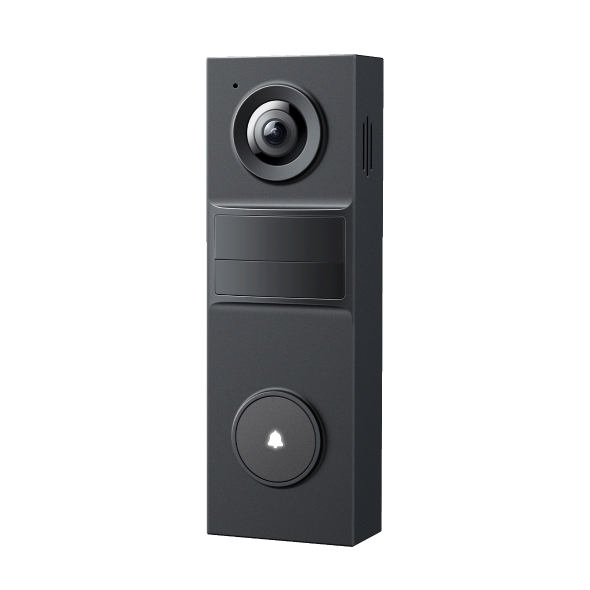
How to install Tapo Doorbell (Tapo D205)
The Tapo D205 uses a new base fixing method; this article will guide you on how to mount the Tapo D205.
There are two ways to install the base.
Mount Option 1. Stick to the wall
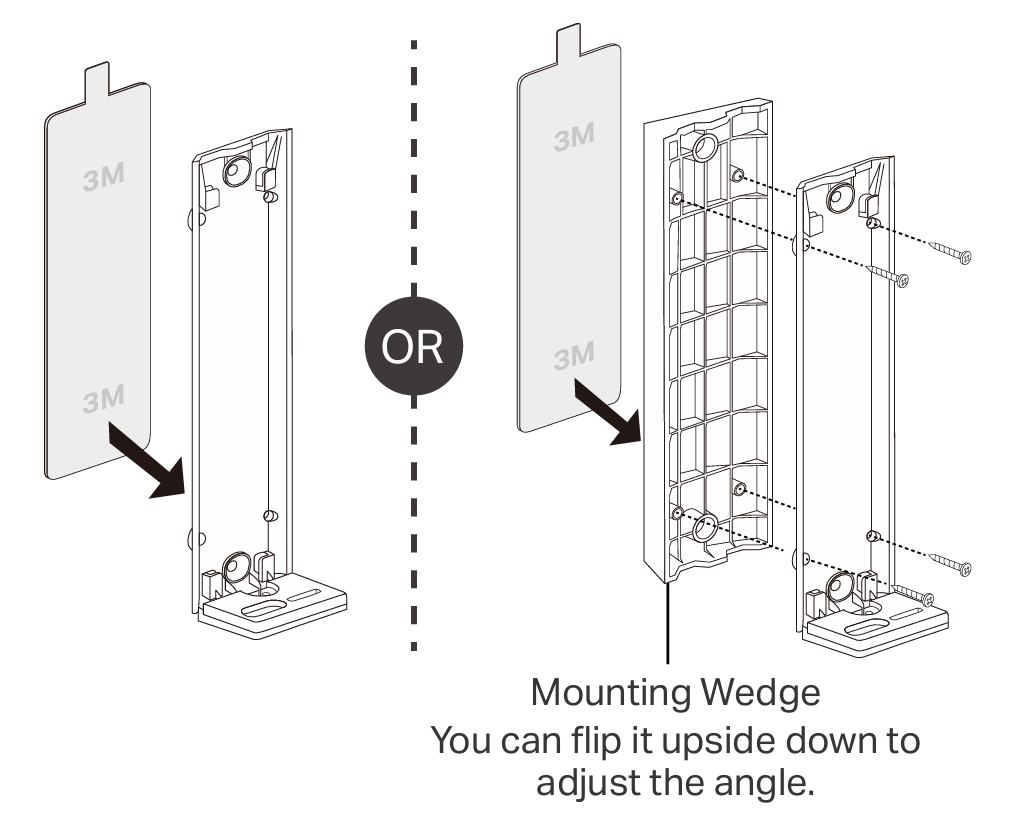
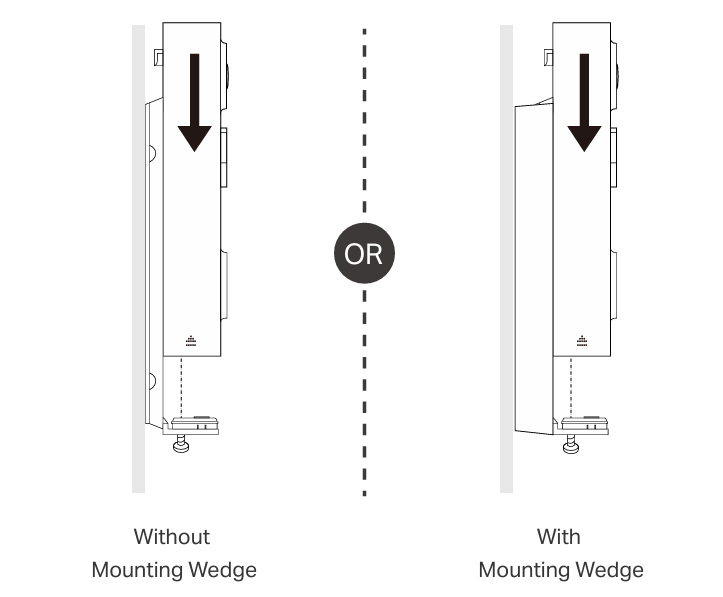
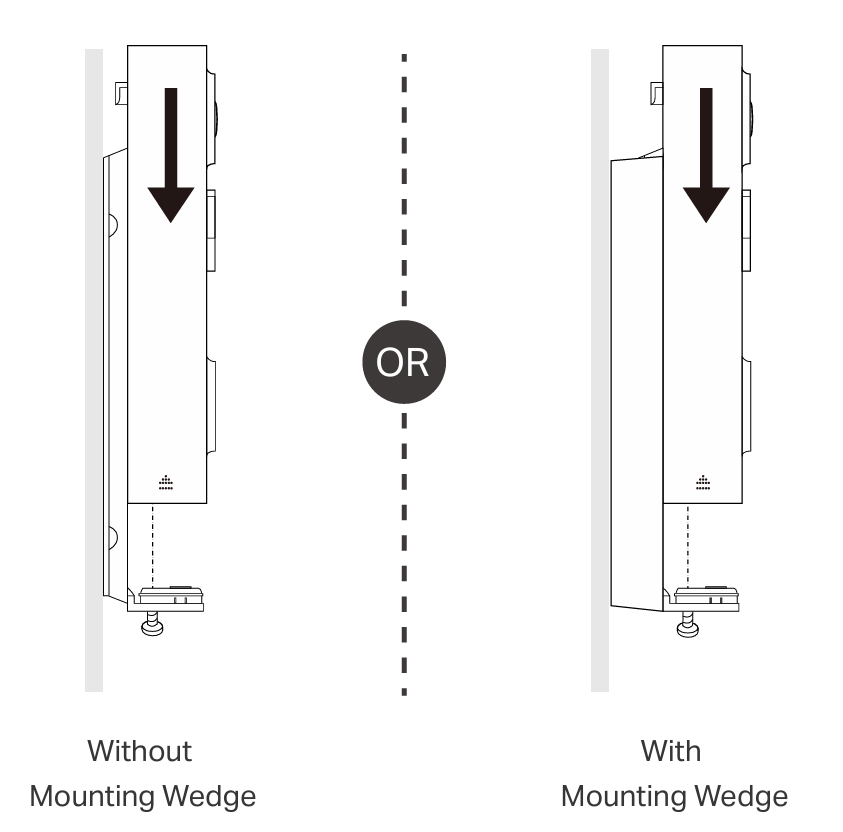
Step 1. Press the top of the mounting bracket and push down to separate it from the doorbell. Attach the included adhesive to the bracket or wedge. If you use the wedge to adjust the angle, first affix the bracket and the wedge with the mounting wedge screws.
Note: The adhesive is for one-time use. Avoid reusing the adhesive to ensure its adhesion.
Step 2. Wipe the surface with a dry cloth, then stick the bracket (or bracket with wedge) with adhesive to a clean wall. Press for 15 seconds to ensure it’s firmly attached. Attach the doorbell to the bracket, sliding down to the bottom until it clicks into place. Then tighten the screw at the bottom to secure the doorbell.
Note: This applies to tile, glass, marble, metal, stainless steel, and smooth wall surfaces.
Mount Option 2. Mount to the wall
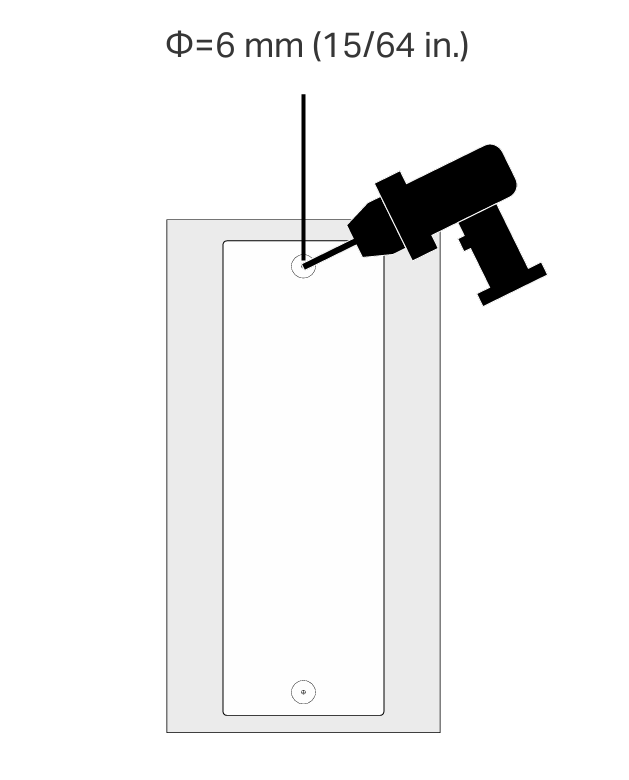
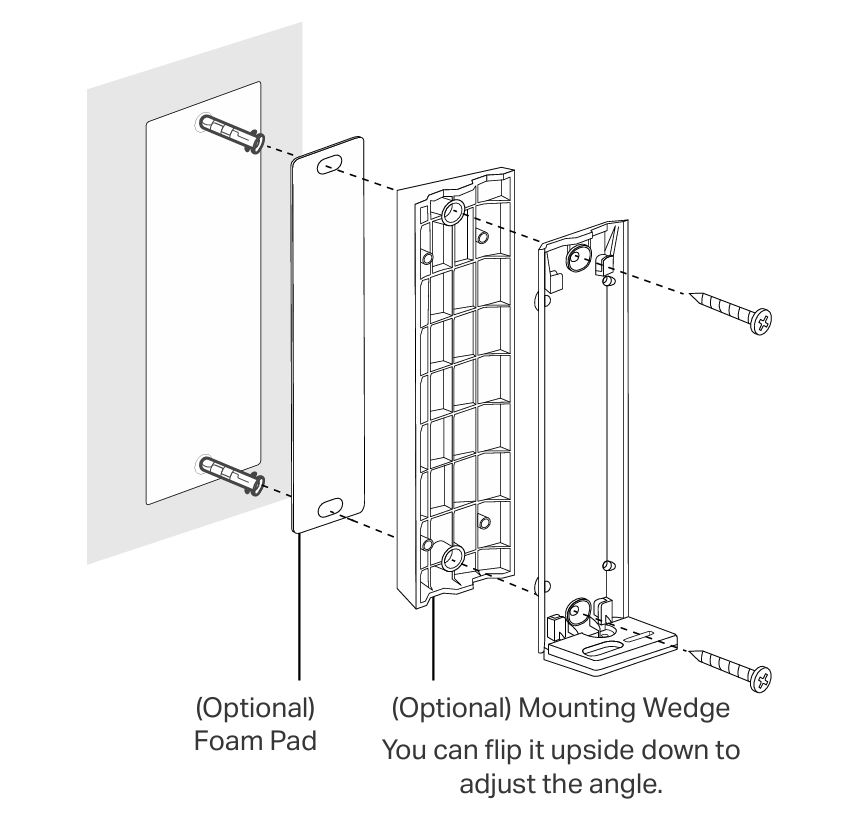
Step 1. Stick the mounting template to the desired place. Drill two holes according to the template.
Step 2. Insert two anchors into the holes. Use the mounting screws to affix the bracket (or wedge with bracket if you use the wedge to adjust the angle) over the anchors.
Note: When mounting to uneven walls, stick the foam pad on the back of the bracket (or wedge if used).
Step 3. Attach the doorbell to the bracket, sliding down to the bottom until it clicks into place. Then tighten the screw at the bottom to secure the doorbell.
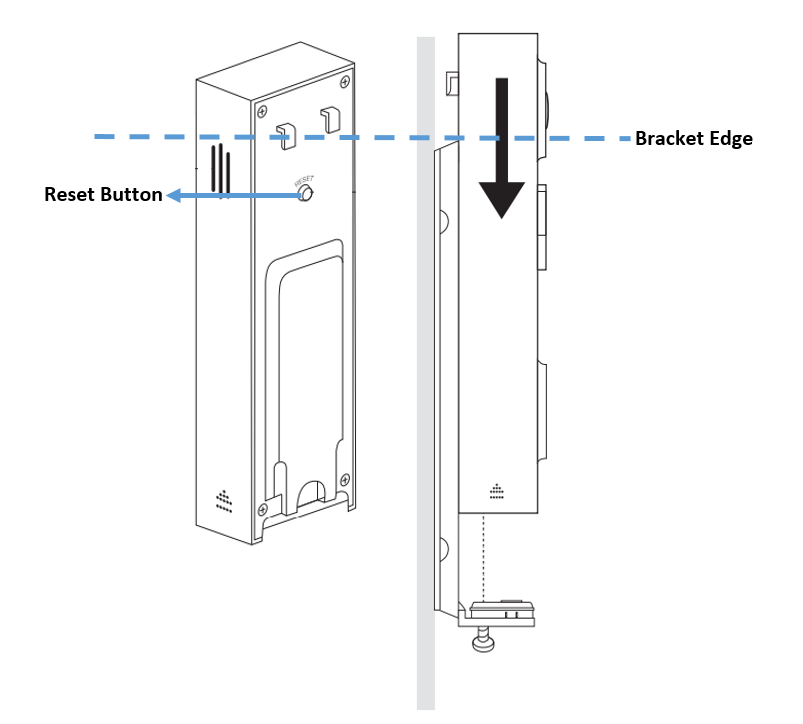
Note: When attaching the doorbell to the bracket, ensure the reset button is below the edge of the bracket for a successful installation.
Questa faq è utile?
Your feedback helps improve this site.