What is a DMZ and how to configure DMZ host
What is a DMZ
A DMZ (demilitarized zone) on a home router refers to a DMZ Host. Strictly speaking, this is not a true DMZ. A home router DMZ host is a host on the internal network that has all UDP and TCP ports open and exposed, except those ports otherwise forwarded. They are often used a simple method to forward all ports to another firewall/NAT device.
When a PC is set to be a DMZ (Demilitarized Zone) host in the local network, it is totally exposed to the Internet, which enables unlimited bidirectional communication between internal hosts and external hosts. The DMZ host becomes a virtual server with all ports opened. When you are not clear about which ports to open in some special applications, such as IP cameras and database software, you can set the PC to be a DMZ host.
Note: DMZ is more applicable in a situation where users are not clear about which ports to open. When it is enabled, the DMZ host is totally exposed to the internet, which may bring some potential safety hazards. If the DMZ is not in use, please disable it in time.
I want to: Make the home PC join the internet online game without port restriction. For example, due to some port restrictions, when playing online games, you can log in normally but cannot join a team with other players. To solve this problem, set your PC as a DMZ host with all ports opened.
How can I do that?
Step 1. Set your PC to a static IP address to be in the same subnet of the router (default IP address is 192.168.0.1), for example, 192.168.0.100.
If you don’t know how to do that, please refer to
How to configure the IP address manually on the wireless clients
Step 2. Log in to the router management page by entering tplinkwifi.net in the browser’s address box after connecting to the router. For how to do that, please refer to How do I log into the web-based Utility (Management Page) of TP-Link wireless router?
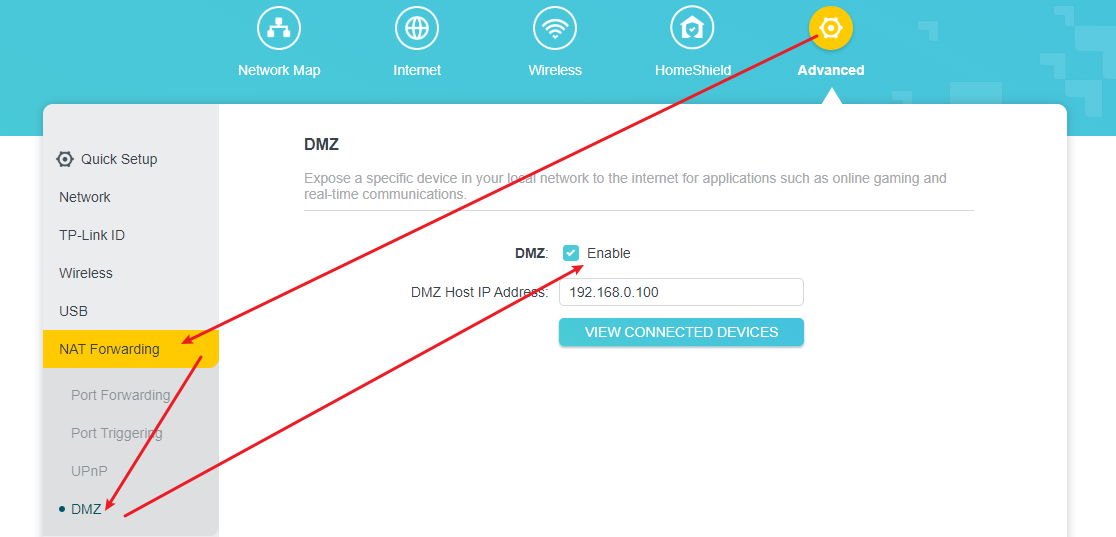
Step 3. Go to Advanced > NAT Forwarding/Forwarding > DMZ. Select Enable and enter the IP address 192.168.0.100 in the DMZ Host IP Address filed and save it.
Step 4. Restart your router for the changes to take effect.
Looking For More
Questa faq è utile?
Your feedback helps improve this site.
TP-Link Community
Still need help? Search for answers, ask questions, and get help from TP-Link experts and other users around the world.