How to configure Guest Network on Archer C50/C20/A5 (new logo)
Guest Network allows you to provide Wi-Fi access for guests without disclosing your host network. When you have guests in your house, apartment, or workplace, you can create a guest network for them. In addition, you can customize guest network settings to ensure network security and privacy.
Here takes Archer C20_V4 as demonstration:
1. Log in the router’s management interface. If you don’t know how to do that, please refer to How do I log into the web-based Utility (Management Page) of TP-Link wireless router?
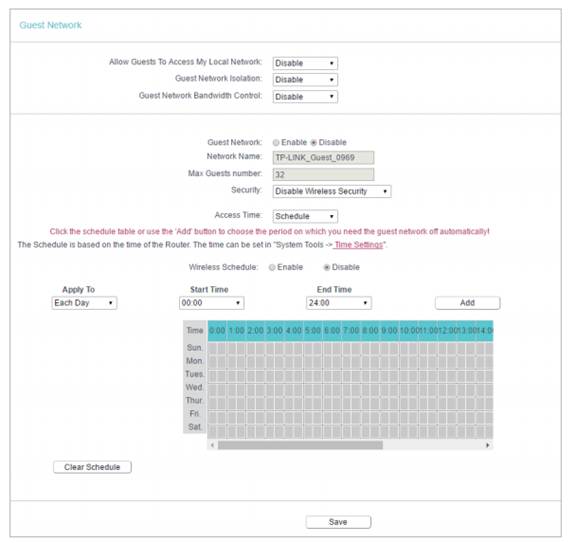
2. Go to Guest Network.
3. Enable the Guest Network function.
4. Create a network name for your guest network.
5. Select the Security type and create the Password of the guest network.
6. Select Schedule from the Access Time drop-down list and customize it for the guest network.
7. Click Save.

• Allow Guest To Access My Local Network - If enabled, guests can access the local network and manage it.
• Guest Network Isolation - If enabled, guests are isolated from each other.
• Enable Guest Network Bandwidth Control - If enabled, the Guest Network Bandwidth Control rules will take effect.
Note: The range of bandwidth for guest network is calculated according to the setting of Bandwidth Control on the Bandwidth Control > Control Settings page.
Get to know more details of each function and configuration please go to Download Center to download the manual of your product.
Questa faq è utile?
Your feedback helps improve this site.
3.0&4.0-F_normal_1584493102128p.png)