Changing Presets and Default State for your TP-Link Smart Bulb
Here we take KL130 as an example.
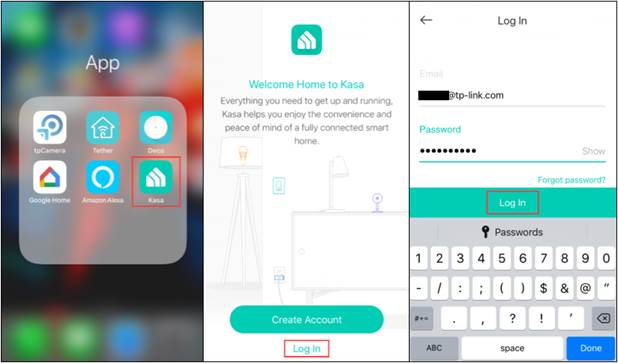
Step 1: Log into the TP-Link Kasa App with your Kasa account.
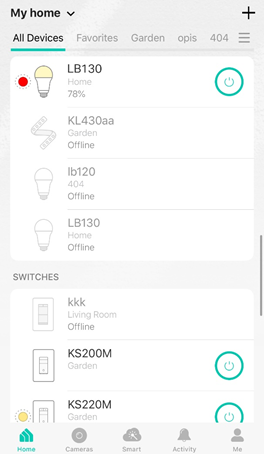
Step 2: Tap “KL130” to enter the Status page.
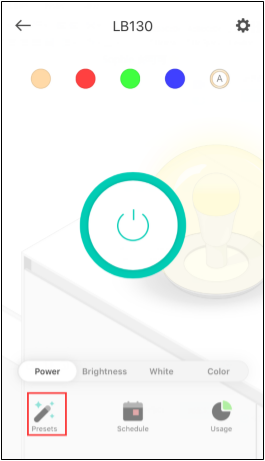
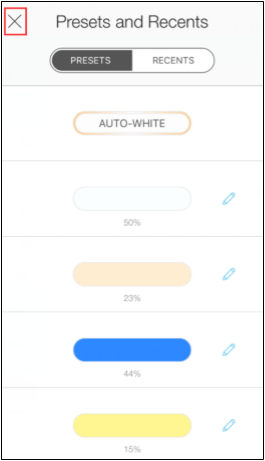
Step 3: Tap “Presets”.
Step 4: Tap the edit icon to modify the preset.
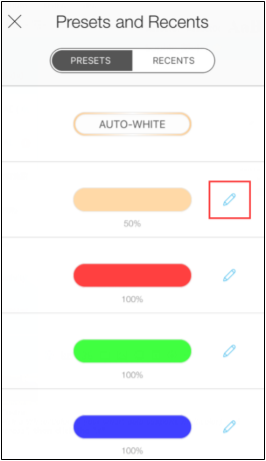
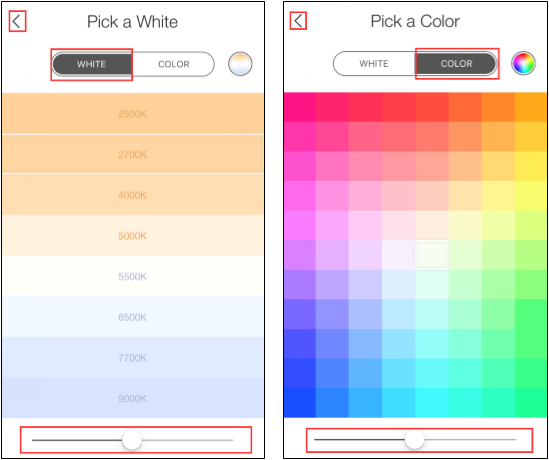
Step 5: Pick a White or Color (if your smart bulb supports multicolor) and set “Brightness”, then click on “<” icon to save settings.
Note: Repeat steps 4 and 5 until all presets are set to the desired settings.
Step 6: When it’s completed, tap “X”.
Step 7: Tap the “Settings” icon, then you can see the “Default States” option of this smart bulb.
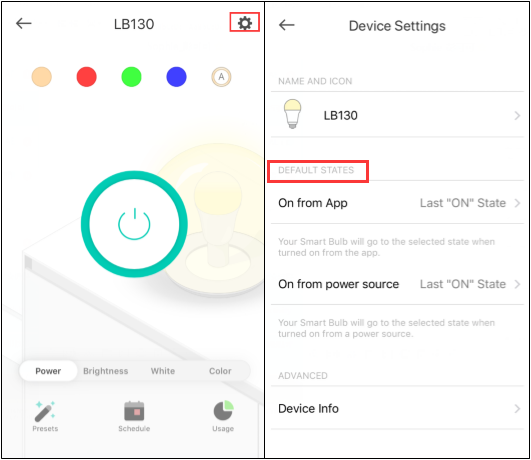
Step 8: Choose the default state you want to edit. Then your smart bulb will go to the selected state when turned on from “Power Source” or “App”.
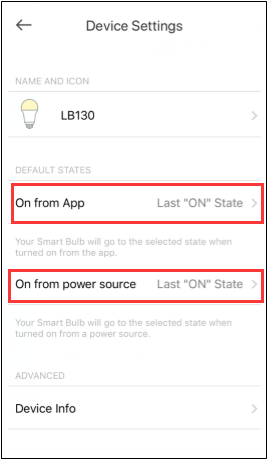
Step 9: Choose your Default State.
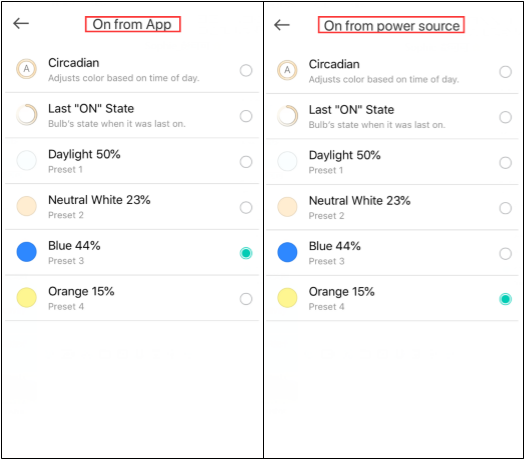
For example, with the above settings, when you turn on the smart bulb with your Kasa app, the bulb will light up blue; when you turn on the smart bulb from the power source, the bulb will light up orange.
Get to know more details of each function and configuration please go to Download Center to download the manual of your product.
Questa faq è utile?
Your feedback helps improve this site.