How do I share a USB drive on my Archer C8, C9, C5 V2, router?
Ez a leírás a következő eszköz(ök)re alkalmazható::
The Local storage-sharing feature allows you to share a USB storage device that is connected to the router, (USB Drive or mobile Hard Disk Drive) to other wired or wireless users on the same network.
You may also refer the below articles to know:
How to access my USB storage device on the TP-Link Routers from my Android and iOS phone
How to access USB storage device on the TP-Link Routers from Windows or Mac OS
HOW TO SET UP:
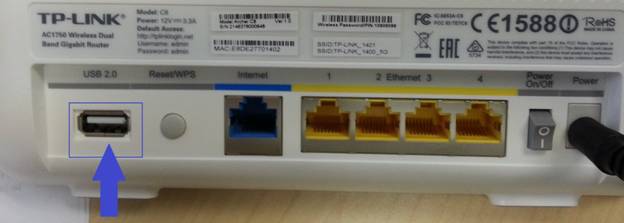
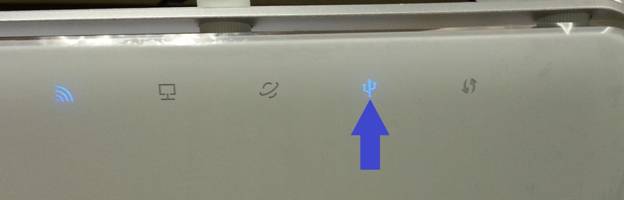
Plug the USB storage into the USB port of the TP-Link router and wait until the USB LED is a solid blue.
Configure the USB share within the tp-link configuration page on the Archer C8 as an example
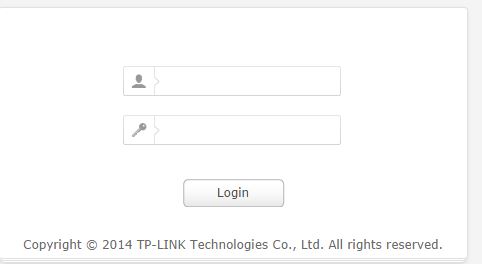
1.) Open a web browser (Internet explorer, Google Chrome, Apple Safari) and type in the address bar tplinklogin.net

2.) You will be prompted to enter a user name and password for which you will want to input admin for both.
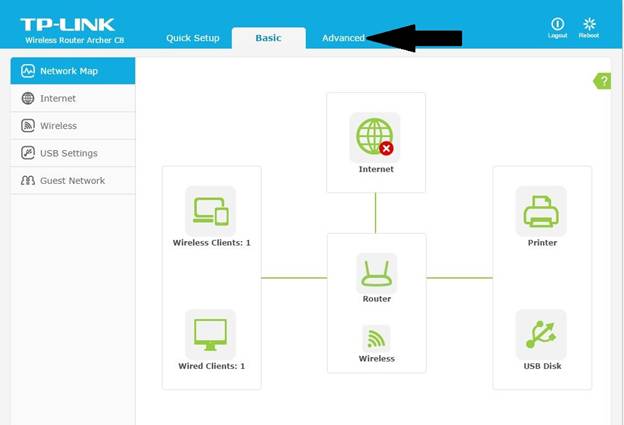
3.) Once you log in click on “advance” to open the advance menu on the TP-Link router.
4.) Within the next screen, you will want to click on USB on the left menu to access the configuration options of the attached USB drive.

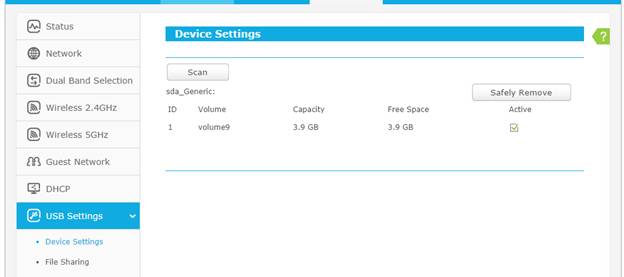
5.) Click on Device Settings listed below USB Settings on the left menu to ensure you are within the correct menu. Within here you will want to ensure that your USB drive is recognized and there is a check mark on active as the below example shows below.
6.) Once your USB drive is detected and active, please click on “file sharing” as displayed below.
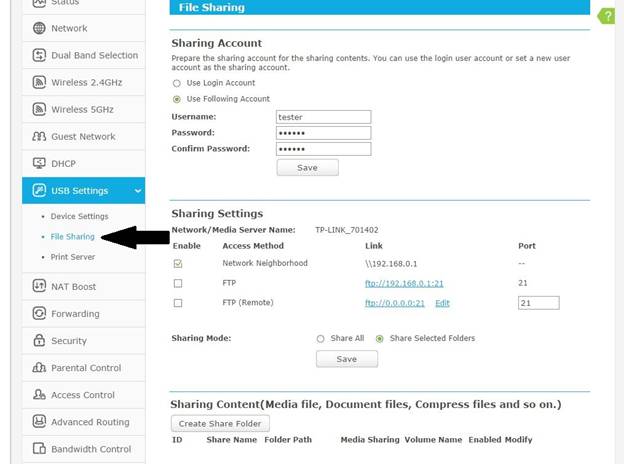
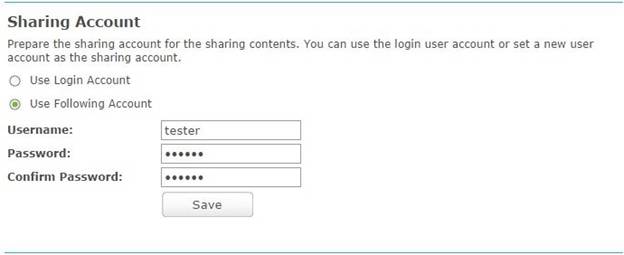
7.) If you would like to use a specific user name and password for access to your selected media/documents, please click on “use the following account.” Within the “user name" and "password”, please create your desired name and password. You will then need to confirm your password on the “confirm password” section.
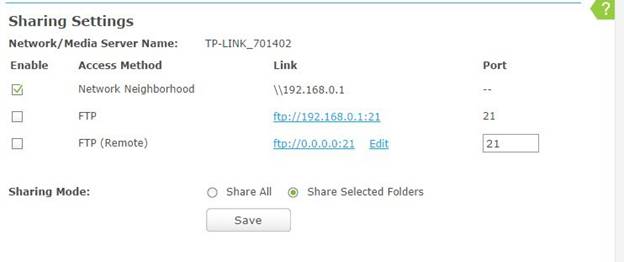
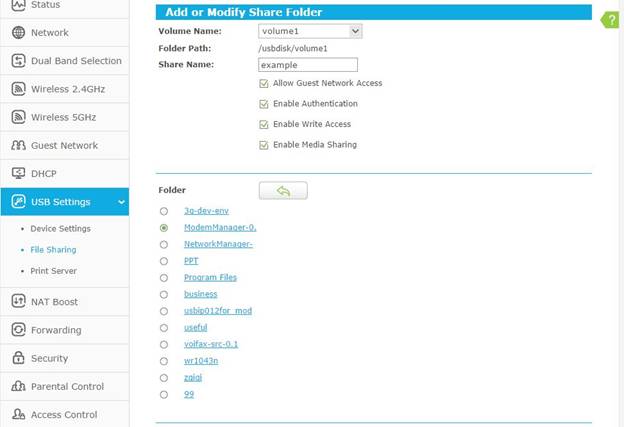
8.) You will then want to choose your sharing method from the three options below. In addition, you will want to choose if you are going to share all folders/files found within the attached drive or share only selected folders. Choosing “share selected folders” will open up the Sharing Content (Media file, Document files, Compress files and so on.) below to allow you to configure the folders you would like to share, the write access, select guest accessibility, enable authentication requirement for accessing the selected folders, rename the share name, and select your volume name. Once you have selected the sharing method please ensure you have clicked save.
a.) Network Neighborhood: This is the standard method of sharing Documents/Media files within a home network. Selecting this option, you will be able to utilize this shared drive within your media players running on your home networks.
b.) FTP: If you are running a FTP client within your network or have networking devices that utilize/run as a FTP client this would be the ideal selection.
c.) FTP (Remote): If you are going to share your USB connected drive across through the internet. You will then select this option. The Ip address listed will be the address of your WAN IP address found within the status section of the router. Clicking edit will allow you to configure the MTU Size, Primary and secondary DNS, and your host name. Normally no need to click edit if unnecessary.
9.)
Once you select the “share selected folders” section. You will then be able to configure and setup each folder within your drive you would like to share by clicking on the “create share folder” to access this configuration option.
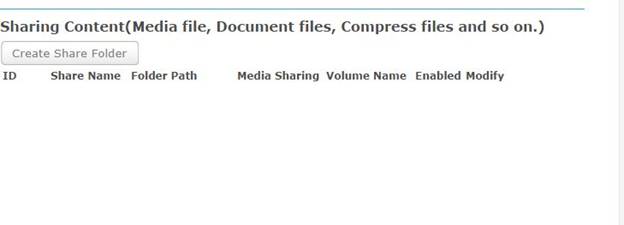
10. Within the “share selected folders” You will be able to select the single folder you would like to share (you may only select one folder at a time). You will also be able to select, from the top of the window, if guest would be allowed to access this, if a user name/password is required, if the people accessing it can write to the shared folder, and the name of the share folder. Once you have selected your folder and desired settings please ensure you do click save at the bottom of the page.
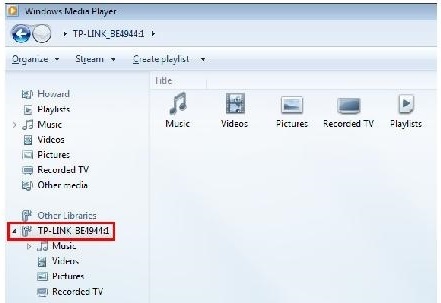
To access the media if you selected “network neighborhood” through your desired device please follow the below suggestions. Make certain “Enable Media Sharing” is checked. If your media doesn’t initially show up please refresh the list.

Access the Media Server on PS3
Select  (Search for Media Servers) under
  (Photo),
  (Music), or
  (Video). The TP-Link Media Servers that can be connected will be displayed.
(Search for Media Servers) under (Photo), (Music), or (Video). The TP-Link Media Servers that can be connected will be displayed.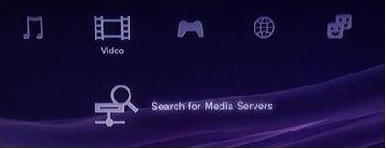
Access the Media Server on XBOX360
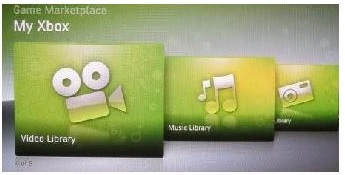
The TP-Link Media Servers that can be connected will be displayed in Video/Music/Picture Library.
Access the Media Server on Windows Media Player
11.) If you have selected to share the your USB drive as an FTP server you may access them via the following methods:
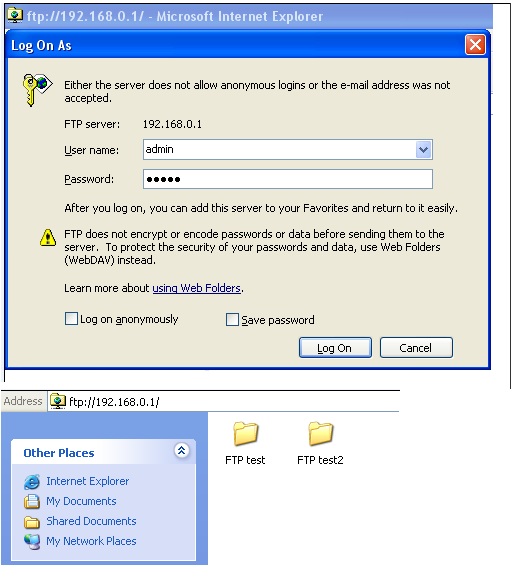
a.)Internal network access:
The FTP server may be accessed by local network and external network. Please open the web browser and type in address ftp://LAN IP, press enter. Then type in your account (if you configured a separate user name and password as described above you would input that when prompted. The default is the same as to access the router itself- admin for both the user name and password) to access to the FTP server. Here the IP address of the router is 192.168.0.1.
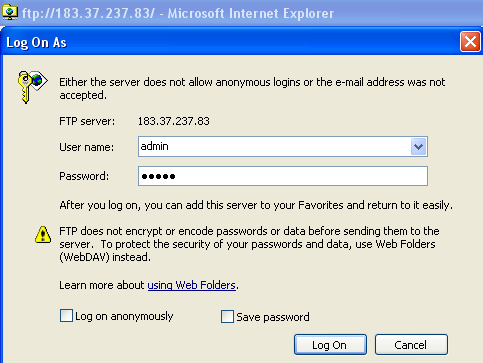
b.) To access the FTP server outside of your network use the IP address and port listed on the FTP (remote) and type this within a browsers address bar and input your user name and password if prompted (if you configured a separate user name and password as described above you would input that when prompted. The default is the same as to access the router itself- admin for both the user name and password).
Notes:
If the FTP server does not take effect immediately, please wait a few minutes.
Get to know more details of each function and configuration please go to Download Center to download the manual of your product.
Ez a GY.I.K. hasznos volt?
Véleménye segíti az oldal fejlesztését