How to connect your wireless devices to the range extender via WPS as AP Mode (new logo)
Wi-Fi Protected Setup (WPS) provides an easier approach to set up a security-protected Wi-Fi connection.
Wireless devices that support WPS, including Android phones, tablets, most USB network cards, can be connected to your extender through this method (not supported by iOS devices).
Follow the steps below, here takes RE305 as demonstration:
1. Login the web management page of the range extender. If you don’t know how to do that, please refer to How to login the web management page of the range extender?
2. Go to Settings > Wireless > WPS.
3. Enable WPS.

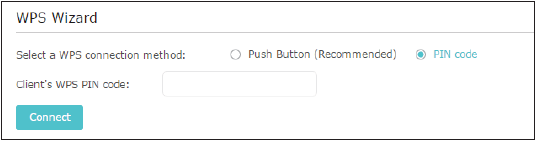
4. Connect via WPS:
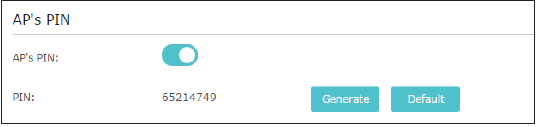
• AP’s PIN: Enable AP’s PIN and enter the PIN on your device. You can click Generate to get a new PIN or click Default to restore the PIN to its factory one.
• Push Button (Recommended): Click Connect and push the WPS button on the client device.
• PIN code: Enter the client’s PIN, and click Connect.
Get to know more details of each function and configuration please go to Download Center to download the manual of your product.
Ez a GY.I.K. hasznos volt?
Véleménye segíti az oldal fejlesztését