How to Install LED Light Strips
LED light strips are great for decorating your walkways, TV setups, bookshelves, bedrooms and so much more. Installation is simple and easy.
Follow the instructions below to learn how to install and cut your LED light strip:
Part 2: How to Cut LED Light Strip
Or Watch Video (Here, we use Tapo LED Light Strip as an example.)
Before You Start: Installation Tips
Please note the following Installation Tips before installing the light strip to avoid damaging your light strip.
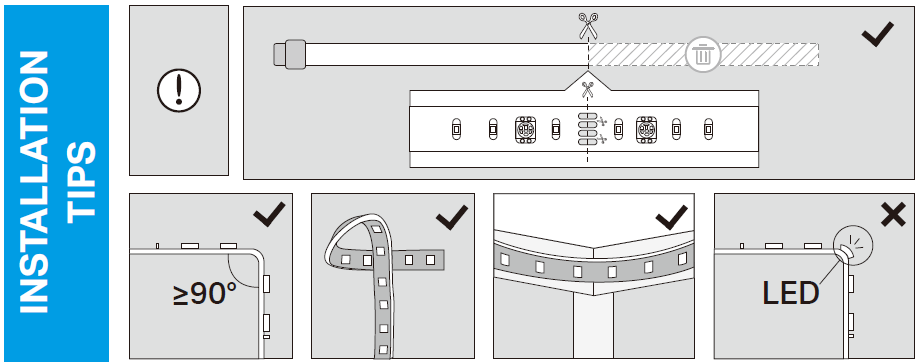
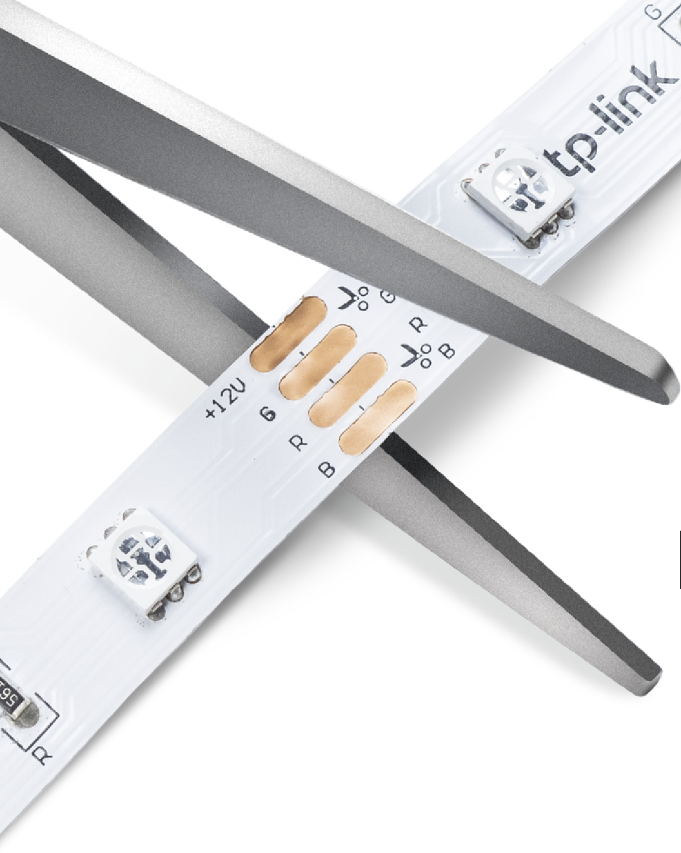
1. Cut Only At Specific Areas of Light Strip
You can tailor the length of your light strip with scissors. Unplug the Light Strip and only cut at the specifically marked areas.
2. Avoid Sharp Turns
Carefully roll the light strip into a clover or use a gentle hill to make 90° turns like those need behind a TV. Sharp bends can damage your light strip.
3. Avoid Sharp Corners
Use gentle sweeps when bending light strips around corners. Avoid creases as they may cause damage.
4. Avoid Bending on LED Beads
Avoid bending the light strip around the LED beads. Doing so will give the light strip a longer life and prevent damage to the beads.
Part 1: How to Install LED Strip Light
The flexible LED strip allows you to attach it to any surface using double-sided adhesive. You can attach the light strip behind a TV or computer, on the edge of a fish tank or stairs.
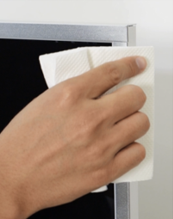
Step 1. Choose Location
Find an area to mount the controller, ensuring its cords can reach both an outlet and your desired lighting location. Wipe away any dust, so the light strip attaches cleanly to the mounting surface.
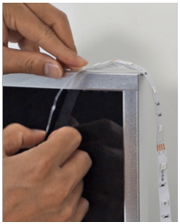
Step 2. Remove Adhesive Tape
Unplug the light strip first. Peel away the 3M adhesive backing bit by bit and stick your light strip to the surface.
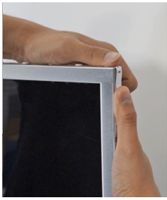
Step 3. Stick Light Strip
Stick the light strip and press over it for about 10-15 seconds.
Secure the controller with the adhesive pads. Do not move it to another place once it is attached.
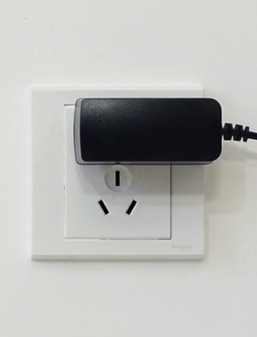
Step 4. Power Up Light Strip
Plug in the power adapter to power on your light strip.
Part 2: How to Cut LED Light Strip
The light strip is cuttable. You can cut the strip at any cutting mark to make it fit your desired location.
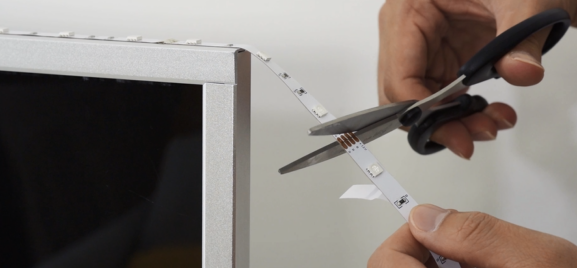
ONLY cut the excess length along the cutting lines. Once you cut it, you can't reconnect the unused segment to the light strip unless you use a connector.
The LED light strip is straightforward to install and can be cut to fit your specific needs. Have fun setting up your LED light strip with lots of vibrant colors.
