How to set up HomeKit-supported Tapo/Kasa devices
Introduction
HomeKit-supported devices can be managed in the Home app and work with other HomeKit-compatible accessories. This guide walks you through setting up your HomeKit-compatible Tapo and Kasa devices.
Requirements
Download the latest version of the Kasa/Tapo app and the Home app from App Store or Google Play.
Configuration
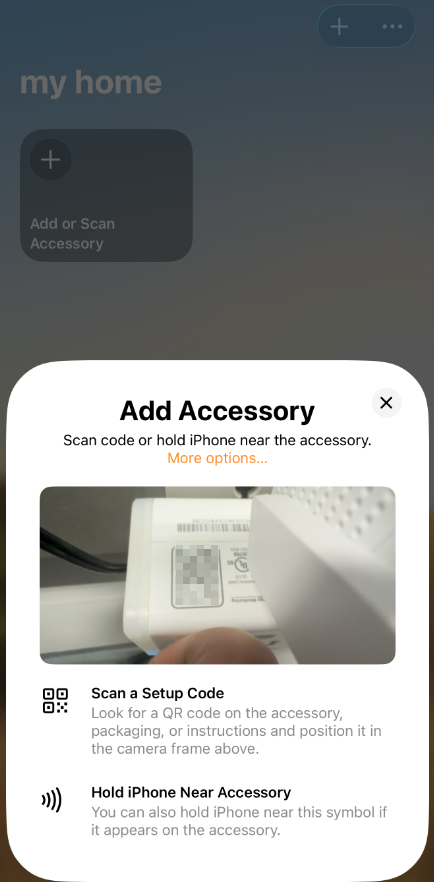
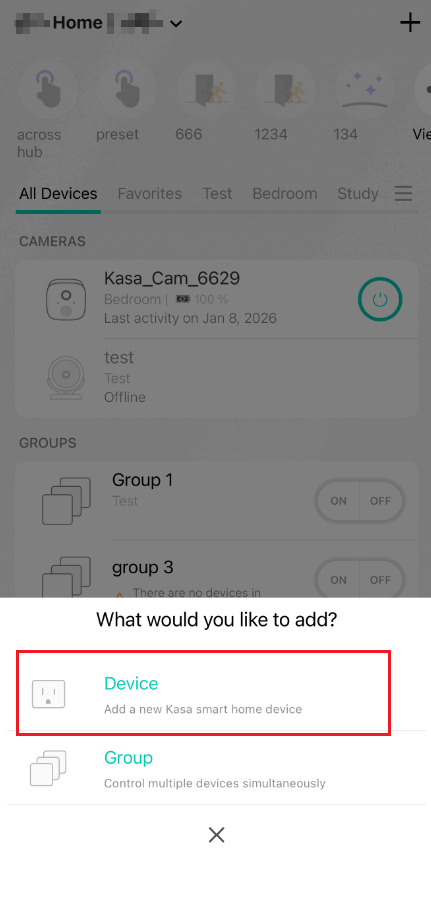
Step 1. Open the Home app, tap the “+” icon in the top-right corner, and select Add or Scan Accessory.

Step 2. Scan the HomeKit QR code or enter the Numeric code on your device. It will add your device automatically.
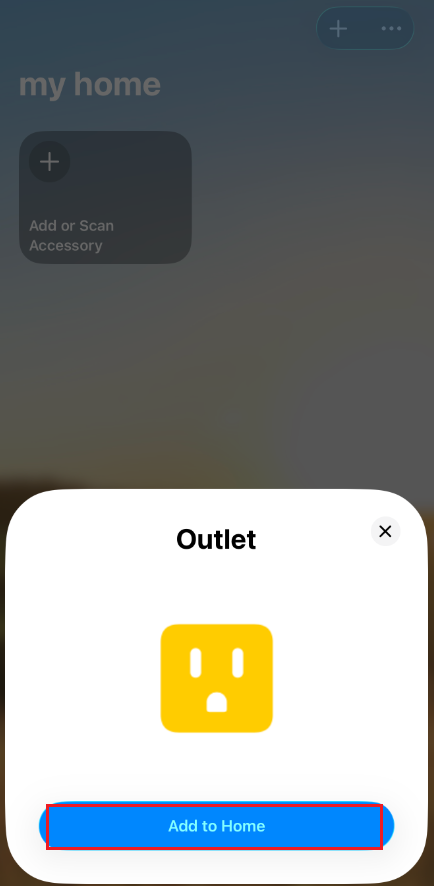
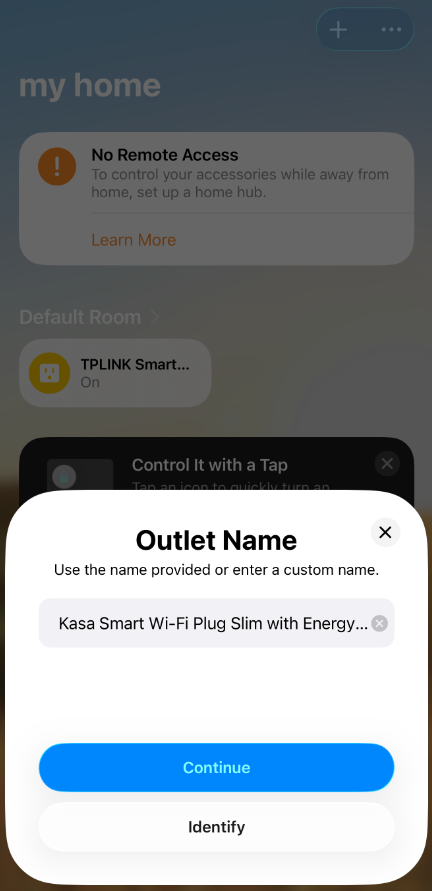
Step 3. After the device is successfully added to the Home app, you can choose its location, edit its name, and adjust other related settings.

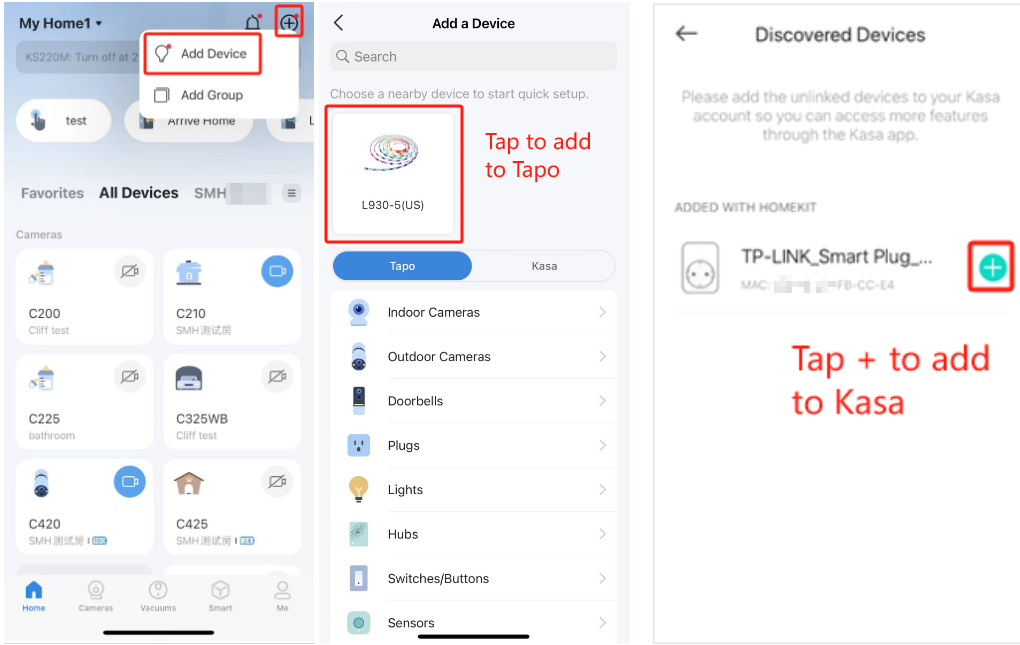
Step 4. Once the devices are added to the Home app, the Kasa/Tapo app will automatically discover them on the same network.
Open the Kasa/Tapo app, and a pop-up window will appear to notify you of the discovered devices.
Alternatively, a red dot may appear on the “+” icon in the top-right corner. Tap the “+” icon to add the discovered devices to the Kasa/Tapo app.
After adding them, you can manage the devices and customize their settings in the Kasa/Tapo app.
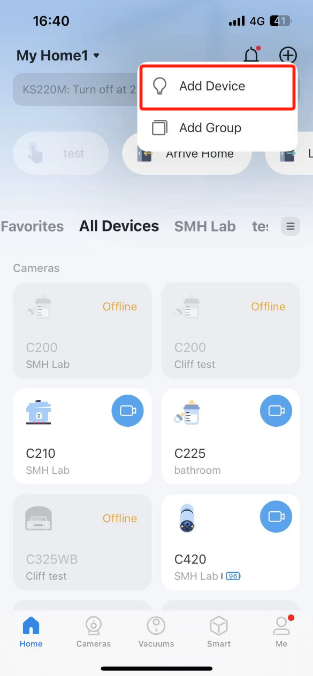
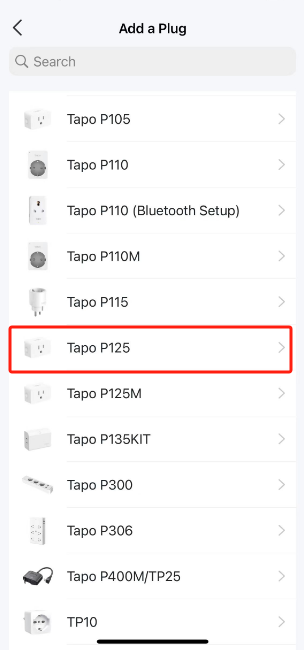
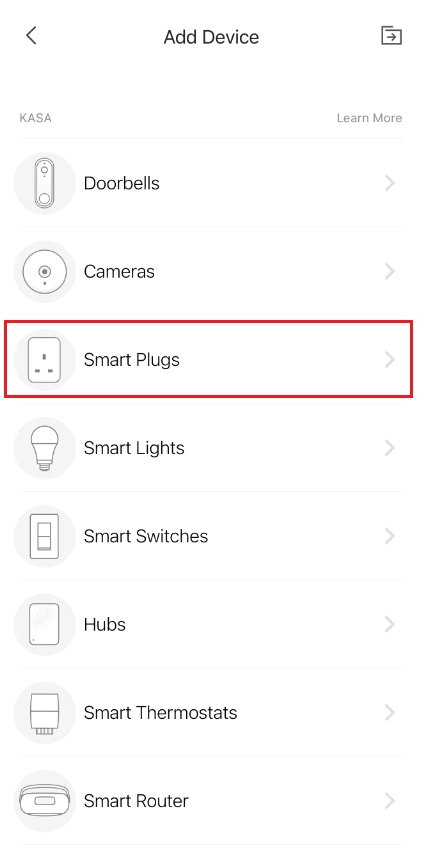
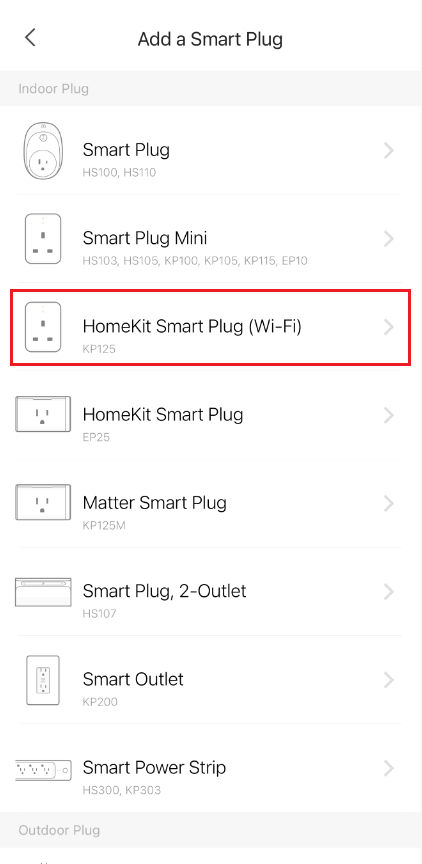
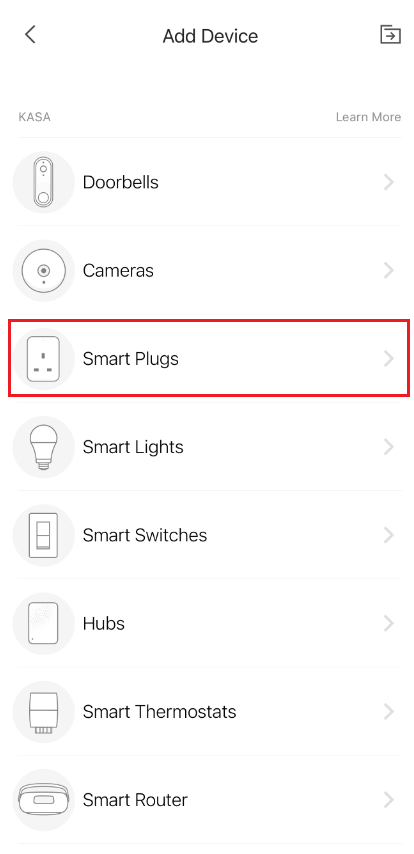
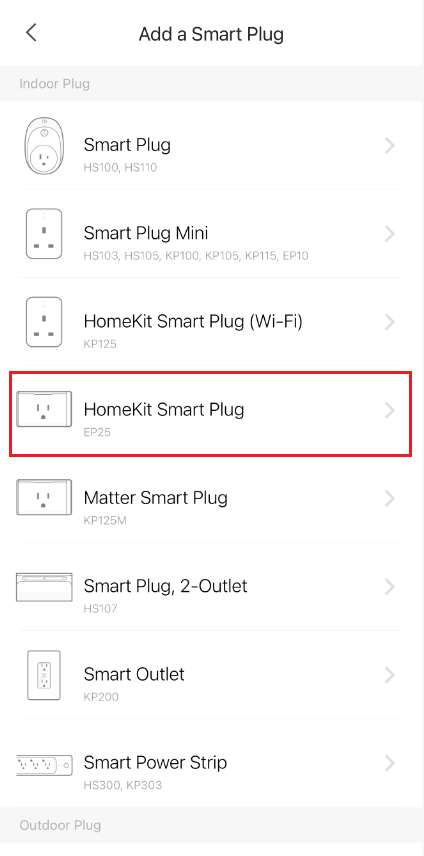
Step 1. Open the Tapo/Kasa app, tap the “+” icon in the top-right corner, choose Add Device. Select the HomeKit device type and the model you want to add.
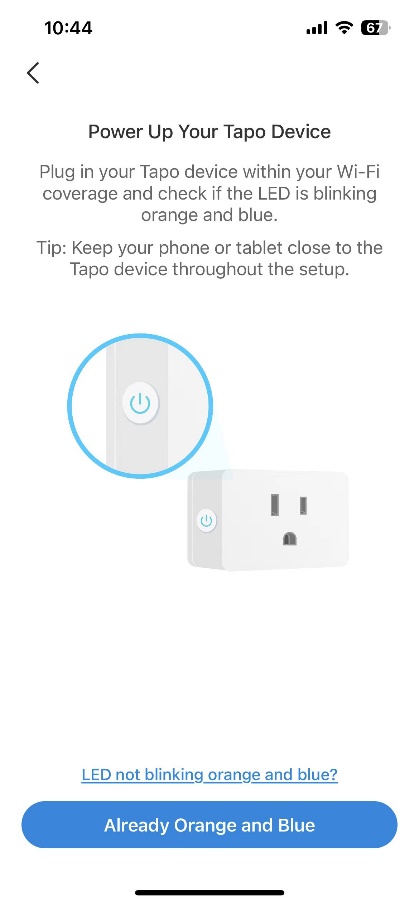
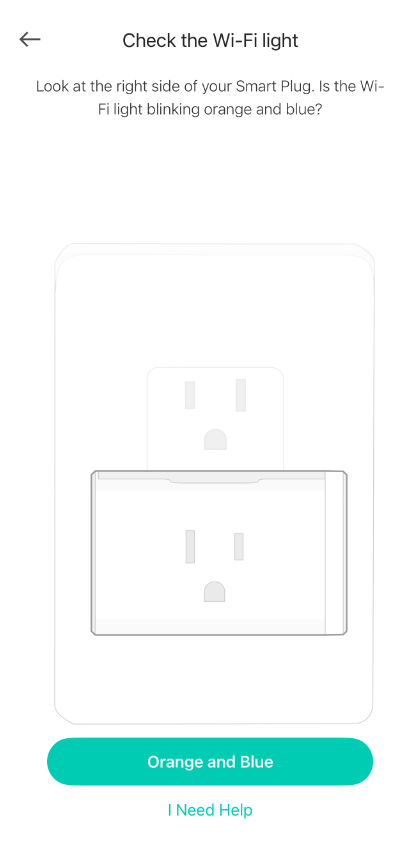
Step 2. Check the LED status, then tap Already Orange and Blue. The Tapo app will attempt to discover the device via Bluetooth.
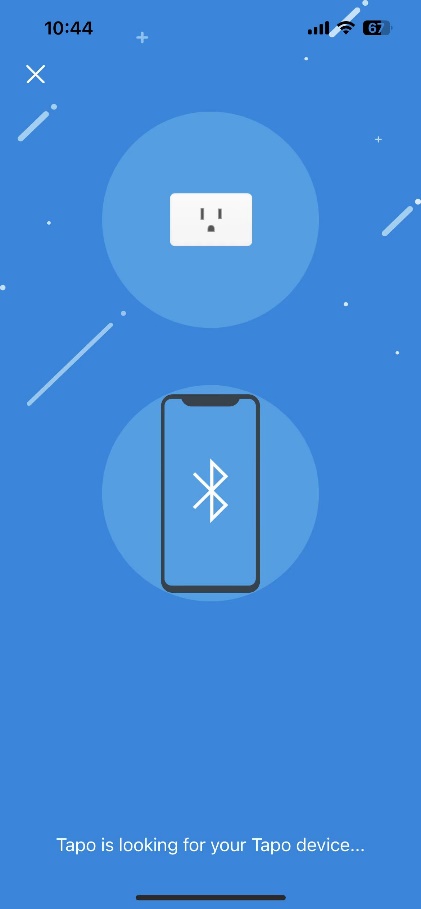
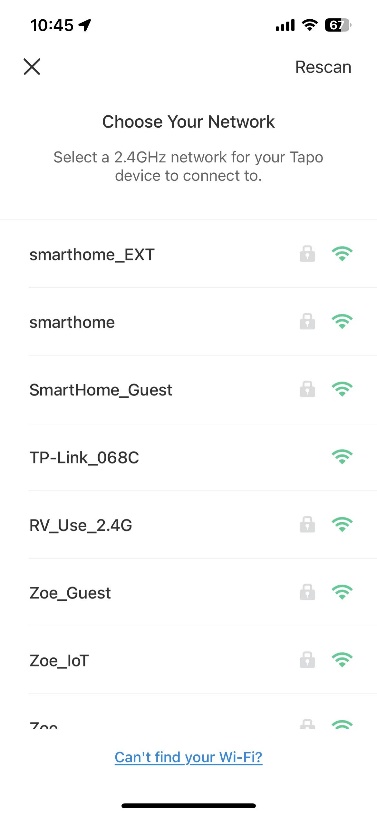
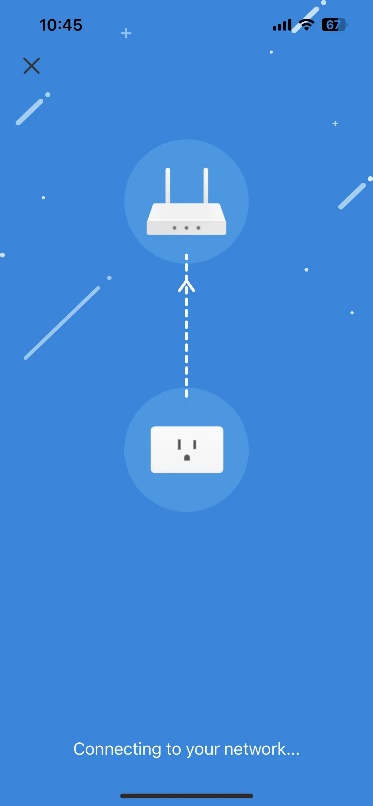
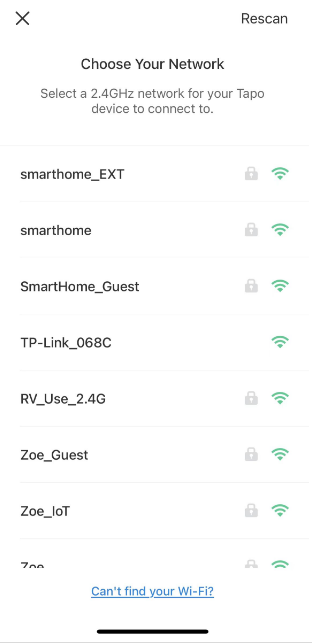
Step 3. After the device is discovered, please connect it to your home Wi-Fi network, then follow the instructions in the App to complete setup.
Step 4. Once setup is complete in the Tapo/Kasa app, you can go to the device Settings page to add it to the Apple Home app.
Alternatively, you can open the Home app directly and add the device from there.

Note: Please first factory reset the device before the configuration. While the plug is powered on, press and hold the power button on the right panel for about 10 seconds until the LED flashes orange and blue.
Step 1. Open your Kasa app, tap “+” in the upper right corner, and select your device.

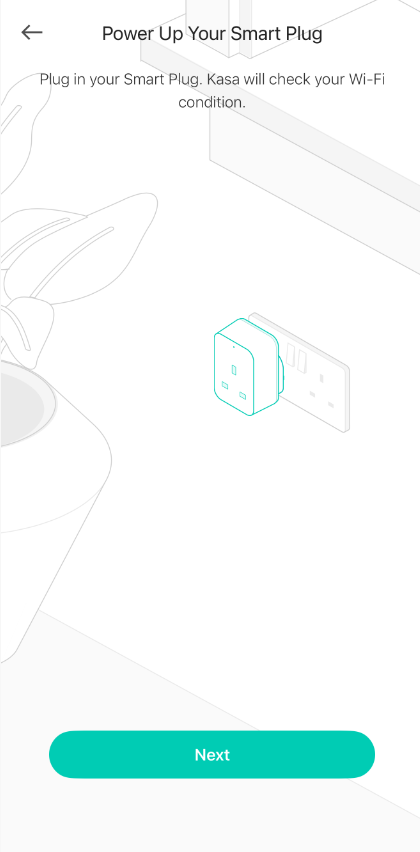
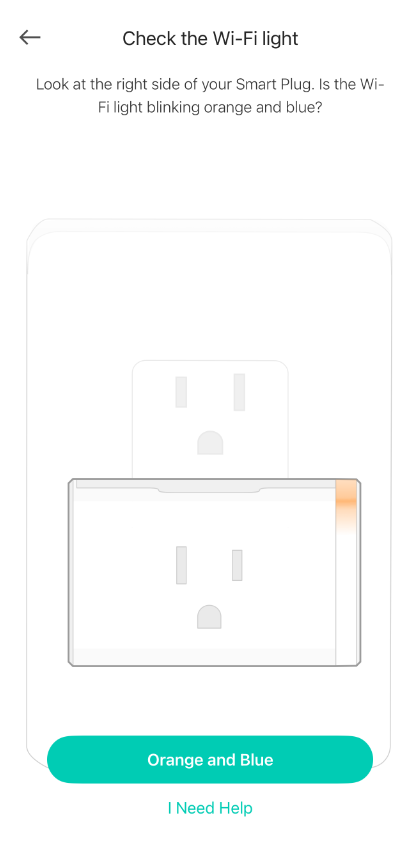
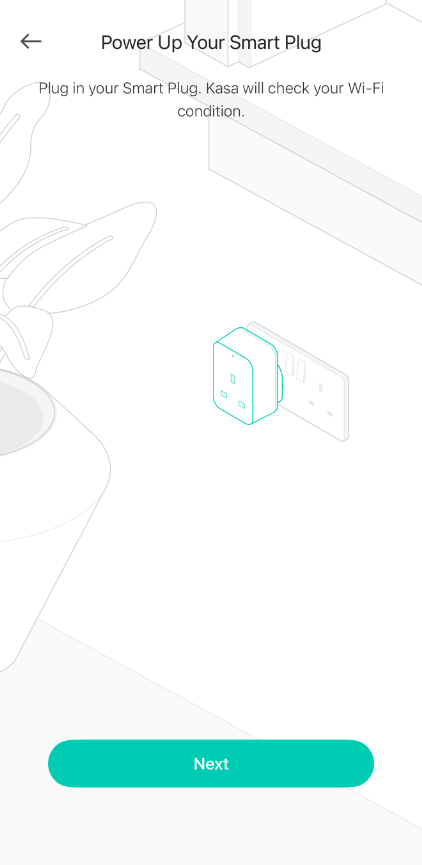
Step 2. Power up your plug and check whether its LED blinks the color required.
If not, please factory reset your plug.
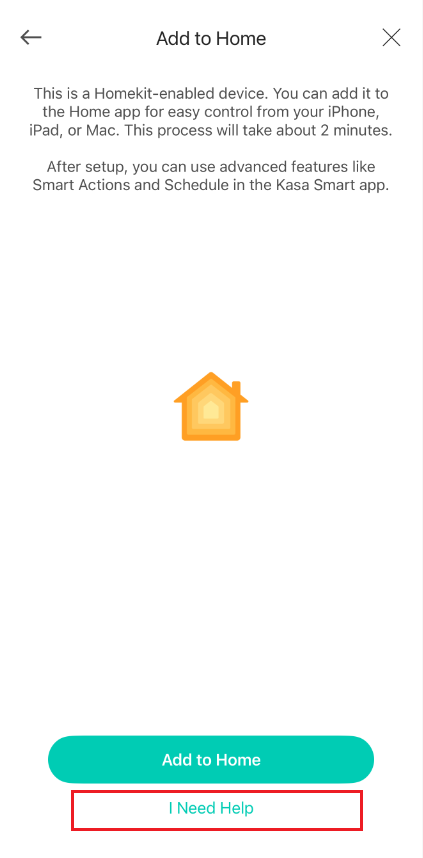
Step 3. Tap I Need Help to bypass the Homekit setup process to set the plug up with Kasa directly. Then scroll down to find the sixth instruction Set Up with Kasa and tap set it up with Kasa manually.

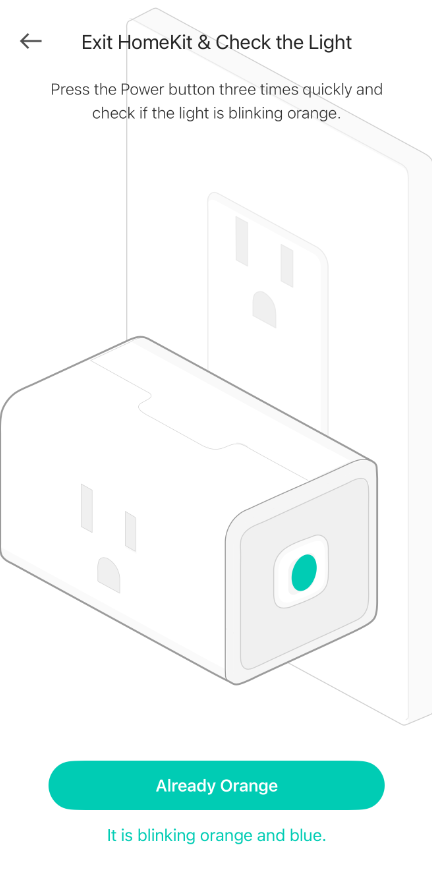
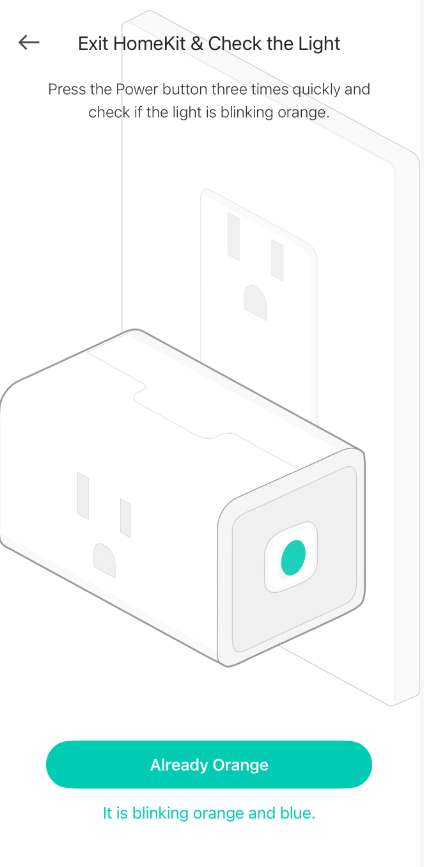
Step 4. Press the power button three times quickly to see the indicator light blinking orange to Exit Homekit. Then tap Already Orange to follow the App instructions to finish the Kasa setup.
Note: If the indicator still blinks orange and blue after you press the power button three times quickly, please Tap “It is blinking orange and blue” to follow the App instructions to finish the Kasa setup.
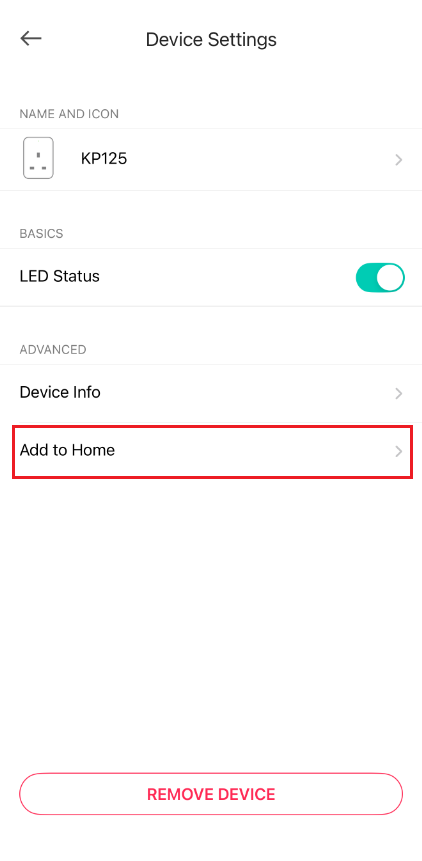
Step 5. If you would like to continue adding your KP125 to Apple Home, after you set it up with Kasa and upgrade the firmware to the latest version, go to the Device Settings page to add it to the Apple Home app.
Note: Please first factory reset the device before the configuration. While the plug is powered on, press and hold the power button on the right panel for about 10 seconds until the LED flashes orange and blue.
Step1. Open your Kasa app, tap “+” in the upper right corner, and select your device.
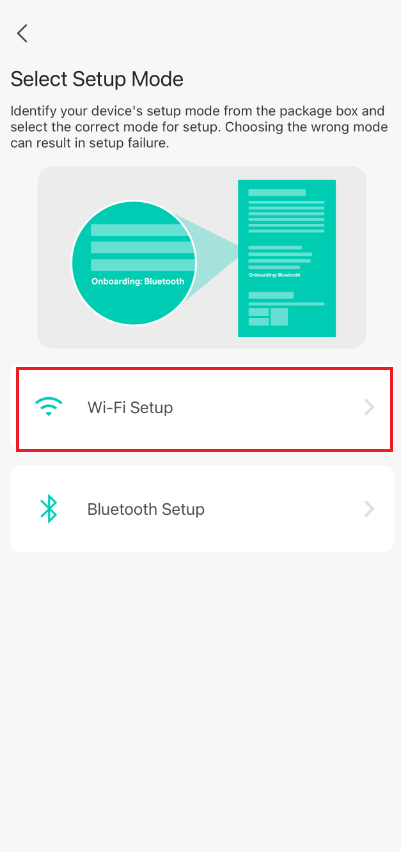
Step 2. Select Setup Mode. You can identify the setup mode from the original package box. Choosing the wrong mode can result in setup failure, we take Wi-Fi Setup as an example.
Step 3. Power up your plug and check whether its LED blinks the color required.
If not, please factory reset your plug.
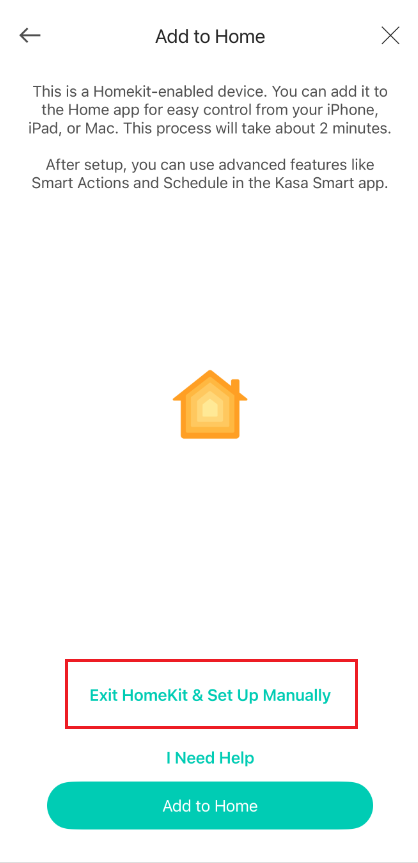
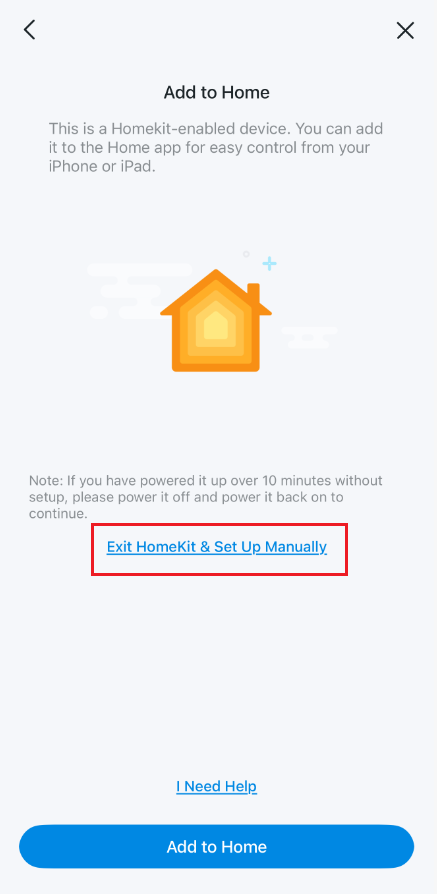
Step 4. Tap Exit HomeKit & Set Up Manually to bypass the HomeKit setup process and set up the plug with Kasa directly.
Step 5. Press the power button three times quickly to see the indicator light blinking orange to exit HomeKit. Then tap Already Orange to follow the App instructions to finish the Kasa setup.
Note: If the indicator still blinks orange and blue after you press the power button three times quickly, please tap “it’s blinking orange and blue” to follow the App instructions to finish the Kasa setup.
Step 6. If you would like to continue adding your EP25 to Apple Home, after you set it up with Kasa and upgrade its firmware to the latest version, go to the Device Settings page to add it to the Apple Home app.
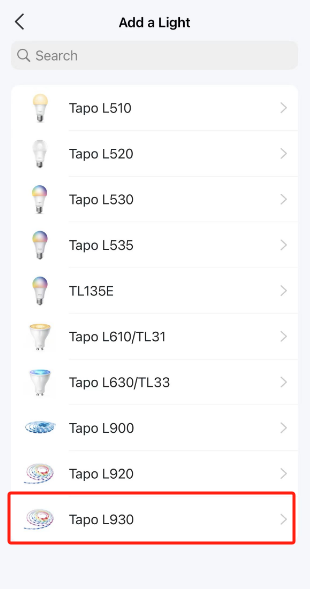
Step 1. Launch Tapo App, tap the “+” icon in the top right corner, and select the type of HomeKit device and the corresponding model number you want to add.

Step 2. After checking the light status, tap Already Orange and Green, and Tapo will guide you to add the light strip to Home. If you want to bypass the HomeKit setup, please tap Exit HomeKit & Set Up Manually.

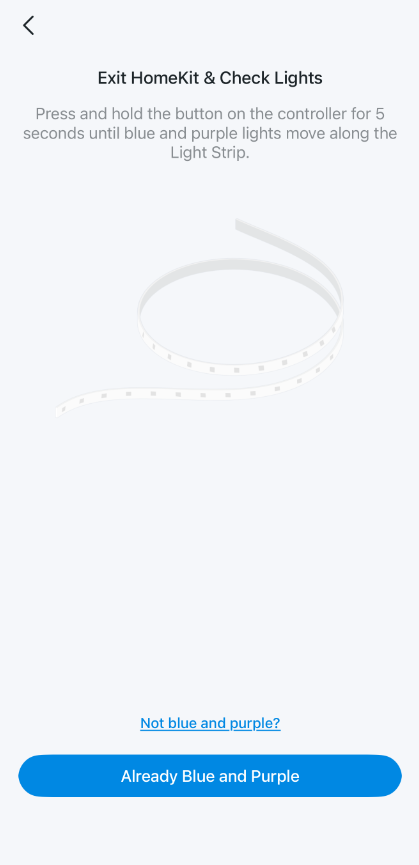
Step 3. Press and hold the button on the controller for 5 seconds until blue and purple lights move along the Light Strip to exit HomeKit mode first. Then you could follow the instructions in the Tapo App to set up the light strip with Tapo (Connect your phone to the light strip's default Wi-Fi, then connect it to your home Wi-Fi, then set an alias and icon for the device to finish setup).

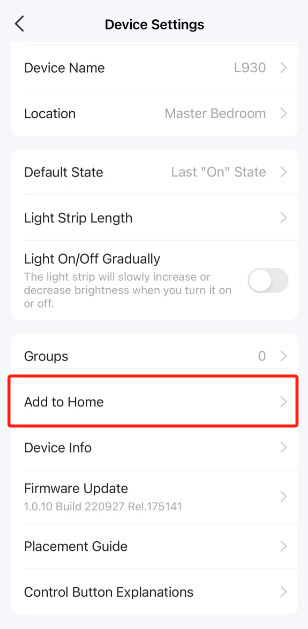
Step 4. If you would like to continue adding L930 to Apple Home after you set them up with Tapo, upgrade to the latest firmware. Please reboot it first, then open the Device Settings page to add it to the Apple Home App. You could also go to Home App to add the device to Home.
QA
Q1: How to troubleshoot when a TP-Link HomeKit-enabled device fails to add to Apple’s Home app
A1: You may refer to this FAQ for troubleshooting suggestions: https://www.tapo.com/faq/199/
Είναι χρήσιμο αυτό το FAQ;
Τα σχόλιά σας συμβάλλουν στη βελτίωση αυτού του ιστότοπου.