How to Set Up a Guest Network for TP-Link Deco
The Deco guest network lets visitors connect to the Internet without accessing resources on your main private network. When Deco works in Router mode, the guest and main networks are automatically isolated, keeping your home Wi-Fi and personal data secure.
Key Takeaways
- The Deco guest network lets visitors use the Internet without accessing shared resources on the main network, protecting the security and privacy of your main Wi-Fi.
- In Router mode, the Deco guest network and main network are automatically isolated. In AP mode, an "Allow Local Access" toggle controls whether the guest network can reach local resources.
- The guest network can be customized with its own network name (SSID) and password, security type (WPA2, WPA/WPA2, WPA3,or None), working band (2.4 GHz, 5 GHz, or 6GHz), and optional bandwidth limits.
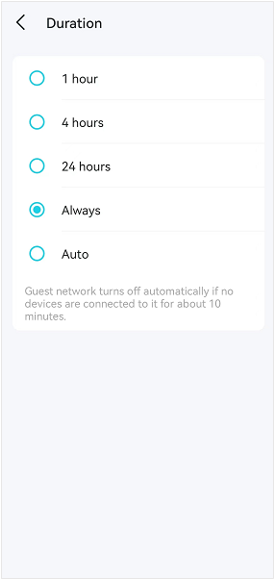
- The Duration setting determines whether the guest network is active for 1 hour, 4 hours, 24 hours, or is always on. On the "Auto" setting, the guest network turns off automatically after about 10 minutes if no devices are connected.
- The Share Wi-Fi feature lets you send the guest network SSID and password to a visitor directly from the Deco app.
A Guest network allows visitors in your home to use the internet without connecting to your private network. Wireless devices connected to a Guest network have no access to resources on the Main network, ensuring the security and privacy of the Main network.
Note:
- When Deco works in the Router mode, the guest network and the main network are isolated.
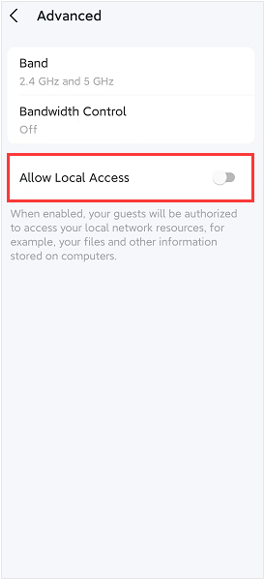
- When Deco works in the AP mode, on the Deco app > guest network > Advanced page, there is an "Allow Local Access" switch once the guest network is enabled, and it can be used to control whether to isolate the guest network and the Main network.
- Features available in Deco may vary by model and software version. All steps and images described here are only examples and may not reflect your actual Deco experience.
Here we take Deco M5 as an example.
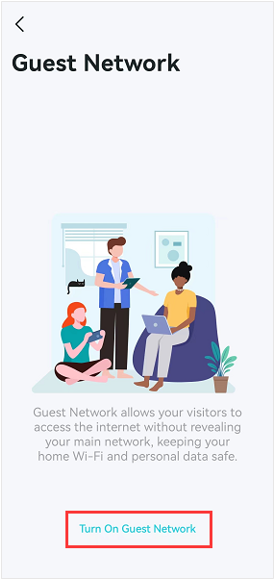
Step 1: Turn On Guest Network
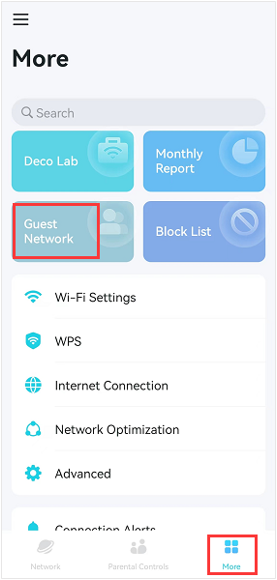
Open the Deco app, go to More > Guest Network, then tap Turn On Guest Network.
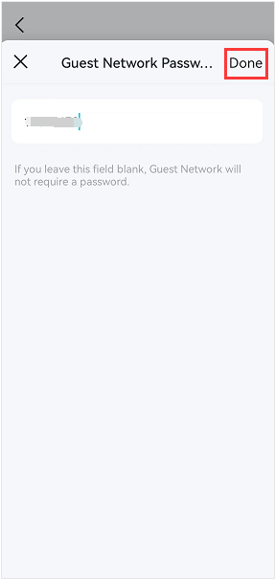
Step 2: Set a Password
Create a password for the guest network, then click on Done.
Note: If you leave this field blank, the Guest network will not require a password to connect.
Step 3: Customize Your Deco guest network Settings
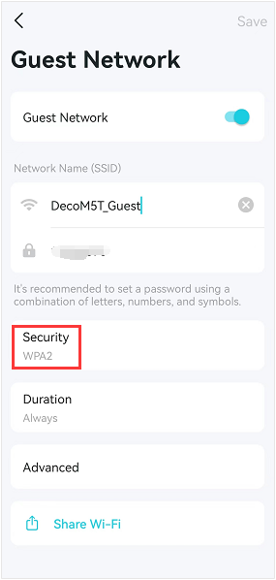
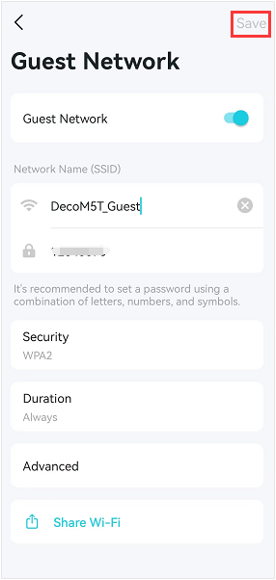
On the Deco guest network settings page, you can change the guest network SSID and password.
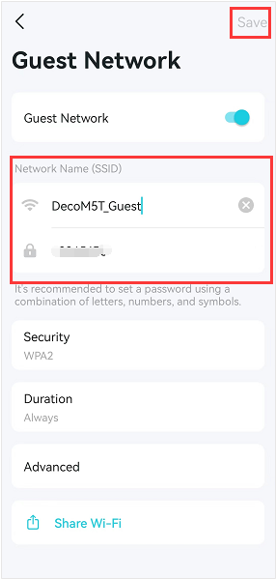
If you want to change the wireless security type, click on Security.

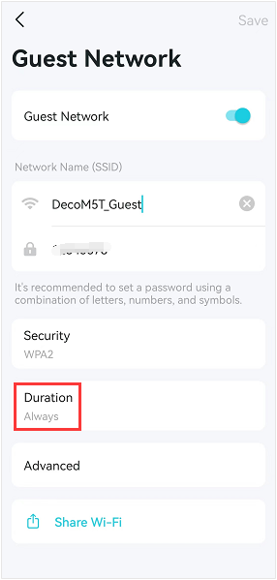
The Duration feature allows you to choose how long to enable the Guest network.
Note: The Guest network turns off automatically if no devices are connected to it for about 10 minutes.
Some Deco models do not support this feature and will support it via firmware updates in the future.
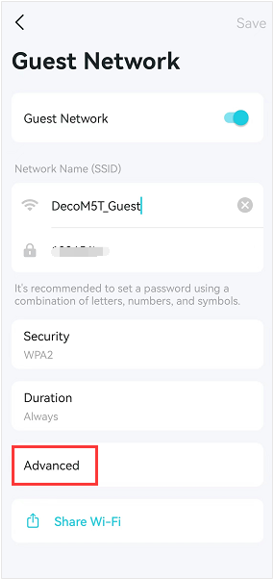
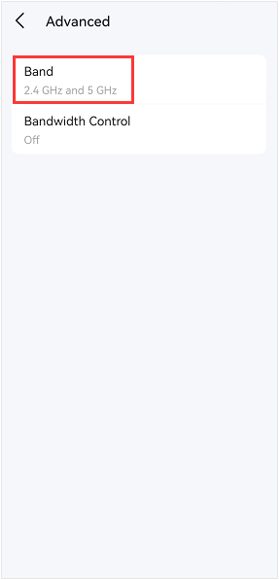
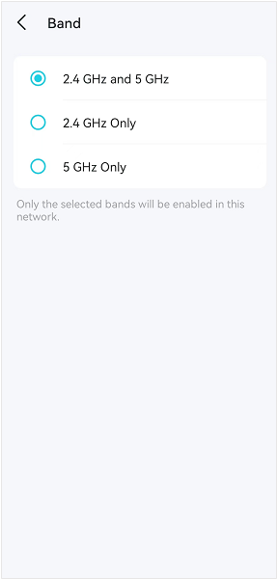
Tap Advanced to select the Guest network's working band and limit the bandwidth allocated to it.
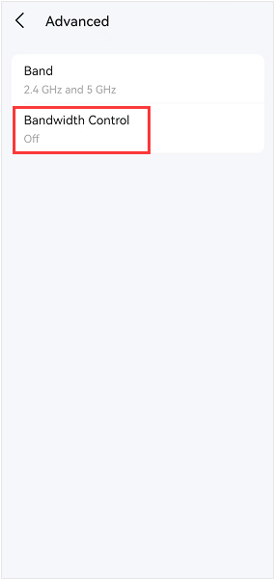
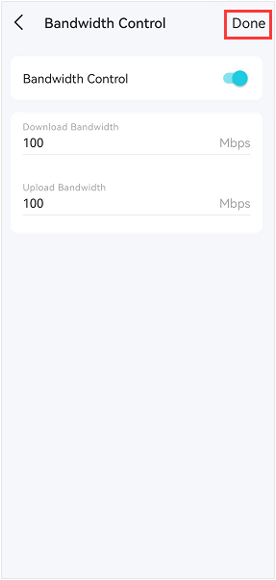
Please tap Bandwidth if you want to limit the bandwidth allocated to the Guest network. After you set the bandwidth, please click on Done to save the settings.
Note: Some Deco models do not support this feature and will support it via firmware updates in the future.
Note: When Deco is in AP mode, there is an Allow Local Access switch on the Advanced page; when enabled, your guests can access your local network resources. Some Deco models do not support this feature and will support it via firmware updates in the future.
Step 4: Save Your Settings
After completing the guest network setup, click Save to save the settings.
Step 5: Share Wi-Fi
Tap Share Wi-Fi, then send the Deco guest network SSID and password to another person so they can connect to the Guest Network.
Note: Some models also support the Captive Portal feature, and these features available in Deco may vary by model and software version. With the Captive Portal feature configured on the Deco app, when wireless clients connect to the Deco network and try to access the internet, they will be directed to a preset web page that requires additional authentication information, see How to configure Captive Portal on Your Deco.
Looking For More
Είναι χρήσιμο αυτό το FAQ;
Τα σχόλιά σας συμβάλλουν στη βελτίωση αυτού του ιστότοπου.
_normal_20230201014412u.png)


TP-Link Community
Still need help? Search for answers, ask questions, and get help from TP-Link experts and other users around the world.