How to change the LAN IP address of TP-Link ISP-customized Modem Router
Introduction
This article provides step-by-step instructions for changing the LAN IP address on TP-Link ISP-customized Modem Routers.
Note:
- Please remember the new LAN IP address of your modem router. If you want to return to the web interface, you need to log in to the router using the new IP Address.
- After you change the LAN IP address, please reboot the device.
Configuration
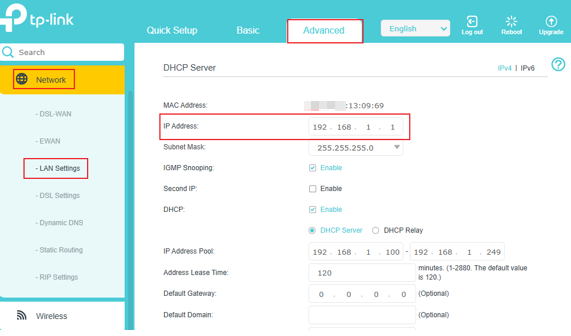
Case 1: For Wireless Routers and Whole Home Mesh Routers, such as EX520, EB810v, HC220-G5, HX510, HB410, etc.
Step 1. Ensure your device is connected to the router via Wi-Fi or an Ethernet port. Open a web browser and enter http://tplinkwifi.net in the address bar to access the web interface.
Step 2. Please go to Advanced > Network > LAN Settings > change the IP Address to what you want > Save.
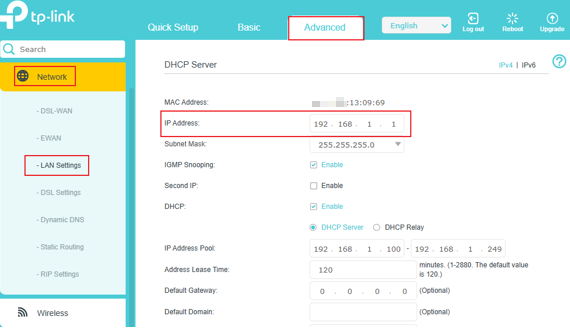
Case 2: For DSL Modem Routers, such as Archer VR1600v, VX230v, VX420-G2v, etc.
Step 1. Ensure your device is connected to the router via Wi-Fi or an Ethernet port. Open a web browser and enter http://tplinkmodem.net in the address bar to access the web interface.
Step 2. Please go to Advanced > Network > LAN Settings > change the IP Address to what you want > Save.
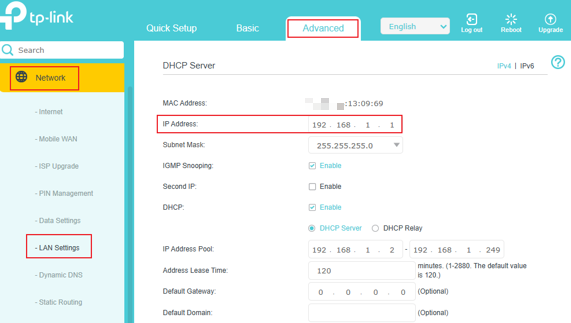
Case 3: For ISP-customized 4G or 5G Routers, such as NX220v, MX510v, NE210-Outdoor, etc.
Step 1. Ensure your device is connected to the router via Wi-Fi or an Ethernet port. Open a web browser and enter http://tplinkmodem.net in the browser bar to access the web interface.
Step 2. Please go to Advanced > Network > LAN Settings > change the IP Address to what you want > Save.
¿Es útil esta pregunta frecuente?
Sus comentarios nos ayudan a mejorar este sitio.


