How to Set Up the Guest Network on TP-Link Wi-Fi Router
Guest Network provides secure Wi-Fi access for guests to share your home or office network. When you have visitors in your house, apartment, or workplace, you can enable the guest network for them. You can set different access options for Guest Network users, which is very effective to ensure the security and privacy of your main network.
Via Web
1. Log in to the web-based interface of the router. If you don’t know how to do that, please refer to
How do I log into the web-based Utility (Management Page) of TP-Link wireless router?
2. Go to Advanced > Guest Network. Locate the Wireless section.
3. Create a guest network as needed.
1) Select 2.4GHz or 5GHz network and tick the Enable Guest Network checkbox.
2) Customize the SSID. Don‘t select Hide SSID unless you want your guests to manually input the SSID for guest network access.
3) Set Security to WPA/WPA2 Personal, keep the default Version and Encryption values, and customize your own password.

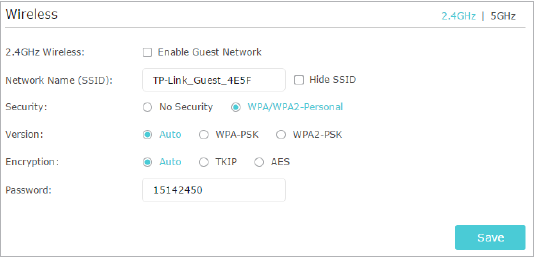
4. Click Save. Now your guests can access your guest network using the SSID and password you set!
Tip: To view guest network information, go to Advanced > Status and locate the Guest Network section.
Via the Tether App
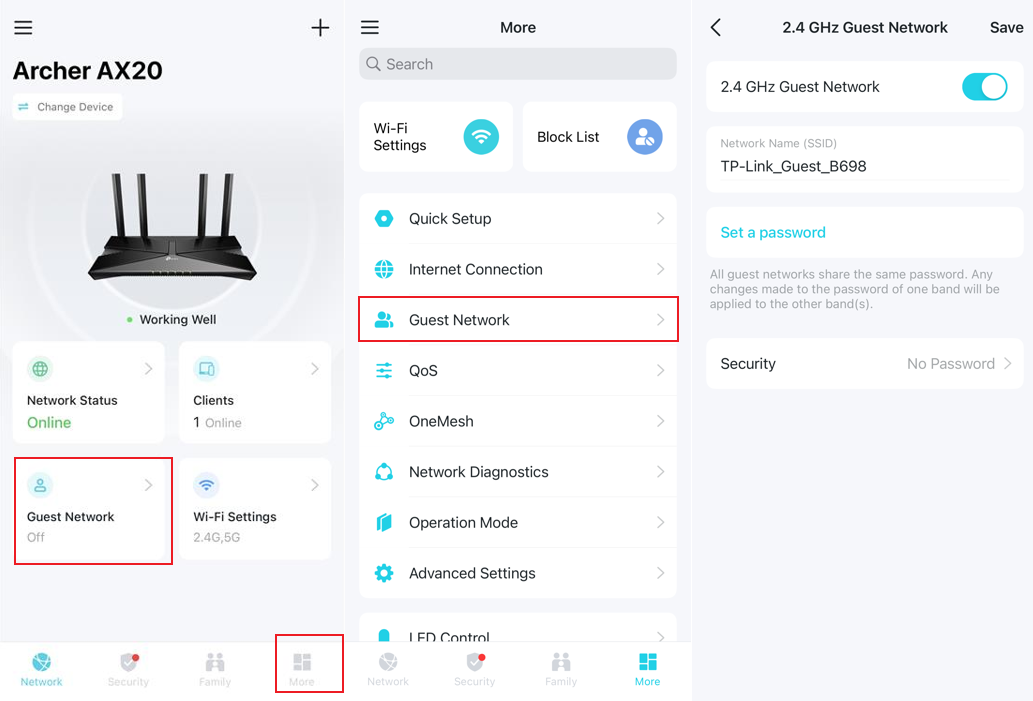
1. Ensure your smartphone is currently connected to your TP-Link router's main Wi-Fi network
2. Launch the TP-Link Tether app and tap on your router icon under the My Devices list
3. Enter the administrator login password you created for your router (if prompted)
4. Tap Guest Network directly, or More at the bottom of the screen, then select Guest Network to configure the settings.
Get to know more details of each function and configuration please go to Download Center to download the manual of your product.
Looking For More
¿Es útil esta pregunta frecuente?
Sus comentarios nos ayudan a mejorar este sitio.

3.0_A_RGB_normal_1584493572647x.png)
-1.0-A_normal_1584496536672l.png)
TP-Link Community
Still need help? Search for answers, ask questions, and get help from TP-Link experts and other users around the world.