How to Access a USB Drive on Your TP-Link Router from Windows or Mac
This guide explains how to connect an external hard drive to your TP-Link router and access it from a Windows PC or Mac. Two access methods are covered: local access over your network using SMB (Samba) or FTP, and remote access from outside your network using Internet FTP. Before following the steps below, make sure you have completed the router settings for USB sharing.
Note: If you are unable to access your USB drive after setup, refer to the FAQ on troubleshooting USB drive access failures on TP-Link routers.
Key Takeaways
- When you connect an external hard drive to a TP-Link router's USB port, any device on your network can access it. Windows users can connect via SMB (Samba) or FTP; Mac users can connect via SMB or FTP through Finder's "Connect to Server" function.
- Enabling the Secure Sharing option in the router's USB settings is recommended to prevent unauthorized access to shared files.
- For local access, use the router's default LAN IP address (192.168.0.1) or the hostname tplinkwifi.net. If you have changed the LAN IP, use the current address instead.
- Remote USB access (Internet FTP) is only available via FTP. SMB is not supported for remote connections. You will need the router's WAN IP address, which can be found under Advanced > Status.
- Windows users can map the USB drive as a persistent network drive using the Map Network Drive feature in File Explorer, pointed to the router's LAN IP path.
Router Settings
1. Plug the USB storage device into the USB port of the TP-Link router.
2. Connect your device to the router via Wi-Fi or an Ethernet cable, open a browser, enter http://tplinkwifi.net/ in the address bar, and log in with your admin password.
3. Go to USB settings. (Advanced->USB->USB storage Device). If the router recognizes the USB storage device, it will show in the status.
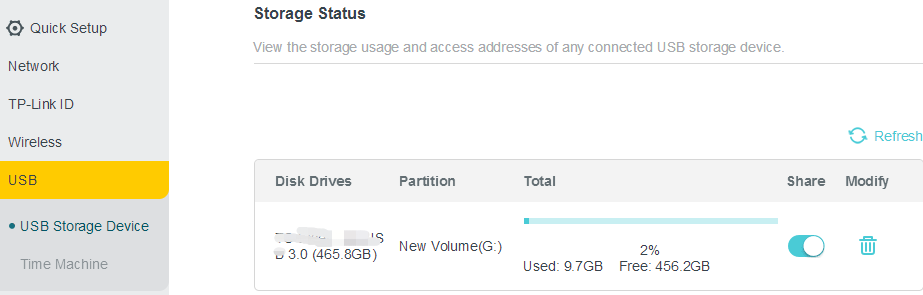
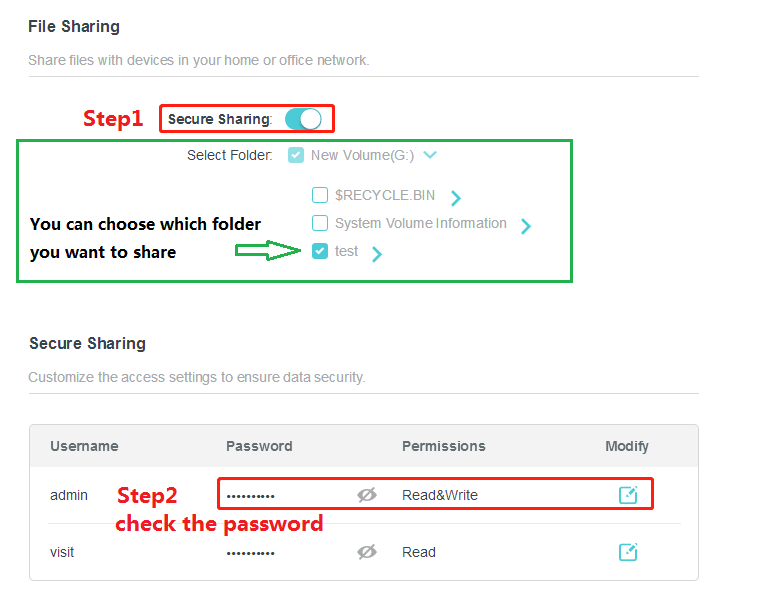
4. Considering the safety, we suggest you enable the "Secure Sharing” option to prevent others from accessing your USB drive without login.
Access the USB drive on Windows and macOS.
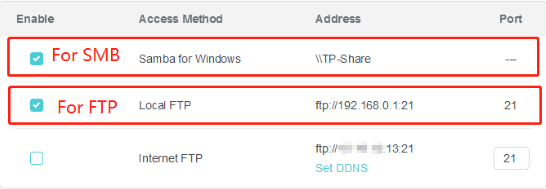
You can share a USB drive over Wi-Fi from your TP-Link router using two methods: 1) Access it locally on your network via SMB and FTP; 2) Access it remotely via Internet FTP. Make sure the corresponding services are enabled in the router settings before proceeding
Option 1. Access the USB drive locally
1) Windows.
SMB(Samba):
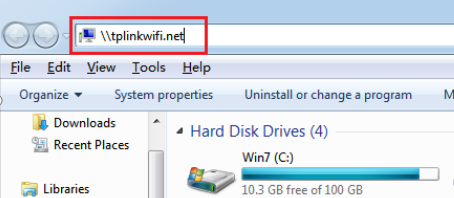
Open File Explorer: Type \\tplinkwifi.net or \\192.168.0.1
Note: 192.168.0.1 is the LAN IP of the router. If you have changed it, please use your router’s current LAN IP.
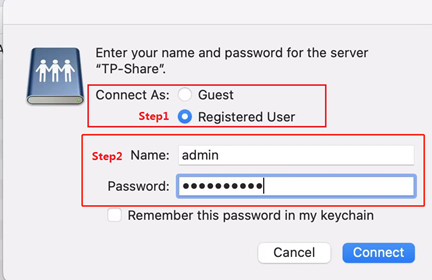
Type in the username and password above to log in.
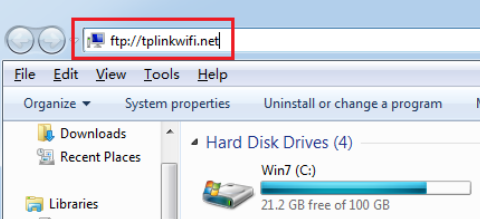
FTP:
Open File Explorer, type: ftp://tplinkwifi.net or ftp://192.168.0.1. Type in the username and password above to log in.
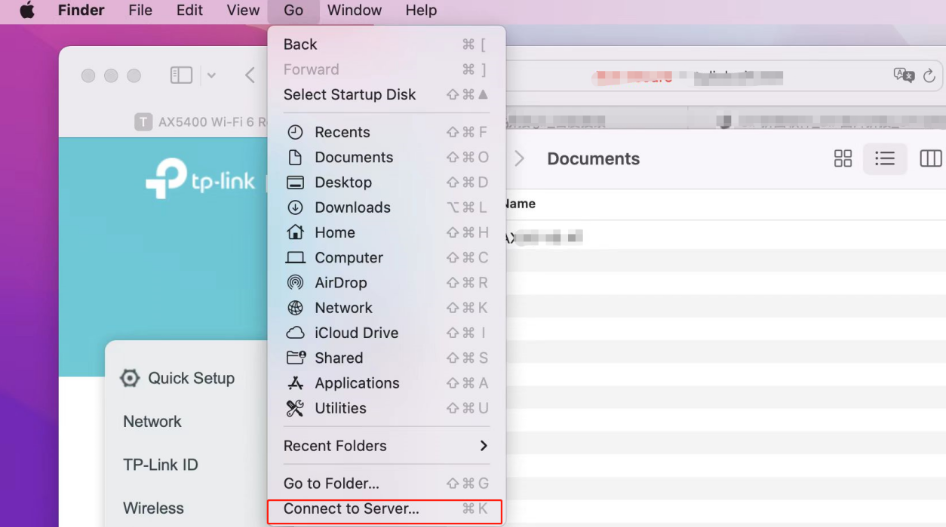
2) macOS
Open Finder, select “Go”, then click “Connect to Server...”
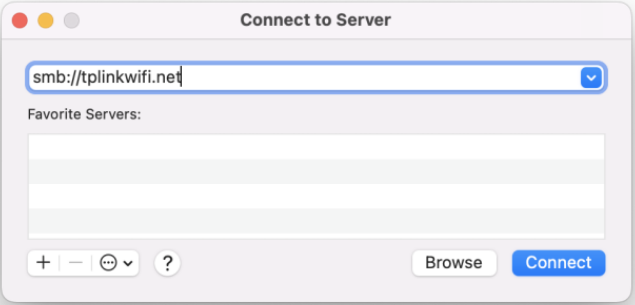
SMB(Samba):
Type: smb://tplinkwifi.net or smb://192.168.0.1 (192.168.0.1 is the LAN IP of the router).
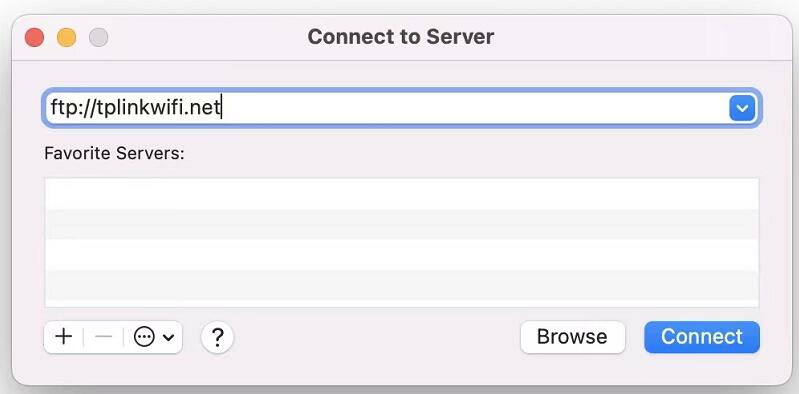
FTP:
Type: ftp://tplinkwifi.net or ftp://192.168.0.1
Option 2. Access the USB drive remotely
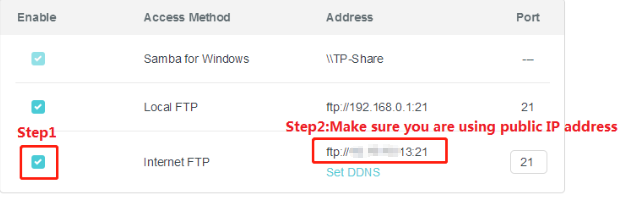
Please note that only Internet FTP allows remote access to the USB drive. Check “Internet FTP”, then click " Save " to enable the Internet FTP service. Use the address in the screenshot to visit the USB remotely.
1) Windows
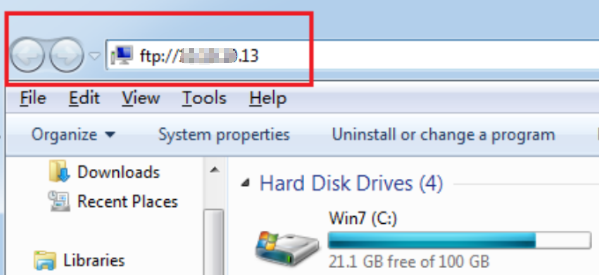
Open File Explorer. Type: ftp://WAN IP
Remind:
In this example, the IP address x.x.x.13 is your router's WAN IP address. (Find the WAN IP via Advanced >- Status)
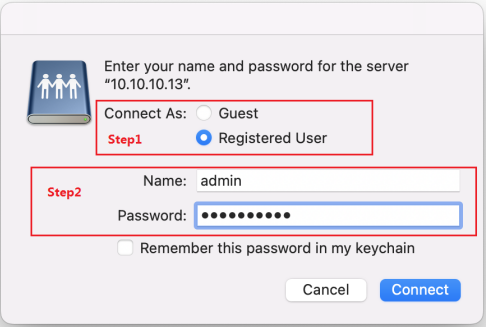
2) macOS.
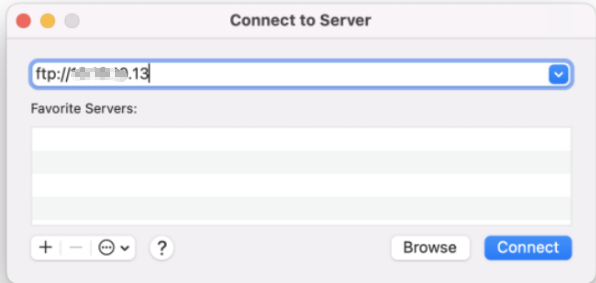
Open Finder, select “Go”, then click “Connect to Server...”.Type: ftp://WAN IP to access the USB drive remotely. Type in your username and password to log in.
If you need to access a USB storage device from the phone, please refer to the FAQ:
How to access my USB storage device on the TP-Link Routers from my Android and IOS phone?
Tips: How to map a USB drive in the Windows System
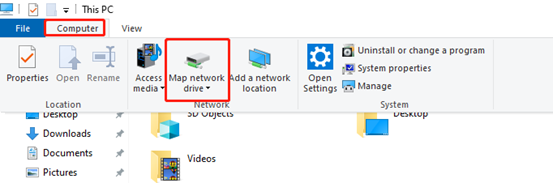
1. Open Windows Explorer.
2. Click Computer. Click the Map network drive.
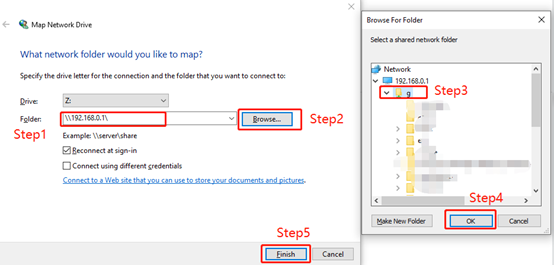
3. Type: \\192.168.0.1\ in the address bar. Then click Browse...
Select the folder you want to share. Click OK. Then click Finish.
Note: 192.168.0.1 is the LAN IP of the router. If you have changed it, please use your router’s current LAN IP.
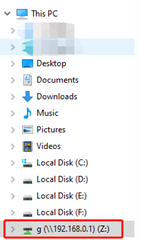
4. After finishing, you can see the mapping drive in Windows Explorer.
To get to know more details of each function and configuration, please go to Download Center to download the manual of your product.
Is this faq useful?
Your feedback helps improve this site.


&Archer-A9(US)_normal_1584493037690i.png)
TP-Link Community
Still need help? Search for answers, ask questions, and get help from TP-Link experts and other users around the world.