How to log in to web management page of TP-Link 5G/4G Router
Introduction
This article aims to provide step-by-step instructions for logging into the web-based management interface of the TP-Link 4/5G Router effectively.
Requirements
- One device that supports Windows, Mac OS, Android OS, and iOS, and can open Web browsers, such as a phone, computer, or iPad.
- Power on the TP-Link 4G/5G Wireless Router and wait for it to reboot completely.
Configuration
The web-based management page is a built-in internal web server that does not require internet access. However, it requires that your device be connected to the TP-Link 4/5G Router wired or wirelessly.
Note: Older web browsers may have compatibility issues with the router’s management page, such as login failures or missing features. For changing wireless settings or performing firmware updates, it is recommended to use a wired connection.
Step 1. Connect your device to the TP-Link 4G/5G router
Method 1: Wired
Connect the computer’s Ethernet port to one of the LAN ports on the router via an Ethernet cable.
Method 2: Wireless
Ensure the wireless device connects to the TP-Link 4/5G router's Wi-Fi network. If you forget the password, reset the router and use the default Wi-Fi name and password on its label.
Step 2. Access the web management page
It's recommended to use Firefox, Chrome, and Edge to access the web management page of the router.
Case 1: Most Models
Launch a web browser, at the top of the window in the address bar type in https://tplinkmodem.net or 192.168.1.1, and then press Enter.

Case 2: Multi-Mode Models (e.g., TL-MR3040, TL-MR3020)
When the router works in the 3G/4G Mode and WISP Mode, type in https://tplinkwifi.net. If it works in the Access Point mode, disconnect it from the upstream device first, then use the same domain.
Step 3 (Optional). Allow access to the web management page
If your browser displays a Privacy Error warning about an insecure connection, click Advanced and select Proceed to tplinkmodem.net (unsafe) or Proceed to 192.168.1.1 (unsafe) to continue; if this warning doesn't appear, skip directly to Step 4.
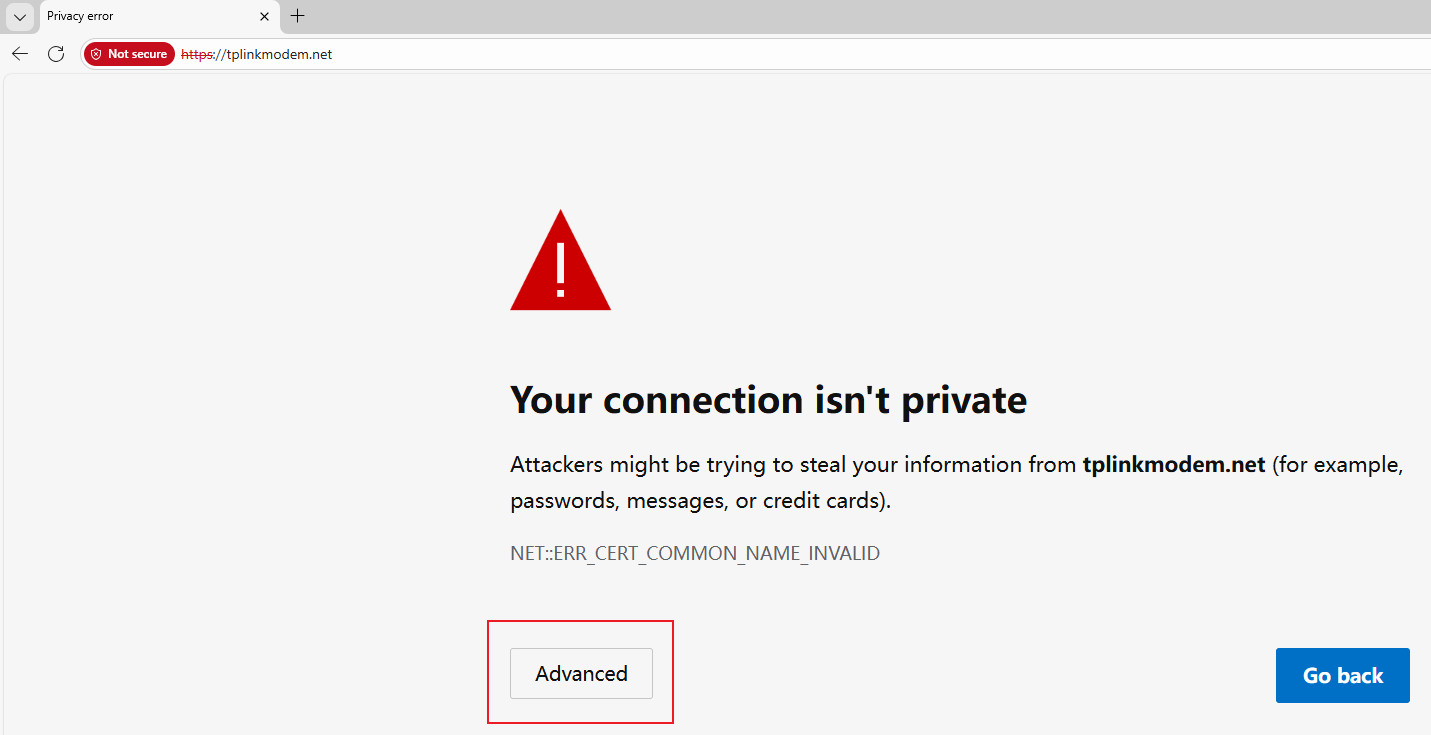

A warning message will appear because tplinkmodem.net uses a self-signed certificate rather than one issued by a trusted authority. This is normal, and your connection remains secure.
For details, see: Why TP-Link HTTPS web interface is detected as unsecure by some web browsers?
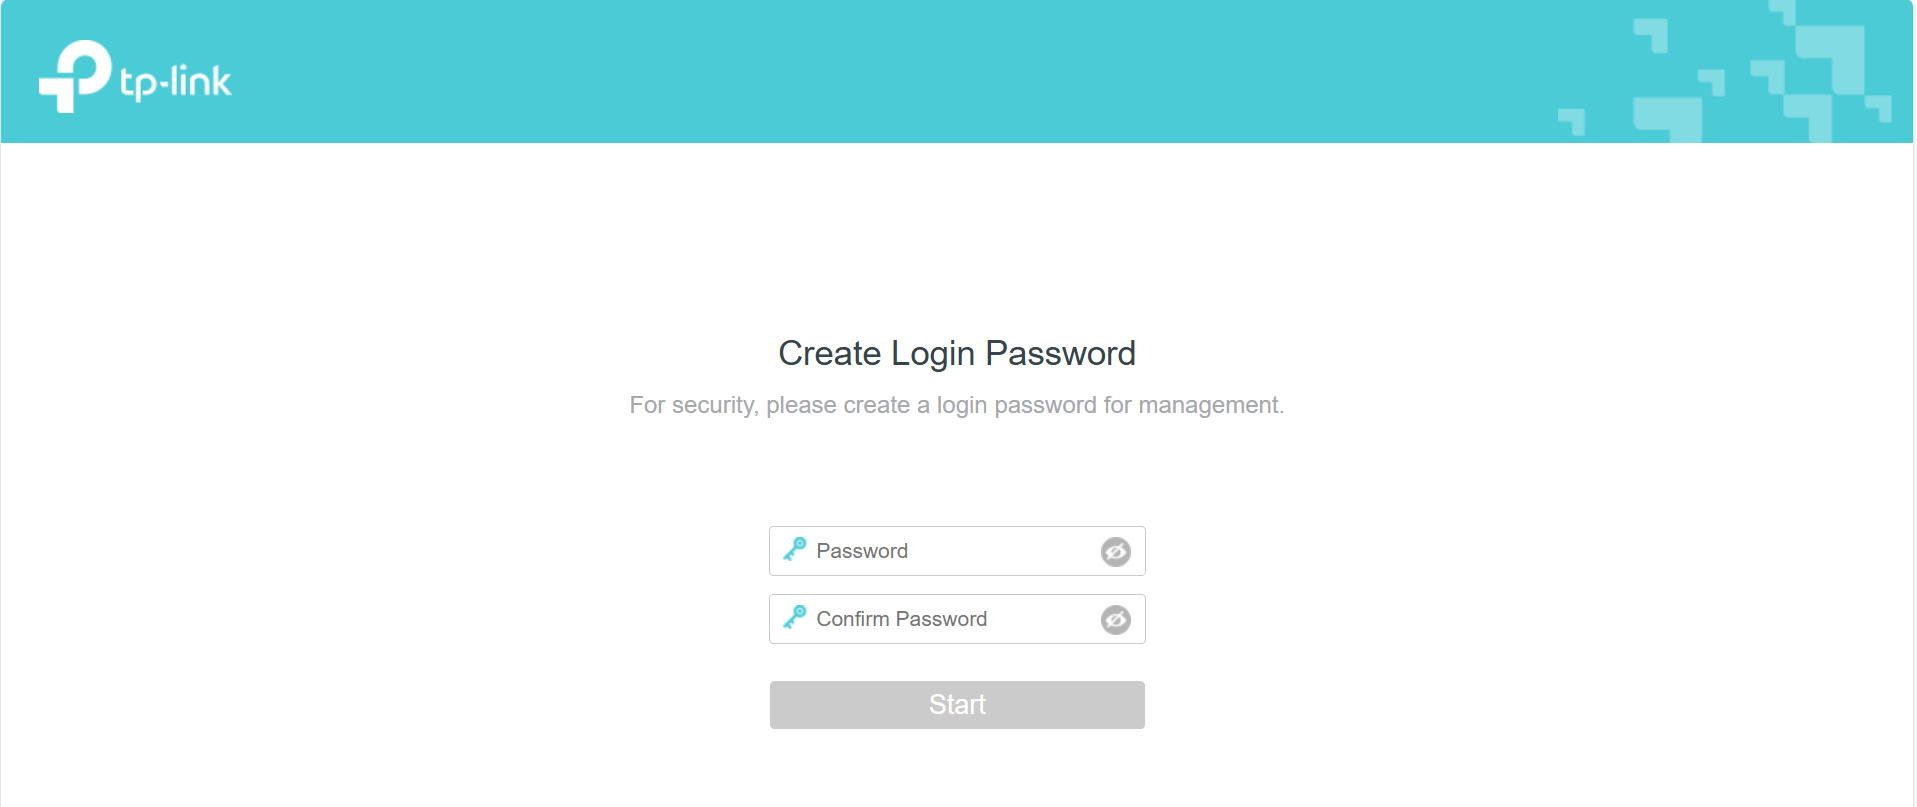
Step 4. Set / Enter password to sign in
When first accessing the system, set a secure administrator password. For some models, the default username and password are both admin.
If you've previously managed the device via the web interface or Tether app, enter your existing password. However, once it has been bound to the TP-Link ID you registered before, sign in with the TP-Link account information.
If you can't access the web management page and see errors like "no internet" or "the website can't be reached", see what should I do if I can’t log into web-based interface of my TP-Link device.
Is this faq useful?
Your feedback helps improve this site.

TP-Link Community
Still need help? Search for answers, ask questions, and get help from TP-Link experts and other users around the world.