How to configure TL-WR802N TL-WR810N working on AP Mode
Scenario:
Here takes TL-WR802N as the example:
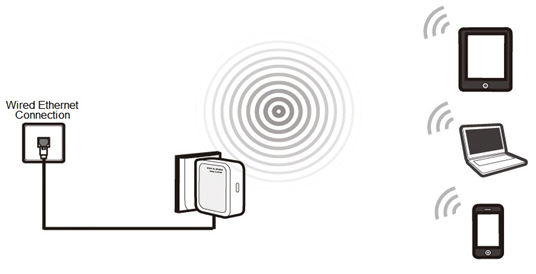
Definition: The TL-WR802N is connected to a wired network and transforms the wired Internet access into wireless so that multiple devices can share the Internet.
Application:
1. Office, hotel and places where only wired network is available.
2. LAN gaming party, small meeting and other situations where a temporary wireless network is needed.
Step1
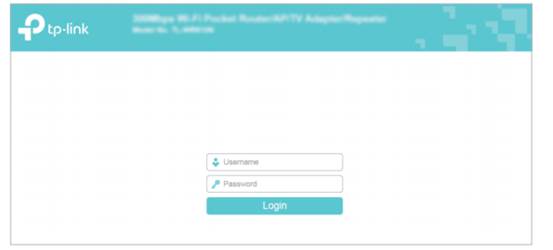
Connect the computer to the Wi-Fi of TL-WR802N. The default wireless network name and password are printed on the label of this device itself. Open the web browser and type the IP address http://192.168.0.254 or domain name tplinkwifi.net into the address bar and then Press Enter.

Step 2
Type the username and password into the boxes of the login page, the default username and password both are admin, then press Enter.
Step 3
Go to Quick Setup-> Click Next
Step 4
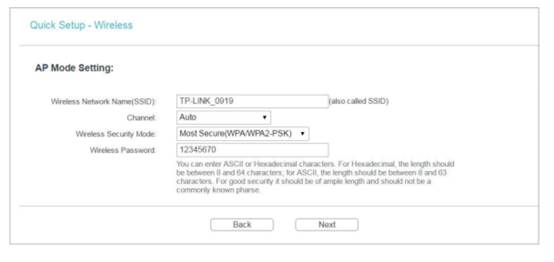
Select Access Point-> Click Next
Step 5
Customize your wireless name (SSID) and password.
Channel: Auto
Wireless Security Mode: Most Secure (WPA/ WPA2-PSK)
Wireless Password: (Create a Private Password)
Step 6
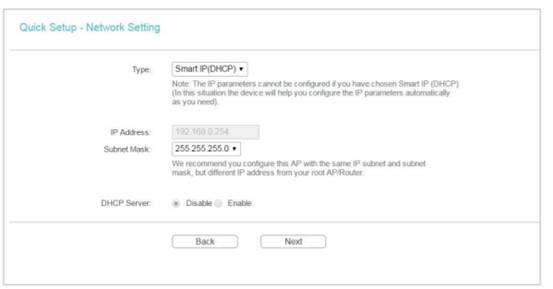
Select the LAN IP type of the router or leave the default setting Smart IP for most cases, and then click Next.
Step 7
Click Reboot to complete the configuration.

Step 8
Relocate the TL-WR802N
You may now connect the TL-WR802N directly into your Wired Ethernet Network Connection as displayed on the picture below.
Congratulations! All your Wi-Fi enabled devices can connect to the customized wireless network.
Get to know more details of each function and configuration please go to Download Center to download the manual of your product.
¿Es útil esta pregunta frecuente?
Sus comentarios nos ayudan a mejorar este sitio.
3.0-L-D-2000px_normal_1584496932325u.png)