How to configure WDS function of VDSL/ADSL Modem Router to extend existing wireless network (new logo)
For example, my house covers a large area. The wireless coverage of the router I’m using (the root router) is limited. I want to use an extended router to extend the wireless network of the root router.
Note:
• WDS bridging only requires configuration on the extended router and make sure your router supports WDS.
• Generally WDS bridging function can be enabled either in 2.4GHz frequency or 5GHz frequency for a dual-band router, but for model like Archer VR600 and Archer VR600v, WDS is only available in 2.4GHz frequency. We use the WDS bridging function in 2.4GHz frequency as example.
1. Visit http://tplinkmodem.net, and log in with the username and password you set for the router. If you don’t know how to login, please refer to Log in to the web management interface.
2. Survey the SSID to be bridged:
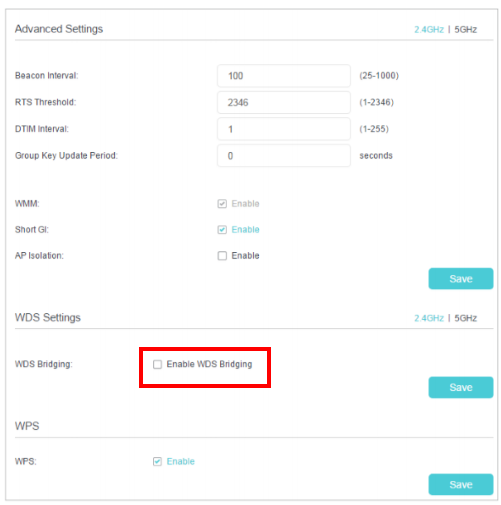
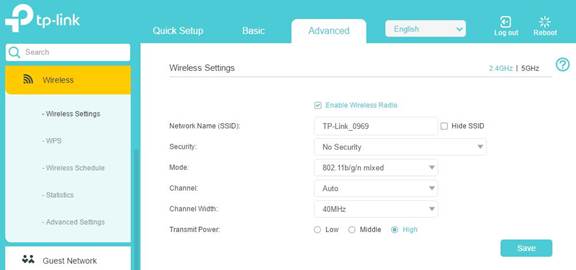
(1) Go to Advanced>Wireless>Advanced Settings. Select 2.4GHz.
(2) Tick Enable WDS Bridging.
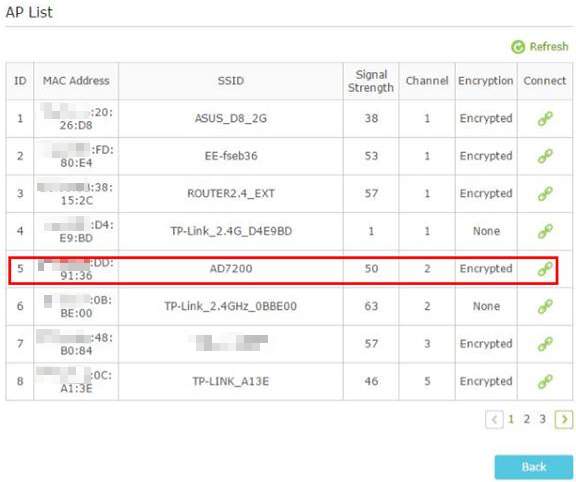
(3) Click Scan, locate the root router’s SSID, and click Connect.
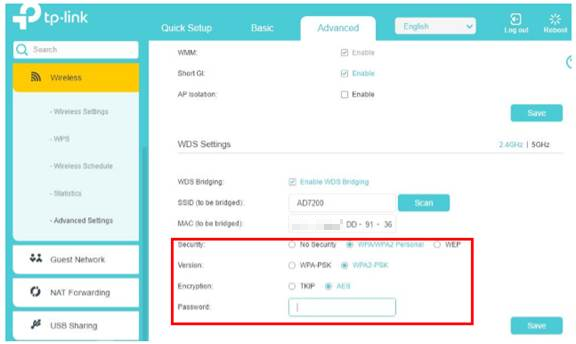
(4) Choose the security version and encryption based on your main wireless network and fill in the same wirelesss password. Click Save.
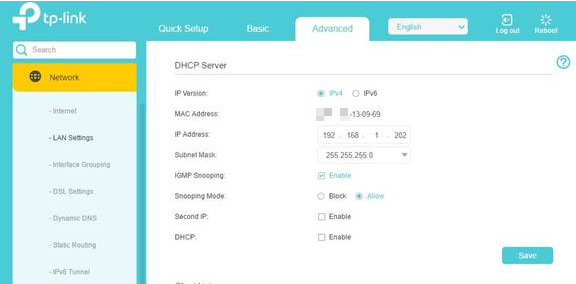
3. Configure the IP address of the router and disable DHCP:
(1) Go to Advanced>Network>Lan Settings.
(2) Change the IP address of the extended router to be in the same subnet with the root router.
(For example, the IP address of the root router is 192.168.1.1, the IP address of the extended router can be 192.168.1.2~192.168.1.254. We take 192.168.1.202 as an example.)
(3) Uncheck Enable on DHCP to disable it.
(4) Click Save.
Now, you can connect to the extended router’s SSID and password to enjoy the network.
Note: The extended router can have different or same wireless network name (SSID) and password as the root router. You can change it on Advanced>Wireless>Wireless Settings.
Get to know more details of each function and configuration please go to Download Center to download the manual of your product.
¿Es útil esta pregunta frecuente?
Sus comentarios nos ayudan a mejorar este sitio.

1.0_1500427316516r.jpg)
