How do I install TL-WR802N/WR810N to work with a DSL modem (Static IP-new logo)?
Preparations:
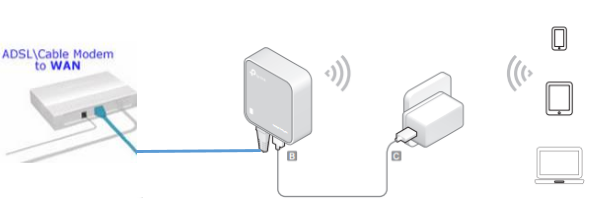
1.Connect your modem to the WAN/LAN port of the TP-Link router via an Ethernet cable.
2.Power on your router first and then modem.
3. Use the default Wi-Fi Name and Wi-Fi Password printed on the Wi-Fi Info Card to connect your laptop or smart phone to the router.
Check the internet connection on your laptop or smart phone, and please note that:
- If you can access internet without any restriction, no other configuration is required.
- If you're redirected to an authentication page, please complete it to access internet.
Here takes TL-WR802N as an example.
1. Login the router. Please refer to FAQ.
2. Go to Quick Setup and click Next to start.
3. Choose the Wireless Router mode and click Next.
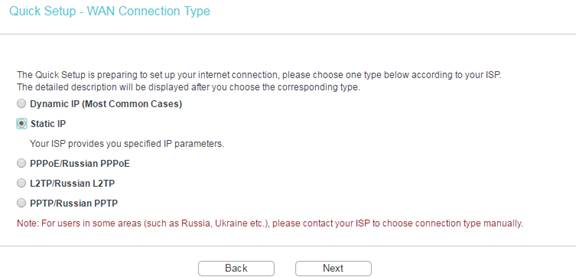
4. Select Static IP as WAN Connection Type, and click Next.
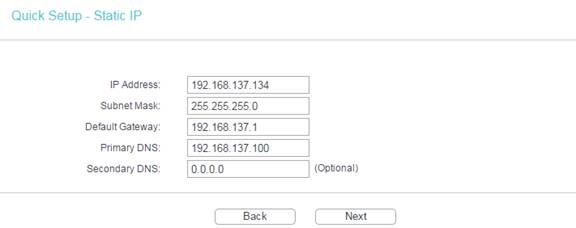
5. Enter the IP parameters provided by your ISP into the boxes shown as below.
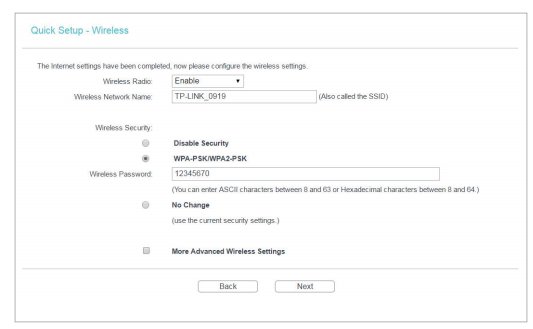
6. Either customize your Wireless Network Name and Wireless Password or keep the default ones, and then click Next.
7. Click Finish to complete the configuration.
Get to know more details of each function and configuration please go to Download Center to download the manual of your product.
¿Es útil esta pregunta frecuente?
Sus comentarios nos ayudan a mejorar este sitio.
3.0-L-D-2000px_normal_1584496932325u.png)