TL-WA801N V6 User Guide
Chapter 3 Customize Your Network
This chapter introduces how to customize your network.
It contains the following sections:
•Use WPS for Wireless Connection (Access Point mode)
1.Visit http://tplinkap.net, and log in with the password you set for the access point.
2.Go to Status. Click Refresh to get the latest network information of the access point.
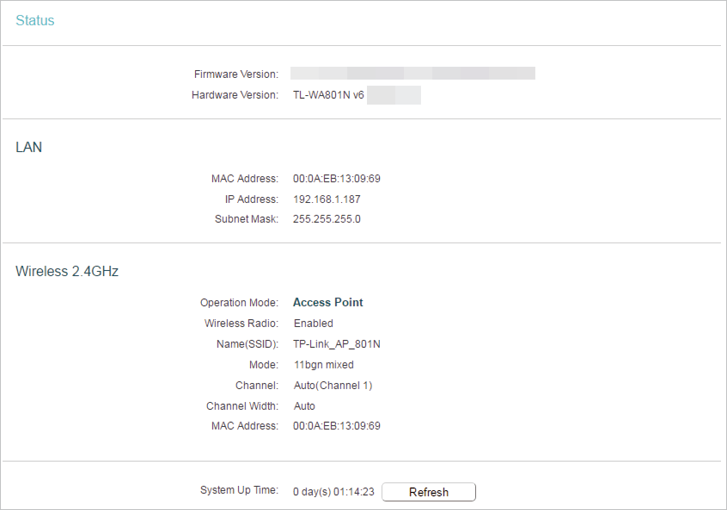
The access point is preset with Smart IP (DHCP), which allows the access point to dynamically obtain an IP address and gateway from the main router/AP. It is recommended to keep the default LAN settings to avoid IP conflict with the main router/AP or other devices on your local network. If it is necessary to change the LAN settings, for example, your network requires a specific IP subnet, follow the steps below:
1.Visit http://tplinkap.net, and log in with the password you set for the access point.
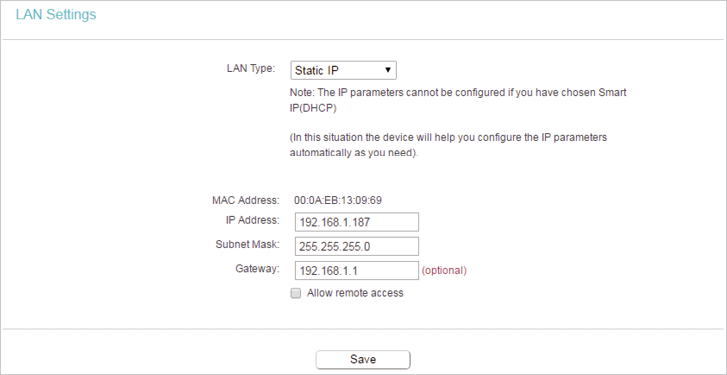
2.Go to Network > LAN.
3.Select Static IP, and set the IP address according to your needs, and then click Save.
 Note:
Note:
•After you have changed the IP address, you must use the new IP address to log in.
•If you select Smart IP (DHCP), the DHCP server settings of the access point will be disabled.
•If the new IP address you set is not in the same subnet as the old one, the IP Address pool in the DHCP Server will be configured automatically.
3. Customize Wireless Settings
The access point is preset with the wireless network name (SSID) and password. You can find them on the product label or customize wireless settings according to your needs.
3.1. Customize the Network Name (Access Point/Multi-SSID mode)
1.Visit http://tplinkap.net, and log in with the password you set for the access point.
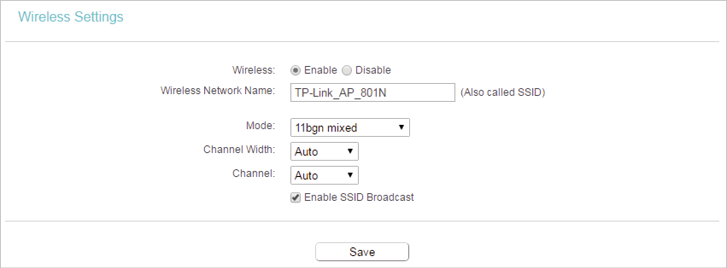
2.Go to Wireless > Basic Settings.
3.Customize the Wireless Network Name (SSID) according to your needs, and leave other parameters as the default settings.
4.Clive Save.
3.2. Customize Wireless Security (Access Point/Multi-SSID mode)
1.Visit http://tplinkap.net, and log in with the password you set for the access point.
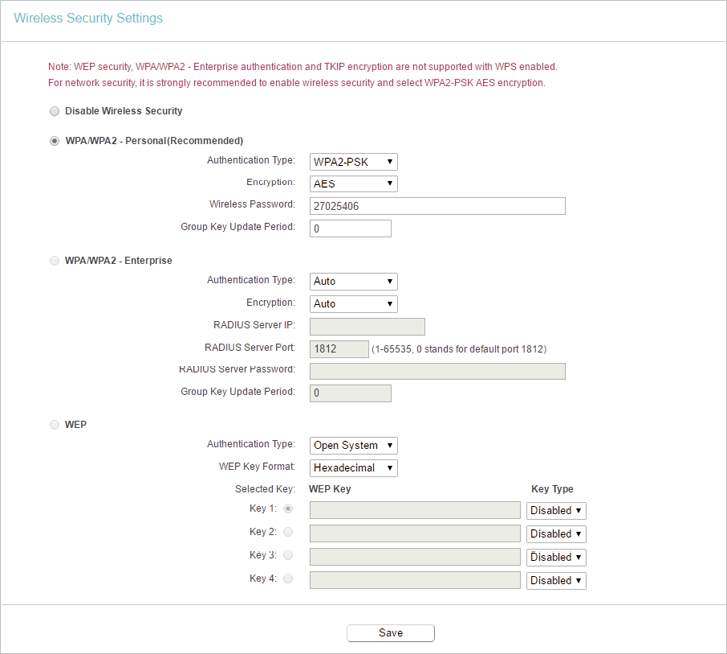
2.Go to Wireless > Wireless Security.
3.Customize the wireless security according to your needs.
4.Clive Save.
3.3. Extend Another Host Network (Range Extender/Client mode)
Range Extender Mode
1.Visit http://tplinkap.net, and log in with the password you set for the access point.
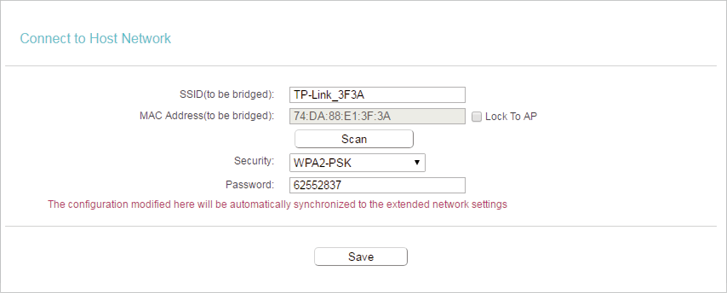
2.Go to Wireless > Connect to Network.
3.Enter the SSID and the password of a host network which the extender will be connected to or click Scan and select a Wi-Fi network.
4.Click Save and the modified configuration will be synchronized to the extended network settings.
Client Mode
1.Visit http://tplinkap.net, and log in with the password you set for the access point.
2.Go to Wireless > Basic Settings.
3.Enter the SSID and the password of a host network which the extender will be connected to or click Scan and select a Wi-Fi network.
4.Click Save and the modified configuration will be synchronized to the extended network settings.
3.4. Customize the Extended Network (Range Extender mode)
1.Visit http://tplinkap.net, and log in with the password you set for the access point.
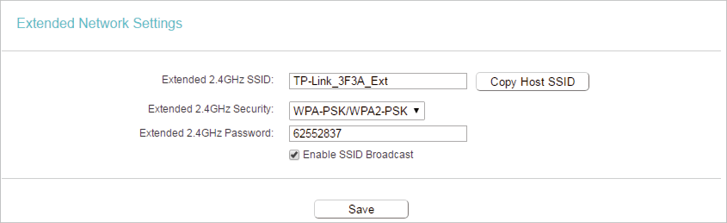
2.Go to Wireless > Extended Network.
3.Modify the SSID and the password of the extended network.
 Tip:
Tip:
SSID Broadcast is enabled by default. If you want to hide the SSID of the extended network, deselect Enable SSID Broadcast, and then the corresponding SSID will not be displayed when wireless devices scan for local wireless networks.
4. Use WPS for Wireless Connection (Access Point mode)
Wi-Fi Protected Setup (WPS) provides an easier approach to set up a security-protected Wi-Fi connection.
Note:
•The WPS function cannot be configured if the wireless function of the access point is disabled. Please make sure the wireless function is enabled before configuration.
•When working in Range Extender, Client or Multi-SSID mode, the WPS funcion of the access point is not available.
•The WPS function is enabled by default. You can go to Wireless > WPS to disable the function as needed.
1.Visit http://tplinkap.net, and log in with the password you set for the access point.
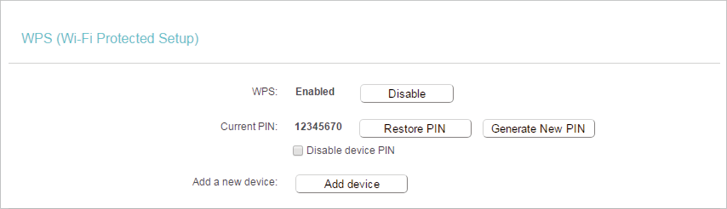
2.Go to Wireless > WPS.
3.Follow one of the following three methods to connect your WPS-enabled client to the access point’s Wi-Fi network.
Method 1: Enter the Access Point’s PIN
1.Keep the WPS Status as Enabled and get the Current PIN of the access point.
2.Enter the access point’s Current PIN on your client device to join the access point’s Wi-Fi network.
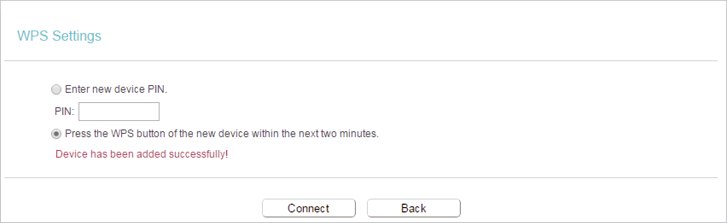
Method 2: Press the WPS Button on Your Client Device
1.Keep the WPS Status as Enabled and click Add Device.
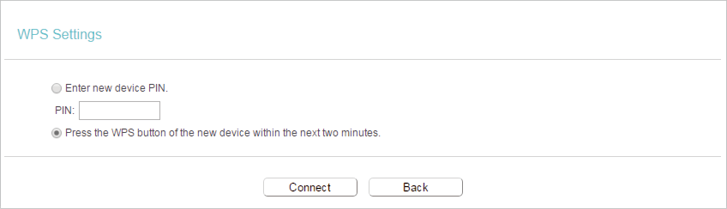
2.Select Press the WPS button of the new device within the next two minutes and click Connect.
3.Within two minutes, press the WPS button on your client device. A success message will appear on the WPS page if the client device has been successfully added to the access point’s network.
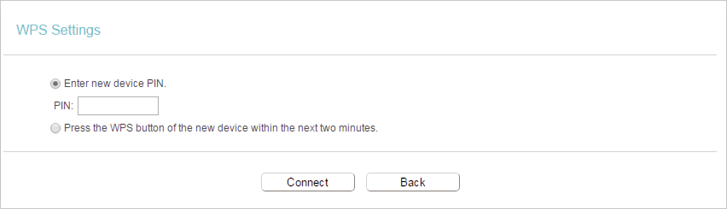
Method 3: Enter the Client’s PIN
1.Keep the WPS Status as Enabled and click Add device.
2.Select Enter new device PIN, and then enter your client device’s current PIN in the PIN filed and click Connect. A success message will appear on the WPS page if the client device has been successfully added to the access point’s network.
Wireless MAC Filtering is used to deny or allow specific wireless client devices to access your network by their MAC addresses.
Note:
When working in Client mode, MAC Filtering is not available.
For example, if you want a wireless client to access the access point, but other wireless clients cannot access the access point, follow the steps below:
1.Visit http://tplinkap.net, and log in with the password you set for the access point.
2.Go to Wireless > Wireless MAC Filtering.
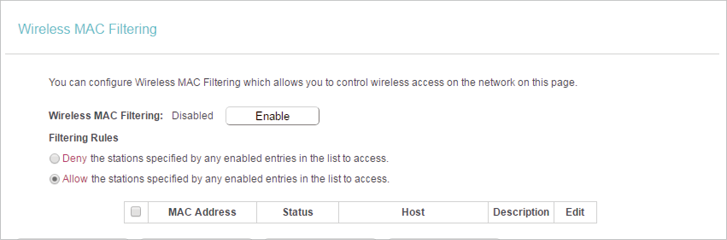
3.Click Enable to enable the Wireless MAC Filtering function.
4.Select Allow the stations specified by any enabled entries in the list to access as the filtering rule.
5.Delete all or disable all entries if there are any entries already.
6.Click Add New.
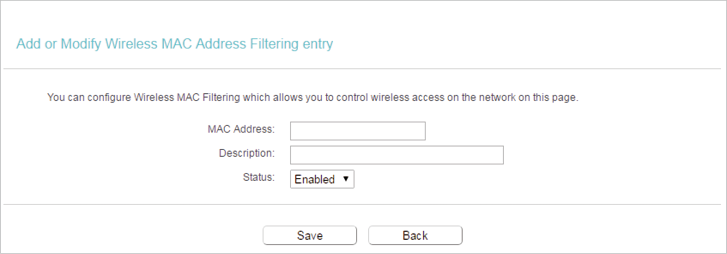
7.Enter the MAC address of the wireless client and select Enabled in the Status drop-down list. Add a brief description for the client if needed, and then click Save. The configured filtering rules should be listed as the picture shows below.
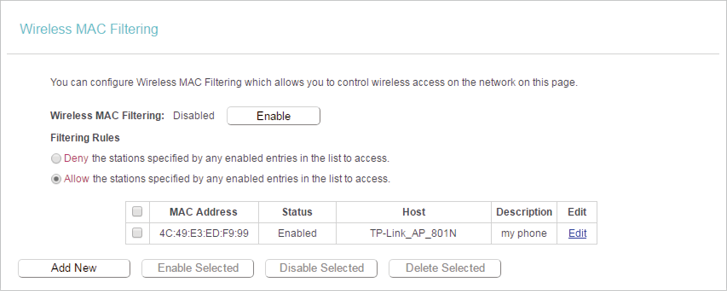
Now, only the wireless client added in the list can access to the wireless network.
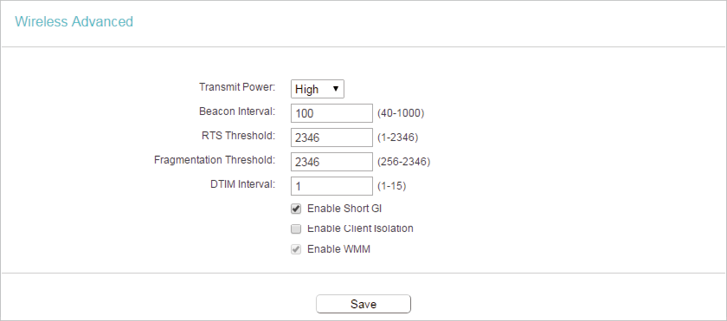
You can view or change advanced wireless settings if necessary. It is recommended to keep them as default.
Note:
When working in Client mode, Wireless Advanced is not available.
1.Visit http://tplinkap.net, and log in with the password you set for the access point.
2.Go to Wireless > Wireless Advanced.
3.Configure the advanced settings of your wireless network and click Save.
Note:
If you are not familiar with the setting items on this page, it’s strongly recommended to keep the provided default values; otherwise it may result in lower wireless network performance.
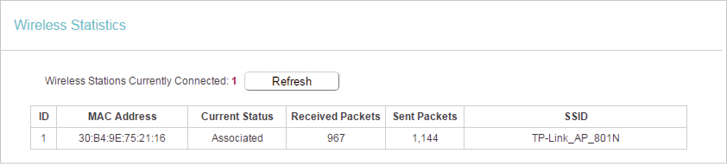
View the wireless statistics of currently connected devices.
Note:
When working in Client mode, Wireless Statistics is not available.
1.Visit http://tplinkap.net, and log in with the password you set for the access point.
2.Go to Wireless > Wireless Statistics to check the data packets sent and received by each client device connected to the access point.
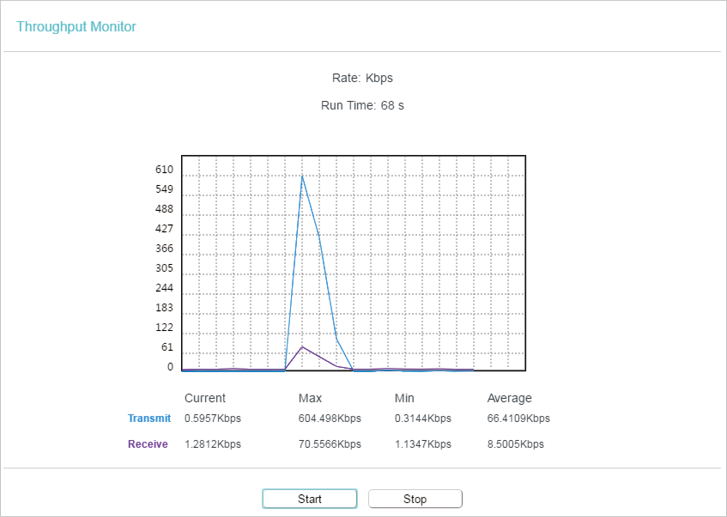
8. Throughput Monitor (Access Point mode)
The throughput chart displays the current data traffic of the network. The curves indifferent colors represent the received and transmitted rates of the 2.4GHz frequencies.
Note:
When working in Range Extender, Client and Multi-SSID mode, Throughput Monitor is not available.
1.Visit http://tplinkap.net, and log in with the password you set for the access point.
2.Go to Wireless > Throughput Monitor and click Start/Stop to view the wireless throughput information.
By default, the DHCP (Dynamic Host Configuration Protocol) server is set to Auto. It will automatically assign valid IP addresses to clients when the DHCP server of the host router/AP is disabled, and will stop working when the DHCP server of the host router/ AP is enabled so as to avoid IP conflict. You can change the DHCP server settings if necessary.
Note:
If you disable the DHCP server and there is no other DHCP server within your LAN, you have to configure the IP address for each client manually.
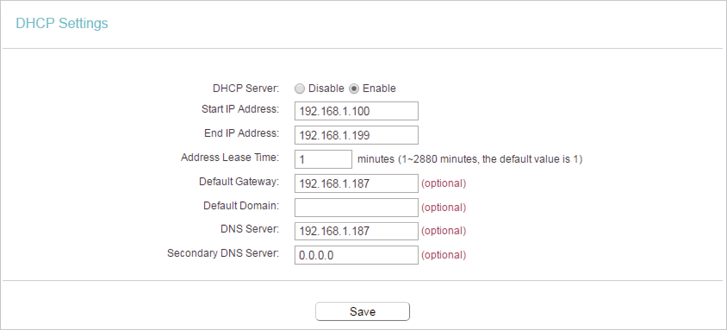
9.1. DHCP Settings
Note:
•To use the DHCP server function of the access point, you must configure all computers on the LAN as Obtain an IP Address automatically.
•When you choose Smart IP (DHCP) in Network > LAN, the DHCP Server settings will be disabled.
1.Visit http://tplinkap.net, and log in with the password you set for the access point.
2.Go to DHCP > DHCP Settings and select Enable.
3.Enter the Start IP Address and End IP Address, and leave other parameters as the default settings.
4.Click Save.
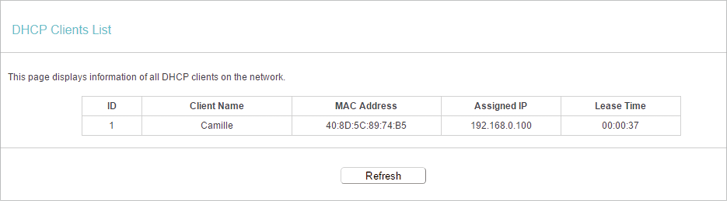
9.2. DHCP Clients List
1.Visit http://tplinkap.net, and log in with the password you set for the access point.
2.Go to DHCP > DHCP Clients List to view the information of the clients connected to the access point. You cannot change any of the values on this page. To update this page and show the current attached devices, click Refresh.
9.3. Address Reservation (Access Point mode)
You can reserve an IP address for a specific client. When you specify a reserved IP address for a PC on the LAN, this PC will always receive the same IP address each time when it accesses the DHCP server.
1.Visit http://tplinkwifi.net, and log in with the password you set for the access point.
2.Go to DHCP > Address Reservation and click Add New.
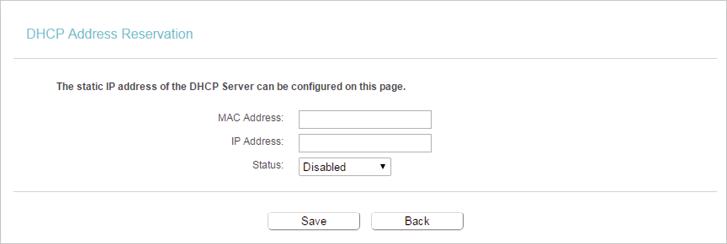
3.Enter the MAC address (in XX-XX-XX-XX-XX-XX format.) of the client for which you want to reserve an IP address.
4.Enter the IP address to reserve for the client.
5.Leave the Status as Enabled.
6.Click Save.