TL-WA801N V6 User Guide
Chapter 2 Set Up Internet Connection Via Quick Setup Wizard
This chapter introduces how to quickly set up the access point.
It contains the following sections:
•The product should not be located in a place where it will be exposed to moisture or excessive heat.
•Place the access point in a location where it can be connected to various devices as well as to a power source.
•Make sure the cables and power cord are safely placed out of the way so they do not create a tripping hazard.
•The access point can be placed on a shelf or desktop.
•Keep the access point away from devices with strong electromagnetic interference, such as Bluetooth devices, cordless phones and microwaves.
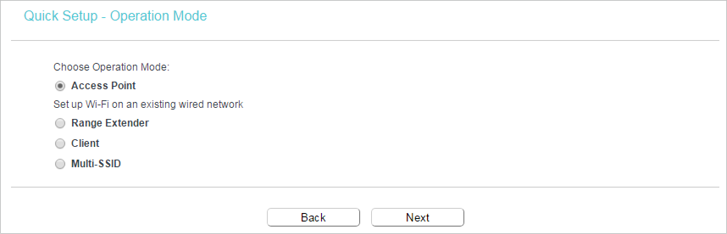
There are four operation modes supported by this access point: Access Point, Range Extender, Client and Multi-SSID. Please determine which operation mode you need and carry out the corresponding steps.
2.1. Access Point Mode (Default)
In Access Point mode, the access point transforms your existing wired network to a wireless one. This mode is suitable for dorm rooms or homes where there’s already a wired router but you need a wireless network.
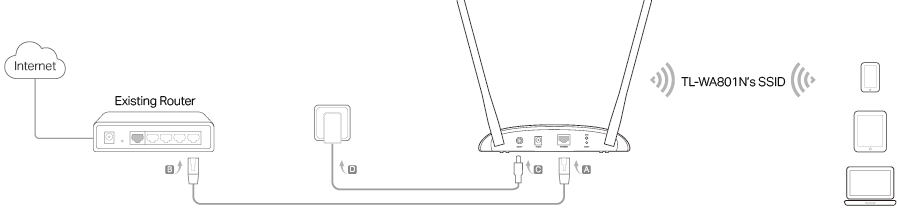
1.Connect the access point according to Step A to D in the diagram.
2.Power on the access point, and wait until the Power (  ) and Wireless (
  ) LEDs are lit and stable.
3.Use the default SSID and Password printed on the label of the access point to join its
Wi-Fi network.
 Note:
Note:
You can surf the internet now. For your wireless network security, it is recommended to change the default SSID (network name) and the password of your Wi-Fi network. To do so, perform the following steps.
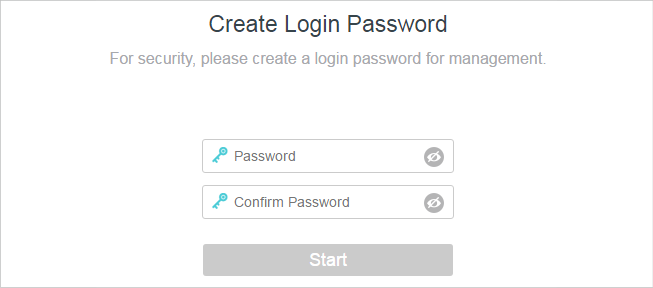
4.Launch a web browser, and visit http://tplinkap.net. Create a password to log in.
 Note:
Note:
If the login window does not appear, please refer to the FAQ Section.

5.Go to Quick Setup and click Next to start.
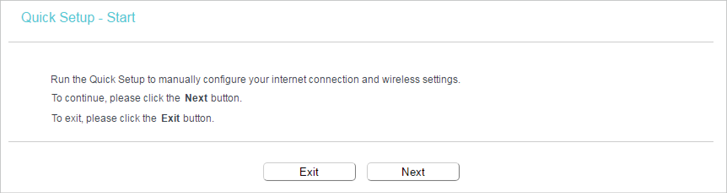
6.Select Access Point mode and click Next.
7.Follow the step-by-step instructions to complete the configuration.
8.Now, reconnect your wireless devices to the new Wi-Fi network, and enjoy the internet!
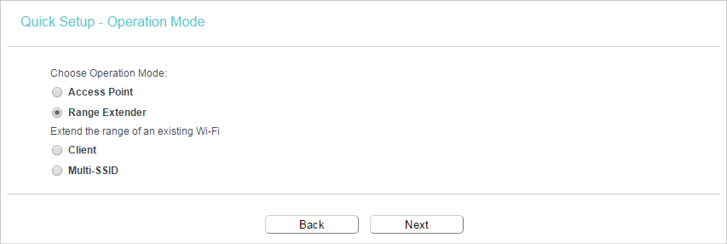
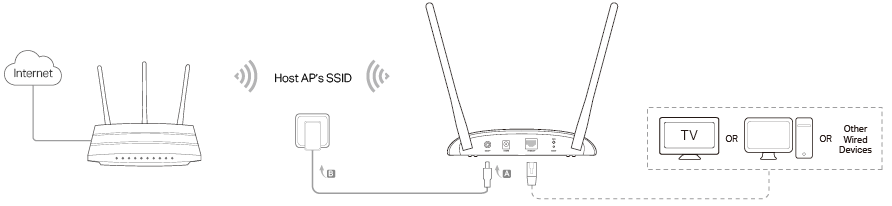
2.2. Range Extender Mode
In Range Extender mode, the access point extends the range of an existing Wi-Fi network. This mode is suitable when you are in a Wi-Fi dead-zone or a place with weak wireless signal, and you want to have a larger effective range of the wireless signal throughout your home or office.
1.Connect the access point according to Step A and B in the diagram.
2.Power on the access point, and wait until the Power ( ) and Wireless (  ) LEDs are lit and stable.
3. Use the default SSID and Password printed on the label of the access point to join its
Wi-Fi network.
4.Launch a web browser, and visit http://tplinkap.net. Create a password to log in.
Note:
If the login window does not appear, please refer to the FAQ Section.
5.Go to Quick Setup and click Next to start.
6.Select Range Extender mode and click Next.
7.Follow the step-by-step instructions to complete the configuration.
8.Relocate the access point about halfway between your host router and the Wi-Fi dead zone.
 Tip: To maximize the signal strength, refer to the FAQ section.
9.Now, connect your devices to the access point wirelessly or via an Ethernet cable, and enjoy the internet!
2.3. Client Mode
In Client mode, the access point connects your wired devices to a wireless network. This mode is suitable when you have a wired device with an Ethernet port and no wireless capability, for example, a smart TV, media player, or game console and you want to connect it to the internet wirelessly.
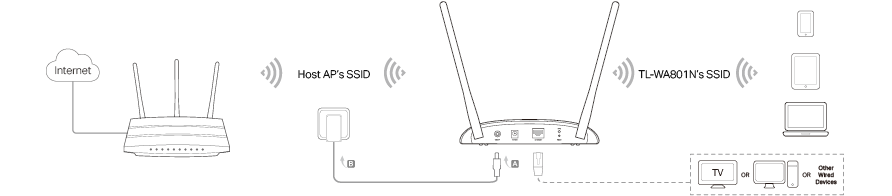
1.Connect the access point according to Step A to D in the diagram.
2.Power on the access point, and wait until the Power ( ) and Wireless ( ) LEDs are lit and stable.
3.Use the default SSID and Password printed on the label of the access point to join its
Wi-Fi network.
4.Launch a web browser, and visit http://tplinkap.net. Create a password to log in.
Note:
If the login window does not appear, please refer to the FAQ Section.
5.Go to Quick Setup and click Next to start.
6.Select Client mode and click Next.

7.Follow the step-by-step instructions to complete the configuration.
8.Now, connect your wired devices to the access point via an Ethernet cable, and enjoy the internet!
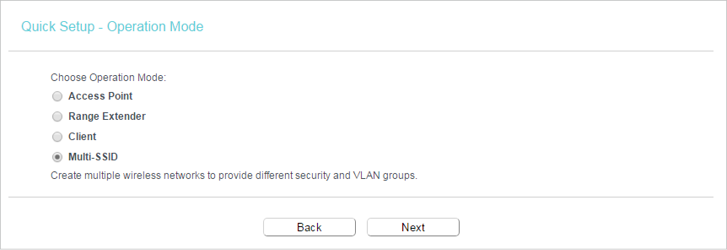
2.4. Multi-SSID Mode
In Multi-SSID mode, the access point creates multiple wireless networks to provide different security and VLAN groups. This mode is suitable when you want your devices connected to different wireless networks and become isolated by VLANs.
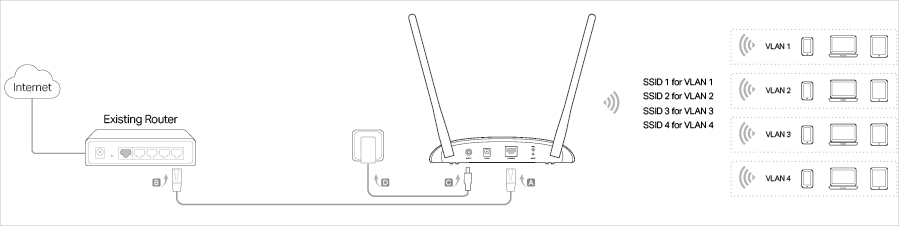
1.Connect the access point according to Step A to D in the diagram.
2.Power on the access point, and wait until the Power ( ) and Wireless ( ) LEDs are lit and stable.
3.Use the default SSID and Password printed on the label of the access point to join its
Wi-Fi network.
4.Launch a web browser, and visit http://tplinkap.net. Create a password to log in.
Note:
If the login window does not appear, please refer to the FAQ Section.
5.Go to Quick Setup and click Next to start.
6.Select Multi-SSID mode and click Next.
7.Follow the step-by-step instructions to complete the configuration.
8.Now, connect your wireless devices to the Wi-Fi networks isolated by VLANs, and enjoy the internet!